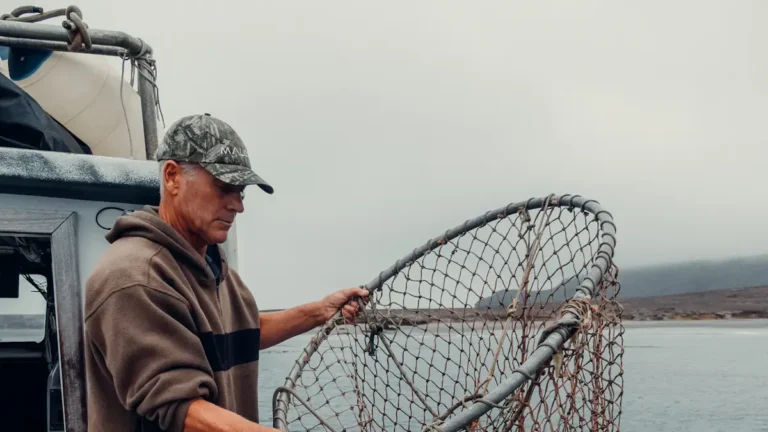
Book Appointment Now

How to Tie a Fishing Knot
Knot failure causes most lost fish, so getting your knots right saves time and trophies. This guide shows which knots match mono, fluoro, and braid, plus how to prep hooks and tag ends for solid ties. Learn the real goal while tying, quick checks to spot mistakes, and fast fixes before each cast. Practice drills will build confidence and speed on the water.
What Fishing Knot Should You Use Right Now?
Considering which knot you should tie right now as you’re standing near the water with a rod in your hands? You’ll ponder seasonal preferences and weather conditions initially, since they change what you’ll need.
Provided it’s warm and calm, lighter monofilament with an Improved Clinch or Uni Knot will feel like home. In windy, rough conditions you’ll favor braid plus a Palomar for strength and peace of mind.
In colder months you could pick fluorocarbon and a knot that resists stiffness. You want to belong to a group that shares practical choices, so pick knots people trust and teach each other.
Try a few, feel how they hold, and don’t be shy to ask fellow anglers nearby for a quick tip or two.
What’s the Primary Goal When Tying a Fishing Knot?
At the time you tie a fishing knot, your main aim is to keep line strength so it won’t fail as soon as a fish pulls.
You also want to maintain knot integrity so the wraps stay neat and don’t slip under pressure.
Finally, make sure the knot will hold reliably every cast and fight so you can trust your gear on the water.
Secure Line Strength
In case you’re tying a fishing knot, your main goal is to keep the line as strong as possible so it won’t fail whenever a fish fights. You want a knot that resists knot failure and limits line wear.
As you tie, consider how the knot distributes load and where friction will concentrate. Choose the right knot for your line type and condition, and make clean, even wraps so stress spreads instead of focusing on one weak point.
Wet the line before tightening to reduce heat and abrasion. Trim tag ends neatly to avoid snagging.
Inspect knots after casts and before fights so you catch wear at an initial stage and share tips with fishing friends. You belong here, learning and improving together.
Maintain Knot Integrity
If you desire your knots to hold at the critical moment, your primary goal is to preserve the line’s strength and prevent any weak spots from forming. You want each turn and tuck to protect the line, not damage it. Feel the material as you work and keep tension steady to avoid sharp bends.
Watch for frayed fibers that signal knot degradation and replace the line whenever you see them. Consider environmental effects like sun, salt, and abrasion that silently wear fibers.
You belong to a community that cares for gear, so treat knots with patience and respect. Use proper lubrication during tightening, trim tag ends neatly, and avoid overworking the line. These small habits keep your knots honest and your confidence high.
Ensure Reliable Hold
Because a knot’s job is to hold under pressure, your main goal during tying a fishing knot is to preserve the line’s strength so it won’t fail at the critical moment. You want knot durability, not just a quick fix.
Work slowly, dress coils neatly, and remove twists so the load spreads evenly. Pick the right knot for your line type and technique so you keep strength where it matters.
After tying, always perform hold testing through pulling steadily then with quick tugs to mimic strikes. Should you feel any slipping or sharp bends, retie and trim tag ends correctly.
Share tips with your crew so everyone learns. That way you all feel confident and connected once the fish strikes.
Choose the Right Fishing Knot for Your Line and Tackle
You’ll want a knot that matches your line and tackle so you don’t lose fish or gear on the occasion it counts.
Consider line and knot strength initially, then match the knot to your hooks, lures, or rigs for the best performance and ease of tying.
Should a knot be fiddly under pressure, choose a simpler strong option so you’ll feel confident on the water.
Line And Knot Strength
At the moment you pick up a rod, the knot you tie can make or break your day on the water, so it helps to match the knot to the line and tackle you’re using.
You want knots that offer knot durability so they hold under stress and resist line abrasion from guides and rough mouths. Choose knots that suit your line type and expected load. For braid you’ll favor knots with bite and low slip. For mono and fluoro you’ll pick knots that cinch neat and keep strength.
Practice each knot until your hands retain it. Share tips with your crew so everyone trusts their connection. Whenever you prep like this, you join a group that cares about catch and fellowship.
Matching Knot To Tackle
At the moment you pick up your rod grasping your knot can hold under pressure, you’ll fish with more confidence and calm.
You want knots that match line type and tackle, so consider knot durability and tackle compatibility before you tie. For braided lines you’ll trust a Palomar for raw strength. For monofilament and fluorocarbon you’ll lean toward an Improved Clinch or Uni for smooth seating.
Whenever joining different materials use an Albright for fusion jobs to keep strength and match tackle compatibility. For live bait or lures choose a Loop Knot so motion stays natural and knot durability remains high under strikes.
Practice these pairings and you’ll feel accepted in any crew upon casting smarter.
Ease Of Tying
How easy is it to tie the right knot in case the fish are biting and your hands are cold? You want knots that match your gear and your moment. Pick simpler knots whenever knot complexity could slow you down.
The Palomar and Improved Clinch are forgiving, low on knot complexity, and fast to learn. Once you practice, your tying speed improves, and you’ll feel part of the crew who knows what to do.
For joins like braid to fluoro, use Albright even though it asks for more attention. Work on a few reliable choices so you’re steady under pressure.
Use moist lines, keep tools handy, and trade tips with friends to enhance confidence and tying speed together.
Prep: Inspect the Line, Clean the Hook, and Set the Tag End
Start through checking your line for wear and cleanliness because a tiny nick or grit can mean a lost fish. You want to assess line elasticity through stretching gently and watching for weak spots. Run the line between your fingers to feel for roughness and to find any concealed abrasions.
Next, clean the hook and inspect for hook corrosion. Use a soft brush and a bit of vinegar or freshwater to remove salt and grime. In case the hook shows pitting, replace it.
Then set the tag end to the right length for the knot you’ll tie. Leave a longer tag for bulky knots and trim closer for simple knots. These steps protect your gear and build confidence before you start tying.
Quick Reference: Best Knots for Common Situations
Speculating which knot will save your day on the water? You want clear choices that fit line type and situation, and you want to belong to a crew that trusts its knots.
For braided lines pick the Palomar knot for top knot durability and simple tying. For mono or fluoro use the Improved Clinch for hooks and small lures, and the Uni knot whenever you need versatility tying to swivels or leaders. Use the Blood knot to join two similar lines and the Loop knot whenever you want lure motion.
Consider weather impact when choosing knots because cold or wet lines behave differently, so moisten and pull slowly. Practice each knot so you feel confident, share tips with friends, and fish together.
Tie the Improved Clinch Knot (Step‑by‑Step)
You’ll start with preparing the line carefully, threading it through the hook eye and wrapping the tag end around the main line five to six times so the coils sit neat and even.
Then you’ll focus on tightening and trimming, moistening the knot, pulling the main line to snug the coils down, and sliding the knot toward the eye until it seats firmly against the hook.
Finally you’ll trim the tag end close but not too tight, leaving a small tail to protect the knot and give you confidence before you cast.
Line Preparation
Preparing your line right before tying the Improved Clinch Knot makes the whole process easier and stronger, so let’s get it done carefully and confidently. You want line flexibility, so evaluate a short length through bending and feeling for soft spots.
Use simple cleaning tools like a soft cloth and small scissors to remove dirt and frays. Treat the line gently and keep your group in mind you belong to a team that cares about craft and catch.
- Wipe the line to remove grit that weakens knots and hurts confidence.
- Check for nicks or stiff sections and cut them out for smooth wrapping.
- Align tag and main line so coils sit neat and tighten evenly.
These steps connect preparation to better knot performance.
Tightening And Trimming
After you’ve slid the wrapped coils down toward the eye and given the knot a gentle pre-seat, take a deep breath and get ready to snug it up so it holds under real use. You’ll moisten the line for knot lubrication so the coils cinch smoothly. Hold the tag and main line, pull evenly, feel the coils settle, and keep your group close at hand-this is something you do together. Check that coils stack neatly, then use trimming precision to cut the tag about 1 8 inch from the knot. That small distance keeps strength and avoids snagging.
| Step | Tip |
|---|---|
| Moisten | Reduce friction |
| Pull | Even tension |
| Trim | 1 8 inch tag |
Tie the Palomar Knot (Step‑by‑Step)
Start through doubling about 6 inches of line and let the loop hang loose through the hook eye so you can work with a thicker, easier-to-handle strand. You’ll make an overhand knot with the doubled line, then pass the hook through the big loop and snug slowly to control loop adjustment and knot durability. Be gentle, moisten, and pull main line and tag together.
- Feel confident as the knot tightens and you protect your gear.
- Share the moment with friends learning beside you and build trust.
- Celebrate the small wins whenever the knot holds under a trial pull.
You’ll trim the tag end close. Practice creates belonging and steady hands, so you’ll keep improving.
Tie the Uni Knot (Step‑by‑Step)
If you desire a knot that’s simple, strong, and very versatile, the Uni Knot will be one of your go-to choices because it works well with most lines and setups and is easy to learn. You’ll feel welcome learning this step-by-step. Start through threading the line through the eye, make a loop formation by doubling back, then wrap the tag end around both strands five to six times. Slide coils toward the eye, moisten, and pull main line to snug. You can adjust for knot variations through changing wraps. Practice creates confidence and belonging among anglers. Use the table below for quick reference and shared tips.
| Step | Action | Tip |
|---|---|---|
| 1 | Thread eye | Use clean cuts |
| 2 | Form loop | Double line |
| 3 | Wrap | 5-6 turns |
| 4 | Slide coils | Moisten |
| 5 | Tighten | Trim tag |
Tie the Non‑Slip Loop Knot (Step‑by‑Step)
Feel the difference a good loop gives your lure through learning the Non-Slip Loop Knot, a reliable choice should you want natural lure action and confident hook presentation.
You’ll feel welcome to try this knot, being aware its loop benefits improve lure motion and hook advantages enhance hookup chances. Start by forming an overhand loop near the tag end. Pass tag through eye, wrap standing line around tag four to six times, then pass tag back through the original loop. Pull gently on tag while holding the loop open, snugging coils neat. Trim excess.
Practice builds confidence and belonging as you share skills with friends. You’ll enjoy smoother casts and better action, and you’ll want to teach someone else.
- Comfort
- Self-respect
- Connection
When to Use a Loop Knot Versus a Fixed Knot?
At the time you choose between a loop knot and a fixed knot, consider how you want your lure or bait to move in the water.
Loop knots give lures free action for natural movement, while fixed knots keep lures tight and direct so you can sense every bite.
Match the knot to the lure type and fishing style at the point you want better action and more bites.
When To Use Loops
Curious about whether to use a loop knot or a fixed knot for your next cast? You want your gear to feel like part of the crew, so pick a loop at the point knot flexibility and bait movement matter most.
A loop gives live bait room to act natural and lets lures swim with lifelike motion. You’ll trust it at the moment feel and action mean bites.
Consider these emotional touches to guide choice:
- You want freedom for the lure to flirt and attract.
- You need confidence that the bait moves like it belongs in the water.
- You crave the calm of understanding action will sell the presentation.
Use loop knots for streamers, soft plastics, and live bait where motion wins hearts and hooks.
When To Use Fixed
You’ve already seen how a loop gives lures and live bait room to move and act natural, but there are plenty of times you’ll want the opposite: a fixed knot that locks the lure tight to the line.
Whenever you need direct hook presentation, precise casting, or better hook set feel, choose a fixed knot. You’ll also pick fixed knot whenever fishing heavy cover or targeting hard fighting fish that pull hard on the hook.
Fixed knots often enhance knot durability for repeated stress and abrasion. Learn a few reliable fixed knots and practice them until they feel familiar. That shared skill ties you to your fishing partners. You’ll cast with more confidence, land more fish, and enjoy time on the water together.
Match Knot To Lure
Choosing the right knot for your lure starts with considering how that lure moves and what you need to feel through the line. You want knot durability whenever you need direct control, and you want free lure action whenever you need natural movement.
Reflect on the lure type and the fish you belong with on the water.
- Use a loop knot whenever you want the lure to swim freely and tempt shy fish emotionally.
- Use a fixed knot whenever you need maximum power and direct hook sets for bigger fish.
- Match knot durability to line type and technique to avoid heartbreak.
You’ll feel more confident realizing your knot fits the lure. Practice both knots so you can choose quickly and stay part of the community that fishes with care.
Line Strength: Mono vs. Fluoro vs. Braid – Where Knots Fail
During the moment you’re choosing line and a knot, know that strength isn’t just a number on the spool; it’s how the line and knot work together under real pressure. You want a line that feels right and a knot that holds whenever fish pull hard.
Monofilament stretches and cushions shock but can suffer line abrasion near knots, so you check coils and trim tag ends. Fluorocarbon hides well and resists abrasion but can be stiffer and invite knot slippage provided it isn’t tied snugly and moistened.
Braid is ultra strong and thin, yet it can cut into knots on rough hardware unless you add a backup knot or a short mono or fluoro leader. You belong to anglers who evaluate, adjust, and trust their setup.
Quick Knot Checks Before You Cast
After you’ve picked the right line and knot for the job, give your setup a few quick checks before you cast to avoid losing a fish and wasting a day on the water. You want to feel confident and part of the crew when you head out.
- Check knot wear through running your fingers along the knot for stiffness or fraying.
- Assess line elasticity with a firm tug to see whether the stretch feels right for the water and species.
- Inspect connection points for tight coils and no slipping as you rotate the rig slowly.
These steps link tactile checks and simple pulls so you trust your gear. In case anything feels off, redo the knot. You’ll save time and keep the group smiling.
Common Knot Mistakes and How to Fix Them
Should you tighten a knot and it still slips or frays, don’t panic - you can fix most problems with a few simple checks and small repairs.
Initially look for damaged line or burrs and trim the tag end. Then check for slipping loops and redo the knot with the proper number of wraps. In case tightening errors happen, slow your pull, moisten the knot, and snug evenly on both ends.
For coils that overlap wrong, unwind and re-seat each wrap so they lie neat and parallel. When a knot jumps during a cast, try a different knot for that line type or add an extra turn.
Lean on friends to spot issues and practice repairs together so you feel supported and confident.
Practice Fishing Knots Off the Water (Fast Drills and Tips)
In the event that you want to get better fast, practicing fishing knots off the water lets you build speed and confidence without frustration. You’ll feel welcome in a small group or alone, and you’ll notice improved hand dexterity with steady knot repetition.
Start with simple drills that keep you invested and calm.
- Set a timer for one minute and tie the same knot until it feels natural.
- Increase to five minutes and switch between two knots to challenge memory.
- Practice under low light or with gloves to simulate real conditions.
Use consistent line types and mark progress with a checklist. Pair brief drills with feedback from a friend so you feel supported.
These habits make learning social, efficient, and enjoyable while building muscle memory.
Frequently Asked Questions
How Do Water Temperature and Salt Affect Knot Slippage?
Colder, denser water can stiffen line and increase knot slippage; salt accelerates abrasion and weakens knot durability. You’ll want to evaluate knots, use appropriate knots for water density, and trust your fishing buddies’ tips.
Can Knots Be Tied Effectively With Cold, Numb Fingers?
Yes - you can tie knots with cold, numb fingers, but reduced finger dexterity and tactile sensitivity make it harder; you’ll benefit from finger warmers, thicker lines, simpler knots, and teammates’ help so you don’t feel alone.
What Tools Help Tighten Knots Without Damaging Line?
“Measure twice, cut once.” You’ll use pliers, hemostats, knot jigs, and rubberized grips for knot tightening while using a cloth, fingertip protectors, or line-safe pliers to guarantee line protection-so you’ll feel supported and included.
How Do You Retie Knots After a Hook Bend or Lure Loss?
You’ll inspect the knot, cut damaged tag, preserve remaining length, then use retie techniques like Palomar or Improved Clinch suited to your line. You’re keeping knot preservation in mind, staying confident and supported.
Are There Eco-Friendly Ways to Dispose of Clipped Tag Ends?
Yes - you can tuck biodegradable tags into soil or compost, drop clipped pieces into recycled fishing line bins, or join local cleanup groups so you’re recycling responsibly and belonging to a community protecting waterways together.