Book Appointment Now

8 Fish Finder Tips: Read Sonar Data Like a Pro
A fish finder screen is a map full of clues that help catch more fish. Scan five quick checks before casting, set transducer position, choose frequency and range, and adjust sensitivity and noise rejection. Use color palettes to separate bait, fish and structure, and learn the difference between marks and arches. Know when to switch to CHIRP or imaging, and use speed, cone angle and zoom to confirm targets for better results.
Quick Start: Read the Fish Finder Screen (5 Checks Before You Cast)
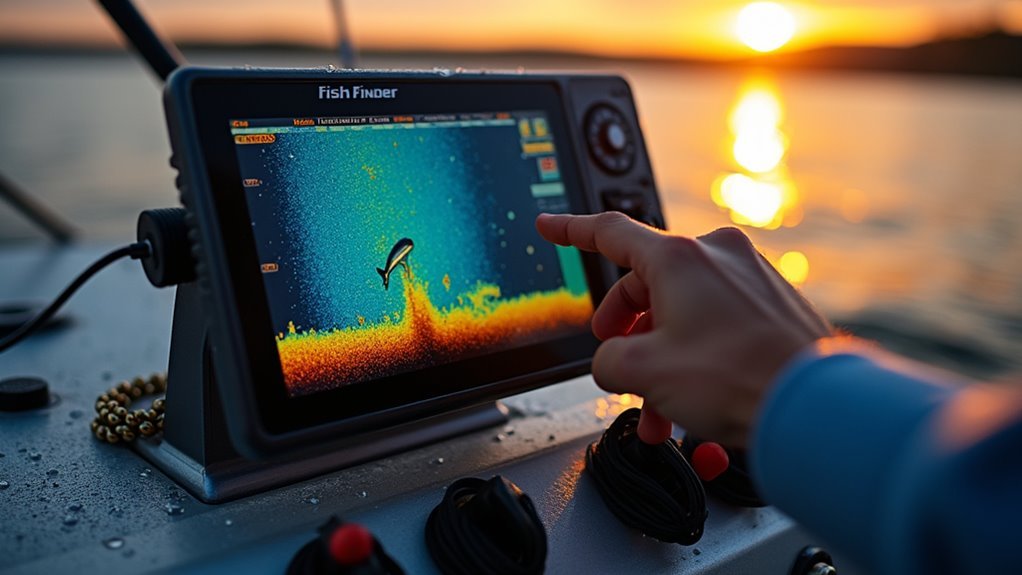
Before you toss your line, take five quick checks on the fish finder screen so you’re confident about where to fish and why. Initially, scan the real time display to see recent activity and moving targets.
Next, observe depth limitations so you pick lures that reach the right zone. Then check bottom contour for structure that holds fish and look for arches or marks near that contour.
Also verify beam width clues on screen so you know whether returns could be off to the side. Finally, watch signal strength colors to judge size and density of returns.
You’re part of a group who learns together, so trust these checks, ask questions, and share what you find with others.
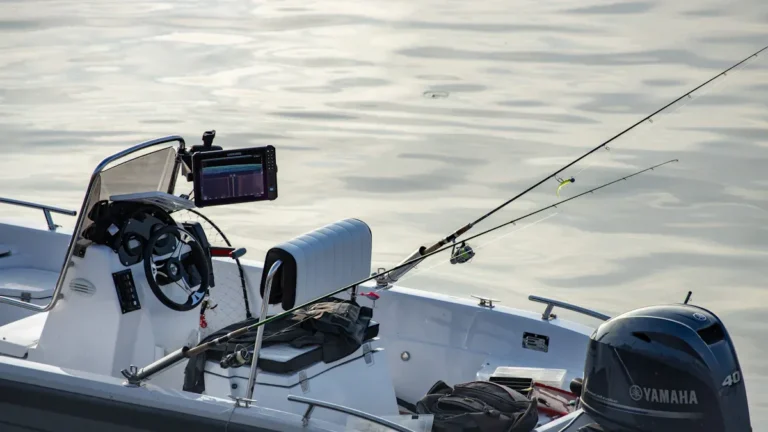
Transducer, Frequency & Range: Set-Up Steps Before You Fish
In case you want good sonar reads and less guesswork, start using checking your transducer placement, frequency settings, and range so each ping gives useful information you can trust.
You’ll feel part of a team once you do simple transducer calibration and frequency balancing before you leave the dock. Place the transducer where it hugs clean water flow. Choose a frequency that matches depth and target size. Set range so the screen shows enough perspective without clutter.
- You belong to anglers who prep carefully and catch more reliably
- You’ll relax realizing echoes come from correct depths
- You’ll trust readings whenever structure shows clearly
- You’ll enjoy shared insight with other fishers
- You’ll gain confidence every time you tweak settings
Set Sensitivity & Noise Rejection Without Overloading Your Screen
Once you crank sensitivity too high, your screen fills with noise and you lose the real targets, so learn to tune it like you’d tune a radio to the clearest station; start at lowering sensitivity until most speckle fades, then raise it slowly until fish and structure reappear with clean edges. You’ll want a sensitivity balance that avoids signal overload while keeping true returns. Work with noise rejection to cut spatter from surface chop and interference. Trust your eyes and crew whenever things look crowded. Share settings that feel right so everyone on board learns. Below is a simple guide to help you practice together and build confidence.
| Setting | Purpose |
|---|---|
| Low sensitivity | Reduce speckle |
| Medium | Balance detail |
| High | Max detail |
| Noise reject | Remove spatter |
| Trial runs | Confirm settings |
Use Color & Palette to Separate Fish, Bait, and Structure
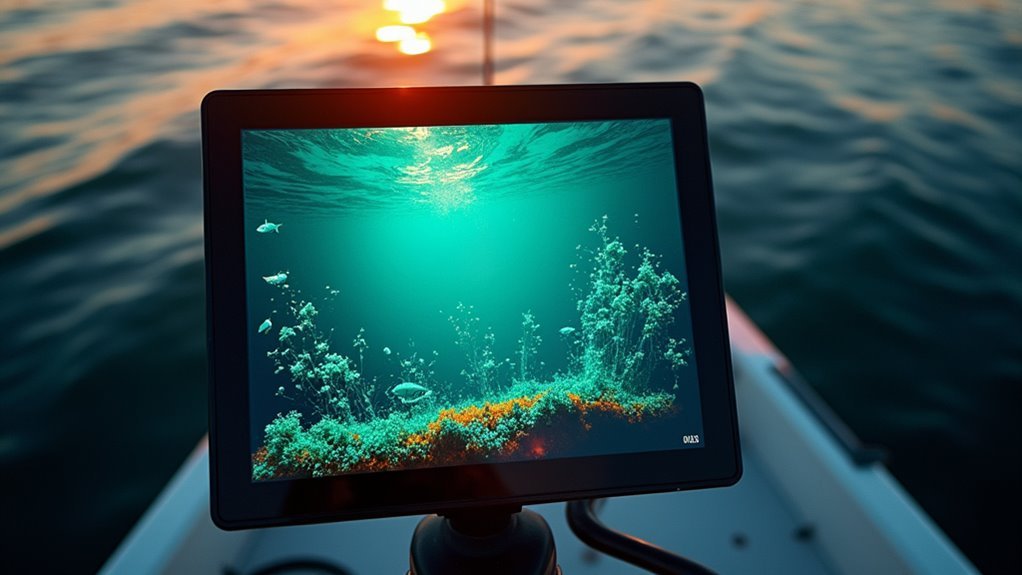
In case you want clearer screens and less guessing, using color palettes lets you separate fish, bait, and structure quickly and confidently.
You’ll learn how color differentiation and palette optimization make the screen feel familiar. Pick a palette where strong returns show warm tones and weak returns show cool tones. That contrast helps you trust what you see and share spots with friends.
- You feel calm whenever targets stand out
- You connect to the water and your crew
- You gain confidence spotting bait clouds
- You celebrate finding structure without doubt
- You enjoy teaching others what you learned
Start with preset palettes, tweak saturation and threshold, then lock settings. Swap palettes as light or depth change so the display stays consistent and welcoming.
Tell Fish From Noise: Marks vs Arches and What They Mean
You’ll learn to tell quick marks from full arches so you don’t waste time chasing false targets. Marks often mean fast or distant returns while arches usually show a fish passing through the cone, and reading target strength will help you judge size and confidence.
Keep your cone width and sensitivity in mind because that changes how marks and arches look on the screen.
Marks Versus Arches
Ever contemplated why some blips on your screen look like quick ticks while others form full arches? You want to know whether that return is a fish or just noise. Look at signal intensity and echo patterns initially. Strong, consistent echoes often mean a solid target moving through the cone. Quick marks show brief crossings or tiny targets. Arches form once a target moves through the cone over time.
You belong here with others who learn these signs together. Trust your screen and patience as you practice.
- You feel relief once a steady arch appears
- You smile at a clear, strong mark that matches your lure
- You share tips and gain confidence
- You notice subtle echo patterns that teach you
- You celebrate each read that grows your skill
Interpreting Target Strength
Considering how to tell whether that blip on your screen is a fish or just noise? You want to belong out on the water and trust your gear, so pay attention to signal intensity initially.
Strong, consistent colors mean a solid return and likely a fish or structure. Faint, scattered pixels suggest noise or plankton.
Learn echo interpretation through watching how marks become arches as targets cross the cone. Thick arches usually mean bigger fish because they reflect stronger signals. Partial arches can still be big when they only pass through the edge of the beam.
Adjust sensitivity and frequency to compare returns. Use wide beams to locate, then narrow beams to confirm.
Stay patient and practice these reads alongside others who share your excitement.
Read CHIRP, Side & Down Imaging : When and How to Use Each
At what point should you switch between CHIRP, side imaging, and down imaging to get the best results on your fish finder? You’ll use chirp advantages whenever you need clear depth and target separation under the boat, then flip to side imaging to scan structure and schools to the sides, and use down imaging for detailed views straight below.
Shift based on what you want to learn next. You belong with anglers who share that careful, curious approach.
- You feel confident finding new spots together
- You relax as structure jumps out on screen
- You celebrate clearer target signals with friends
- You trust your gear to reveal concealed schools
- You share small wins and learnings as a team
Choose modes with intent and patience.
Use Speed, Cone Angle & Zoom to Target and Confirm Marks
You’ll get better marks once you adjust boat speed to match what the sonar shows, slowing down to confirm targets and speeding up to cover water.
Pick the right cone angle so you’re either sweeping wide areas or narrowing in for detail, then use zoom and split screens to check size and position.
With small, steady moves you’ll feel more confident about which blips are fish and which are just bottom or structure.
Adjust Boat Speed
Curious how boat speed can make or break a sonar mark? You’ll want to find an ideal speed that balances clear returns with fuel efficiency.
Slower speeds give fuller arches and cleaner separation between fish and structure. Too fast and marks smear into streaks. Use steady, small speed changes as you move between cone angles and zoom levels to confirm targets.
- You feel in control whenever arches are clear and consistent
- You relax understanding your fuel efficiency is steady on long scans
- You connect with others when you share speed tips that work
- You gain confidence as marks repeat at the same speed
- You enjoy the calm of precise, patient searching
Keep adjustments gentle and watch screen response to lock onto true targets.
Select Appropriate Cone
Contemplating how to pick the right cone so your sonar marks make sense instead of causing frustration? You’ll start by matching beam width to your goal.
Use a wide beam for quick searches because its larger coverage area finds targets fast. Then slow down and switch to a narrow beam as you want detail and accuracy on a promising mark.
Pay attention to speed because moving too fast blurs returns and hides size and position cues. Whenever you change cone angle expect differences in echo shape and thickness.
Practice toggling beams on familiar water so you trust what you see. You’re part of a group learning together, so share settings and progress with other anglers to build confidence and consistency.
Use Zoom & Split
At the moment you combine zoom, split screens, cone angle, and boat speed, you get a powerful way to target and confirm marks without guessing at what the screen means. You’ll use zoom adjustment to magnify depth bands while the split configuration shows wide and narrow cones side to side.
That way you can scan with a wide beam, then focus with a narrow beam and slower speed so as to confirm a shape. You belong to a group that reads sonar like a craft. You’ll feel confident once marks line up on both screens.
- You trust your tools and each other
- You slow down to inspect a promising echo
- You switch cone angle to sharpen detail
- You fine tune zoom adjustment for clarity
- You set split configuration to compare returns
Fish Finder Troubleshooting: Fast Fixes on the Water

Curious why your fish finder suddenly goes blank or shows fuzzy echoes exactly as the bite should be good? You’re not alone and you’ve got this. Start with a quick cable inspection. Look for loose connectors, corrosion, or pinched wires.
Then try simple power cycles to reset the unit and clear temporary glitches. Should the screen still fuzz, check transducer alignment and mounting height, then assess on another boat or battery to isolate power issues.
Adjust sensitivity, frequency, and cone settings to see whether echoes sharpen. Clean the transducer face and remove debris that mimics noise.
In case you feel stuck, call a friend who fishes with you or reach out to the community for hands-on help and reassurance.
Frequently Asked Questions
Can Sonar Detect Fish Species or Exact Fish Size Reliably?
No - you can’t reliably ID species or exact size. Envision guessing a fish through its shadow; species differentiation is limited and size estimation is approximate, but you’ll still feel connected to the hunt and learning together.
How Do Water Temperature Layers (Thermoclines) Alter Sonar Returns?
Thermoclines scatter and refract sonar, so you’ll see weaker or split returns where temperature gradients change water density; stick together with fellow anglers, adjust frequency and sensitivity, and you’ll better interpret those altered echoes.
Will Metal Debris or Submerged Logs Trigger Fish Icons?
Yes - they can. You’ll see metal interference or submerged hazards produce strong, persistent echoes that could be tagged as fish icons, so trust patterns and arc thickness, compare frequencies, and you’ll feel confident interpreting returns together.
Can Nearby Electronics or Trolling Motors Permanently Damage Sonar Performance?
Yes - nearby electronics or trolling motors can cause electromagnetic interference and signal distortion that degrade sonar temporarily; they rarely cause permanent hardware damage, so you’ll feel safer troubleshooting grounding, cable routing, and ferrite choke use together.
How Do Ice or Heavy Rain Affect CHIRP and Side Imaging Accuracy?
Ice and heavy rain reduce clarity: you’ll get signal interference and image distortion, with weaker returns and noisy screens. You’ll want patience, shared tips, and adjusted frequencies or sensitivity so everyone’s readings stay useful and trustworthy.