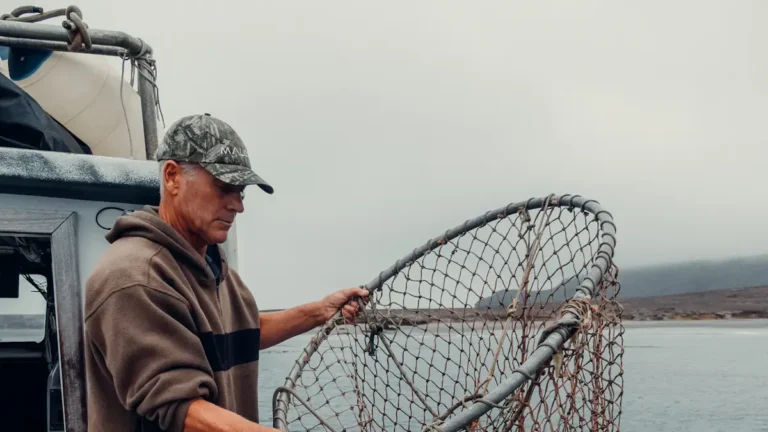
Book Appointment Now

How to Tie Fishing Line
Tying strong fishing knots keeps tackle secure and puts more fish in the boat. Start by choosing the right line-monofilament, fluorocarbon, or braided-and prepare the hook or swivel. Thread the line, use a reliable knot like the Improved Clinch or Palomar based on the line type, moisten the knot before tightening, and trim the tag end. Check each knot for neat coils and solid hold so it won’t fail at the moment it matters.
Quick Answer: Tie Fishing Knots Right Now
Want a fast way to get fishing right now? You’ll feel welcome as you learn fast tying techniques that build confidence and connect you to others who fish.
Start off choosing knots based on purpose and line type; knot selection matters more than speed alone.
For hooks and lures pick a knot that grips braided or mono lines. During joining lines pick a knot that keeps strength and sits slim in guides.
Practice each knot slowly at the outset, then speed up while keeping coils neat. Moisten before tightening and trim tag ends.
Say hi to fellow anglers, trade tips, and you’ll speed up together. You’ll belong to a small club that values skill, patience, and shared success.
Quick Checklist: Tools, Lines, and Tackle
If you desire your next trip to feel calm instead of chaotic, start with a simple checklist of tools, lines, and tackle you can rely on. You’ll want pliers, clippers, a hook file, and a small flashlight. Add spare hooks, swivels, weights, and foam floaters that match your planned fish.
Pack mono, fluorocarbon, and braid spools in labeled pouches so you don’t guess at the water. Good tackle organization saves time and builds group confidence whenever you fish together. Schedule regular tool maintenance after each outing to keep gear ready and safe.
Lay items into tackle boxes with dividers, zip bags, and elastic straps. Bring a small notebook to log knots and line choices so you learn as a team.
Which Line to Use: Mono, Fluoro, or Braid?
Whenever you pick line, consider how much stretch you want and how much feel you need from the rod.
Monofilament gives you stretch and forgiveness that helps land fish and absorb shocks, while braid and fluorocarbon trade that stretch for greater sensitivity and hookset control.
Keep those tradeoffs in mind so you can match line choice to the fish, lure, and your confidence on the water.
Mono: Stretch And Forgiveness
Because monofilament stretches, you get a built in shock absorber that can save a cast, a lure, or a fish, and that stretch makes mono forgiving for anglers learning knots or fighting hard runs.
You’ll appreciate mono’s line elasticity whenever a sudden strike or surge hits. That give reduces peak load and lets your knots handle sudden force without cutting into the line. Knot stretch helps prevent shock failure and makes tying simpler for beginners and buddies teaching each other.
- Mono absorbs shocks, so you’ve got more margin on heavy pulls
- It’s easier to feel mistakes whenever checking knot stretch before a cast
- Knots glide and seat well thanks to elasticity
- You’ll find it kinder to hooks and leaders under strain
- It builds confidence while you practice tighter knot technique
Braid Vs Fluoro: Sensitivity Tradeoff
You’ve just seen how mono’s stretch gives you a forgiving buffer during hard runs and sudden strikes, and that same feel highlights why choosing between braid and fluorocarbon matters so much.
You want more bite detection, so braid shines with near-zero stretch and top sensitivity. That helps you feel subtle taps and structure underfoot, and braid’s low line memory keeps casts smooth.
You also want stealth and abrasion resistance, so fluorocarbon offers invisibility under water and higher breaking strength per diameter. That makes hookups cleaner around rock and reef.
Often anglers pair braid main line with a fluoro leader to gain sensitivity plus invisibility. Try knots like the double uni to join them. You’ll feel confident choosing based on water, cover, and target species.
Prepare Line and Hook
Before you tie the knot, pick the right line for the job so you won’t be surprised upon stretch or weakness on the water.
Check the hook carefully for sharpness, rust, or bent points so your rig will hold once a fish bites.
Then thread the line through the eye and secure it with a simple bite or loop as you prepare the specific knot you’ll use.
Choosing The Right Line
Contemplating which line will give you the best chance of landing a fish? You want a line that feels like part of your kit and enhances your confidence. Reflect on lining strength and diameter choice together.
Stronger line helps with big fish, but thicker diameter can spook wary fish or reduce casting distance. Balance matters and you’re not alone figuring it out.
- Match line to rod power and target species for reliable performance
- Choose lighter diameter for finesse when fish are pressured
- Pick higher lining strength for rocky or heavy cover situations
- Consider braid for sensitivity and low stretch needs
- Use fluorocarbon leader for invisibility near the bait
These choices fit your style and help you fish with friends and family.
Inspecting The Hook
A quick check of the hook tells you a lot about how well your knot and rig will hold up, so take a calm moment to inspect it carefully.
Run your fingers along the bend, point, and shank to feel for rough spots or burrs that can cut line. Look closely for hook corrosion at the eye and along the shaft; even minor pitting weakens the metal.
Check eye alignment so the eye sits straight with the shank. In the event the eye is bent, the knot will twist and weaken.
You want a clean, sharp point and a smooth eye for reliable knots. Share these checks with your fishing friends so everyone trusts their gear and feels confident on the water.
Threading And Securing
Once you’re ready to attach the line, keep things calm and steady so the work is clean and strong; you’ll thank yourself later. You want your knot durability to be reliable, so prepare the line and hook with care and a friendly steady hand.
Use line lubrication sparingly to help coils seat without slipping. Stay patient and know others here learn the same way.
- Thread the line through the hook eye twice for Palomar or once for Clinch depending on braid or mono
- Check for frays and cut a clean end before tying
- Moisten the knot with water or saliva and snug slowly to set coils
- Pull both tag and standing line together for even tightening
- Trim tag close but not flush to keep strength and control
Improved Clinch Knot : Step-by-Step
Start through threading the line via the hook eye and let the tag end hang loose while you wrap it around the standing line 5 to 7 times; this step sets the stage for a secure connection and is where you’ll control how neat the knot will sit. You’ll pass the tag end back through the small loop next to the eye, then through the larger loop you just formed. Use gentle moistening techniques before you pull. Apply even tightening methods through pulling the tag end and standing line together, slowly snugging coils so they sit tidy. You belong to anglers who care about craft. Practice brings calm confidence. Below is a small table to touch that feeling.
| Care | Comfort |
|---|---|
| Steady hands | Warm smile |
| Shared tips | Quiet satisfaction |
Palomar Knot : Best for Braided Line
At the time you’re using braided line, the Palomar knot works so well because it keeps most of the line’s original strength and stays simple under heavy pull.
You’ll like how the step-by-step technique is easy to follow: double about six inches of line, pass the loop through the hook eye, tie an overhand knot with the doubled line, then pass the loop over the hook and pull both ends to tighten.
As you try it, you’ll find the knot is fast to tie, forgiving while you learn, and very reliable on braided line.
Why It Works
Why does the Palomar knot hold so well with braided line? You feel confident tying it because its knot mechanics work with braid’s thin, slippery nature. The doubled loop spreads pressure, and reduced line friction keeps strands from cutting into each other.
You belong to anglers who share this reliable trick and it stays simple whenever you need it most.
- Loop doubles the line so load spreads evenly
- Overhand knot secures without crushing fibers
- Low line friction prevents heat and weak spots
- Symmetrical shape resists slipping under shock
- Easy to inspect so you trust your knot before casting
Together these bits explain why the Palomar grips braided line. You’ll notice strength, simplicity, and a friendly confidence each time you tie it.
Step-By-Step Technique
Grab about six inches of line and you’ll find the Palomar knot feels quick and confident once you see the steps laid out.
Fold the line to form a loop and pass it through the hook eye. Tie an overhand knot with the doubled line, but don’t tighten. Let the hook hang loose while you pass the loop over the hook. Pull both ends slowly to snug the knot, moistening initially to protect the fibers.
You’ll like this method because it works well with braided line and shows clear material compatibility compared to other knots. Try small knot variations like a slightly larger loop for bulky eyes or a clipped tag for neatness. Practice until it feels natural and you’ll belong with anglers who trust this knot.
Double Uni Knot : Tie Line to Lure or Leader
Start with acknowledging that the Double Uni knot is one of the best choices for tying braided line to a fluorocarbon leader or attaching a line to a lure in case you need a slim, strong connection that will pass easily through rod guides.
You’ll like how it balances strength and smoothness, and it’s welcoming to anglers learning about knot tightening and line compatibility. You’ll tie two small unis facing each other, snug coils, then pull both standing lines to dress the knot.
- Use matching line diameters whenever possible for best strength
- Wrap each tag end six times around the doubled line
- Moisten before final snug to protect fibers
- Pull slowly to avoid overlapping coils
- Trim tails close but leave a tiny tag for safety
You’re part of a fishing community using reliable, neat knots.
FG Knot and Double Uni : Braid-to-Fluoro Leaders
Expertising the FG knot alongside the Double Uni gives you two reliable ways to join braided mainline to a fluorocarbon leader, so you can choose the best fit for your fishing style and conditions. You’ll feel confident whether you pick the low profile FG for strength and smooth passage through guides or the forgiving Double Uni for easy dressing and repair. Both share fg applications in salt and fresh water, and both include uni variations to suit line diameters. Use the FG at moments stealth and guide clearance matter. Use Double Uni at moments you want simplicity and quick adjustments. Below is a friendly comparison to help you belong to a group that values smart knots.
| Knot | Strength | Ease |
|---|---|---|
| FG | High | Moderate |
| Double Uni | Good | Easy |
| Use | Stealth | Quick fix |
Loop Knots: Non‑Slip Loop and Rapala
At the moment you want the bait to move naturally and still stay securely attached, loop knots are your best friend; they give lures and baits freedom to swim while keeping the connection strong.
You’ll learn two reliable loop knots: the non slip loop and the Rapala technique. Both let the lure act freely and keep you feeling confident on the water.
Use the non slip loop whenever you need a stable, compact loop. Use the Rapala technique for a bit more swivel and action. They complement each other and fit most tackle setups.
Practice both so you join the community of anglers who trust their knots.
- non slip loop steps and feel
- Rapala technique basics
- when to pick each knot
- common mistakes to avoid
- moistening and tightening tips
Snell Hooks and Surgeon’s Knot for Joins
A snell knot is a simple, dependable way to tie a hook so it pulls in line with the shank, and you’ll find it especially useful whenever you desire better hook set and more natural bait presentation.
Paired with a surgeon’s knot for joins, you get a smooth, strong system that keeps your leader and main line connected without bulky bumps. You’ll learn the snell knot through passing a doubled leader through the eye, wrapping the tag around the shank several turns, then snugging coils straight and moist.
Next, use a surgeon’s join to connect the leader to the main line upon overlapping ends, tying a secure surgeon’s join, and pulling evenly.
Together they feel tidy, reliable, and like gear cared for by friends on the water.
Test Knots and Spot Failure Points
Before you trust any knot on a big day, you’ll want to check it and learn exactly where it could fail so you don’t get surprised once a fish takes off.
You’ll examine knot durability through gently pulling and twisting each knot, watching for slippage, crushed wraps, or sudden gives. Pay attention to line abrasion where guides or hook eyes rub.
Use these checks to build confidence and belong to a group that cares for gear and each other.
- Pull examination slowly, then with a firm tug to reveal weak spots
- Twist the line to see whether coils separate or bind
- Run fingers along the knot to feel roughness from line abrasion
- Inspect tag end seating and coil alignment
- Rewet and reexamine after adjusting wraps
Pro Tips: Prevent Twist, Trim, and Dress Knots
Keep your knots tidy and your line turning right, because preventing twist, trimming cleanly, and dressing knots properly will save you gear and fish. You want knot maintenance to feel easy and shared with friends, so work slowly, keep tension, and use line lubrication like saliva or a drop of water to seat coils. Prevent twist through letting line spool off freely and through pinching the line as you tighten. Trim tag ends close, but leave a tiny nub to guard against slipping. Dress knots by aligning wraps, removing overlaps, and snugging evenly. Practice these habits and you’ll belong to anglers who care for their gear and catch more often.
| Tip | Why | How |
|---|---|---|
| Lubricate | Protects | Moist before pull |
| Dress | Aligns | Smooth coils |
| Trim | Neat | Cut 1–2 mm |
| Release twist | Smooth cast | Spin spool free |
| Check | Confidence | Tug trial |
Troubleshooting: Slipped Knots, Frozen Line, Fixes
Ever questioned why a knot you tied ten times suddenly slips the moment a fish takes the bait? You’re not alone. Knot slippage and frozen line problems come up once temperature, lubrication, or technique fail you.
You’ll feel reassured understanding fixes are simple and shared among anglers who care for each other.
- Warm up frozen line through keeping it inside your jacket or using warm hands prior to tying to avoid stiffness and breakage
- Moisten knots to prevent knot Slippage and to let coils seat evenly as you tighten
- Re-tie with a stronger knot like the Palomar should slippage repeats under load
- Inspect line for nicks or stiffness caused by cold or sun, then trim damaged sections
- Practice slow, deliberate tightening to keep coils neat and secure
Frequently Asked Questions
How Do Water Temperature and Saltwater Affect Knot Strength?
You’ll see reduced knot strength as thermal degradation weakens fibers in warm water and salt corrosion attacks material, so you’ll want to rinse, inspect, re-tie more often, and choose resistant lines to protect your crew.
Can I Tie These Knots One-Handed or With Cold-Gloved Hands?
Yes - you’ll manage even like a one-handed maestro, adapting one handed techniques and gloved dexterity; simpler knots (Palomar, improved clinch, double surgeon’s loop) work best, practice together with friends to build confidence and belonging.
What Knots Work Best for Heavy-Duty Saltwater Game Fish?
You’ll want braided knots like the Palomar and Double Uni plus high-tensile options like a well-tied Improved Clinch for mono leaders; you’ll feel confident and part of the crew as you’re landing big saltwater game.
How Do I Retie or Retire Line After Multiple Catches?
Consider your line as a trusted rope; you’ll retie after frays or weakening. Prioritize line maintenance, inspect for nicks, cut back compromised sections, replace spooled line whenever knot durability drops, and you’ll keep the crew confident.
Are There Knotless Options for Leaders or Quick-Change Rigs?
Yes - you can use fluorocarbon leaders with quick release rigs, letting you swap leaders or setups fast. You’ll feel part of the crew whenever you use snap swivels, knotless sleeves, or clip-on leaders for easy changes.