Book Appointment Now

How to Tie a Swivel on Fishing Line
You lost a big bass last weekend because a knot slipped, and you don’t want that to happen again. This guide shows how to tie a swivel onto mono, fluorocarbon, and braid so your gear stays secure and tangle-free. Start by cleaning and aligning the swivel and line, then choose the right knot - Palomar for strength, Improved Clinch for neatness, Uni for a loop or action - and lubricate before snugging the wraps evenly. Step-by-step instructions cover tying, testing strength, trimming the tag, and avoiding common mistakes so you fish with confidence.
Quick Answer: Best Swivel Knots and When to Use Them
Usually you’ll want a knot that’s simple, strong, and suited to your line type, and the Palomar, Improved Clinch, and Loop knots cover almost every situation you’ll face.
You’ll pick the Palomar when you want raw strength and a knot that behaves on braided or mono.
You’ll use the Improved Clinch for routine line to swivel ties that stay tidy.
You’ll choose the Loop knot when you want a bit more action at the end of the line.
As you tie, consider about swivel maintenance and knot aging.
Inspect swivels and knots after each trip, replace weakened line, and re-tie before a long session.
You belong to anglers who care, so take your time, moisten knots, and pull steady to keep trust on the water.
When to Use a Swivel vs. Tying Line Directly (Decision Checklist)
Whenever you’re fighting persistent line twist, reach for a swivel to stop the mess before it starts.
In case your lure or rig needs natural action or a direct feel, you’ll want to tie line straight to preserve movement and sensitivity.
Consider the lure type and how much twist it creates, then choose the option that keeps your setup tidy and your confidence high.
When Tackling Line Twist
Provided that line twist keeps ruining your casts and you want a reliable fix, deciding whether to use a swivel or tie directly comes down to a few clear factors you can check quickly. You want belonging on the water, so trust simple checks that respect your gear and skill. Consider line memory and routine reel maintenance whenever choosing.
Check these points before you act:
- Frequency of twist and type of lure or bait you use, plus whether your spool shows line memory that makes coils hold shape.
- Your reel maintenance history, braid versus mono, and whether drag or spool issues could be causing twist.
- How often you replace tippet or leaders, how visible swivels are to fish, and whether extra knots will bother you.
Use these steps to decide confidently and keep fishing enjoyable.
Matching Lure And Line
Match the right lure to your line via asking a few clear questions about what you want the lure to do and how your setup handles motion and twist. You want the lure action to be lively, but you also need to match line weight so the bait moves correctly. Ask: will the lure spin, wiggle, or need free pivoting? Will heavy line hide subtle action? Decide whether a swivel will reduce twist without killing motion or whether tying line directly keeps action truer.
| Use Swivel | Tie Directly |
|---|---|
| Spinning lures that twist | Delicate action plugs |
| Heavy line setups | Light line, high feel |
| Multi lure rigs | Single precise presentations |
| Prevents leader twist | Maximizes lure action |
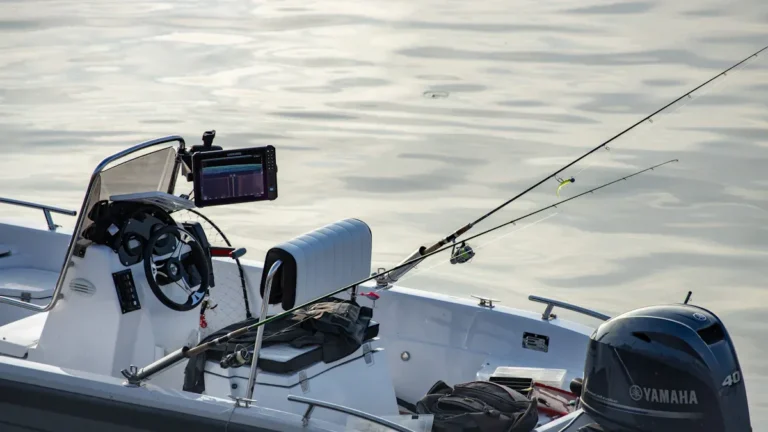
Choose the Right Swivel for Mono, Fluoro, and Braid
Pick a swivel that matches your line and fishing style, because the wrong choice can cost you fish and frustrate your day on the water.
You want a swivel material that resists corrosion for salt or stays light for freshwater.
Match eye size to your line and knots so you get smooth seating without bulk.
You belong with gear that feels right and reliable.
- For monofilament prefer brass or stainless swivels with medium eyes for easy knot dressing and good strength
- For fluorocarbon choose low profile, smooth swivels so the stiffer line seats cleanly and slips without chafing
- For braid select swivels with larger eyes and strong material to avoid cutting and to let advanced knots lie flat
Trust your hands and try small changes until it feels like yours.
Prepare Line and Swivel: Alignment, Lubricants, and Tidy Tag Ends
Before you tie, line up the swivel and the standing line so they sit straight and free of twists, because neat alignment makes every knot hold better.
Lightly moisten the knot area and, in case the line is stubborn, use a tiny dab of silicone or line conditioner to let the wraps slide smoothly and seat without friction.
After snugging the knot, trim the tag end close and tidy any frays so the swivel won’t snag or weaken the connection.
Align Line And Swivel
Get your line and swivel lined up so they sit straight and smooth before you tie, because a small twist or kink can ruin a knot and cost you a fish. You want confident line orientation and precise swivel alignment so the knot forms evenly and holds under pull. Take a moment to let the line settle and to check for concealed twists.
- Lay the doubled or single line straight and parallel to the swivel eye to avoid snags
- Smooth any coils with your fingers and rotate the swivel gently until it rests naturally
- Trim frayed tag ends and tuck them so they won’t catch during tightening
This caring, team minded step helps you tie stronger knots and keeps your gear ready for shared days on the water.
Apply Thin Lubricant
Often a small dab of thin lubricant makes the difference between a knot that slides snugly and one that binds or weakens, so you’ll want to handle this step with care.
You choose a light lubricant that supports line health and won’t gum up the swivel or line. Apply a tiny drop to the knot area and the swivel eye, then spread it with your finger or a cloth. Watch the application timing so you lubricate just before final tightening, not hours earlier while dust can stick. This keeps the knot moist during the final pull and reduces heat and friction that harm fibers.
You’ll feel more confident tying aware the lubricant protects your knot and welcomes others who share the water with you.
Trim And Tidy Tagends
You’ve just lubed the knot and felt it snug up, so now it’s time to tidy the tagends and finish the job with care. You want trimmed aesthetics and secure heat resistant ends so your rig looks and feels ready. Gentle scissors or a hot tool make a difference. Trim close but not too close, then melt synthetic tagends briefly to stop fray and add strength.
- Use sharp scissors for clean cuts and avoid jagged fibers
- Apply a quick touch of heat to braided or monofilament tagends for heat resistant ends
- Leave a tiny nib of tagend when extra security feels needed
You belong to anglers who care about details. Take your time, align everything, and trust the knot to perform.
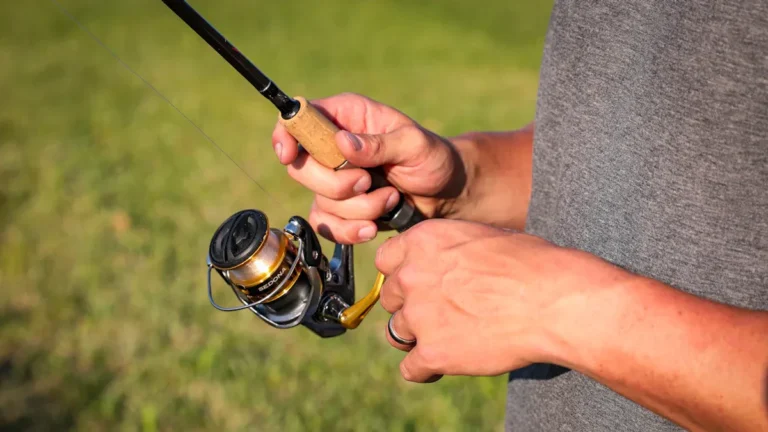
Tie a Clinch Knot to a Swivel (Step-by-Step)
Tighten your confidence prior to tying a clinch knot to a swivel, because this simple knot will keep your rig secure and your catch on the line.
You start by passing the line through the swivel eye, then wrap the tag end around the standing line five to seven times. Keep those wraps neat so tag alignment stays correct and you reduce knot failure.
Next pass the tag end through the small loop near the eye, then thread it back through the larger loop you created.
Moisten the knot with saliva or water, then pull steadily and evenly to seat the coils.
Trim the tag end but leave a small tail, check the wraps, and give a final firm pull.
Tie a Uni Knot to a Swivel (Step-by-Step)
Start through threading the line via the swivel eye and double back to form a small loop, because the Uni knot gives you a strong, low-bulk connection that works well with both monofilament and braided lines.
You’ll hold the standing line in one hand and the tag end in the other, keeping steady hand tension as you wrap. Make five to seven tight turns around the loop, then pass the tag end through the small loop you made.
- Slide the knot down toward the swivel while keeping even hand tension
- Moisten the wraps to protect the line and snug the knot slowly
- Trim the tag end leaving a short tail for security
Practice will help you feel casting angles and confidence. You belong here; you’ll get it right.
Tie a Palomar Knot to a Swivel (Step-by-Step)
Start proximate preparing your line and swivel: double the line, pass the loop through the swivel eye, and make sure the tag end is long enough to work with.
Next, form a simple overhand knot in the doubled line and then pass the swivel through the loop you’ve made.
Finally, moisten the knot, pull each end steadily to tighten, and trim the tag close for a neat, strong Palomar connection.
Prepare Line And Swivel
Grab your line and swivel and relax; tying a Palomar knot is one of the simplest, strongest ways to attach a swivel. Initially, inspect your swivel for rough edges and check for swivel corrosion. Provided it looks good, straighten any kinks in the line and trim frayed ends. Keep line storage habits in mind so your line feeds smoothly and stays tangle free.
- Lay out enough line to work comfortably without knots or twists
- Clean swivel eye with a bit of fresh water to remove grit that causes corrosion
- Choose a bright, flat surface and good light for steady, confident hands
These steps help you feel ready and connected to others who care about neat, reliable rigging.
Form A Loop
Now that your line and swivel are clean and ready, you’ll form the loop that makes the Palomar knot so strong and simple.
Fold about six inches of line back to create a doubled section, and hold that bend between thumb and forefinger. Pass the doubled line through the swivel eye so the loop sits neatly against metal. Make an overhand knot with the doubled line, keeping the loop large enough to pass the swivel through next.
Check loop rigidity by feeling the doubled lines together and adjusting the bend so it doesn’t collapse whenever you pull gently. This step affects casting impact, so take your time.
As you work, know others have learned this the same way, and you belong to that steady, careful group.
Tighten And Trim
With the swivel through the loop and the overhand knot in place, work the knot snug so it won’t slip as you cast or fight a fish. You’ll moisten the knot lightly, then pull both the standing line and tag end evenly. Feel for any twists and cinch until the knot seats cleanly against the swivel eye.
Take satisfaction in the small details; tidy tag end aesthetics matter to the group you fish with.
- Trim the tag end close but leave a tiny tail so knot drying won’t make it pop free
- Use sharp clippers and cut at an angle for neatness and strength
- Check the knot after a short cast and tighten again should it be necessary
You’re part of a community that cares about craft and reliable gear.
Braid Method: Double-Uni to a Swivel (Quick Steps)
Tackle the Double-Uni to swivel method whenever you want a strong, low-profile connection between braided backing and a swivel. You’ll feel confident using this braid method because it handles braid specific slickness and resists slipping.
Start by overlapping braid and leader around the swivel eye, then tie a Uni knot from each side toward the eye. Tighten each Uni snug, then pull both standing lines to slide the knots together.
Dress the knots so they sit clean and compact against the swivel. Trim tag ends close but not flush to preserve knot security.
You’ll like double uni variations that add extra turns for thin braid or fewer turns for thick braid. Practice a few times and you’ll join the community of anglers who trust this quick, neat connection.
How to Test Knot Strength and Trim Neatly
You’ve just tightened a neat double-uni or finished a Palomar on your swivel, and you want to be sure it’ll hold whenever a fish charges; checking knot strength and trimming neatly gives you that confidence.
Start with a quick visual inspection, look for neat wraps, no crushed fibers, and the knot seated squarely against the swivel eye.
Then do gentle stress testing through pulling the standing line hard, then the tag end, and finally use a firm tug to simulate a run.
Whether the knot slips or bulges redo it.
Trim tag ends close but not flush to avoid slippage and keep a small tail for security.
- Use moistened pulls to set knots
- Leave 2 to 4 mm tails on mono
- Check again after a cast
Common Swivel-Knot Mistakes and How to Avoid Them
Even careful anglers make swivel-knot mistakes, and whenever they happen it’s usually because of small, fixable habits rather than bad luck.
You’ll often see knots fail from poor lubrication whenever you skip moistening; that friction weakens fibers as you cinch. Stop rushing and wet the knot before you pull it tight.
Another common slip is overconfident tightening; you yank too hard or unevenly and you distort wraps. Instead pull steadily, feel the turns seat, and snug evenly.
Mistied wraps, missed passes through the eye, and tail lengths left too short all come from hurry or distraction. Slow down, check each wrap, leave a proper tag, and dress the knot neatly.
You’re part of a crew that cares about craftsmanship, so take the extra minute.
Five Quick Anti-Tangle Tips for Swivels and Knots
As lines twist and flies wrap, it’s frustrating and it can cost you fish, so let’s look at five quick anti-tangle tips that really work alongside swivels and knots. You want gear that keeps you fishing, not wrestling line. Check swivel materials and pick smooth finishes that let knots seat cleanly.
Mind line memory through stretching new mono or lubricating braid before tying.
Tie tidy knots like the Palomar or improved clinch and moisten them to seat properly. Place swivels between leader and tippet to stop twist from reaching your flies.
- Keep tag ends short but not too short; tuck should you need to avoid snags
- Use matching diameter swivels to your line strength
- Inspect swivels for burrs and replace whenever rough
Trust these steps and you’ll feel part of a skilled, caring crew.
Frequently Asked Questions
Can Swivels Corrode Faster in Saltwater and How to Prevent It?
Yes - swivels corrode faster in saltwater from saltwater corrosion, so you should rinse gear after use, dry it, store it dry, and choose swivels with protective coatings or stainless/bronze finishes to protect shared outings.
Can I Use Swivels With Leaders for Lure Casting, Not Just Fly Fishing?
Absolutely - you can. Like a bridge joining two islands, swivels improve lure compatibility and protect your leader; they’ll augment casting technique, reduce twists, and help you fish confidently alongside others who share your passion.
Do Swivel Sizes Affect Lure Action or Casting Distance?
Yes - swivel size impacts lure action and casting performance; larger swivels can slightly reduce action and distance, while smaller, low-profile swivels preserve lure movement and cast better, so choose size that matches your lure and technique.
How Do I Store Swivels to Prevent Tangles and Corrosion Long-Term?
Consider your tackle as a tidy nest: store swivels in sealed packets or bead containers, keep them dry with silica, group according to size, label everything, and you’ll belong to anglers who protect gear, prevent tangles, and beat corrosion.
Are There Legal Restrictions on Swivel Use in Certain Fisheries?
Yes - you’ll find fishing regulations and gear restrictions vary throughout regions; check local rules, permits, and seasonal closures. Join local angling groups or forums to stay informed and support compliant, community-minded fishing practices.