Book Appointment Now

How to String a Fishing Pole
Stringing a fishing pole is simple and gives gear a fresh start. Begin by loading the line onto the reel, thread it through each guide from the bottom up, and keep gentle tension to prevent loops. Spool evenly while watching for twists, then add a leader and tie the proper knot for your lure or swivel. Set the drag for smooth play and learn quick fixes for tangles and line memory so casts stay clean and confident.
Quick Steps to String a Fishing Pole (Short Version)
In case you want to get your rod ready fast and fish sooner, follow these clear, simple steps that’ll walk you through every essential move.
Initially, open the reel seat and slide the reel foot into place, tightening until snug so balance feels natural.
Next, open the bail and feed the tag end through the nearest guide, keeping gentle line tension as you position the bulk spool for smooth unwinding.
Tie an arbor knot around the spool, cinch it tight, trim the tag and close the bail.
Reel on with steady tension until the spool is nearly full, then cut the line and check for twists.
Finally, thread the line through each guide to the tip and leave a few feet for attaching tackle.
Choose the Right Fishing Line (Monofilament, Fluorocarbon, Braid)
Whenever you’re picking line for your rod, consider about what you’ll be fishing for and wherever you’ll be casting, because the right line makes everything easier and more fun. You want a line that fits your community of anglers and feels reliable. Monofilament is forgiving, good for beginners, and has decent line durability. Fluorocarbon hides well and helps in case color visibility matters. Braid gives strength and sensitivity for heavy cover.
| Type | Best for |
|---|---|
| Monofilament | General use, easy knotting |
| Fluorocarbon | Clear water, low color visibility |
| Braid | Thick cover, high strength |
Trust your choice, ask friends, and practice spooling to build confidence and belong.
Pick the Right Leader for Your Fish and Setup
Because leaders protect your main line and give you the right presentation, you’ll want to choose one that matches the fish you’re after and the cover you’ll be fishing, not just what looks easiest at the store.
You care about belonging to a group that fishes smart, and choosing the right leader material and leader strength helps you fit in with more experienced anglers. Consider clear fluorocarbon for spooky fish and heavy cover, and about wire or braid leaders for toothy species.
Match leader strength to the fish size and the fight you expect. Use lighter leaders for natural presentation and heavier ones for heavy structure. Blend materials when needed, and evaluate knots and connections so you trust your setup before you cast.
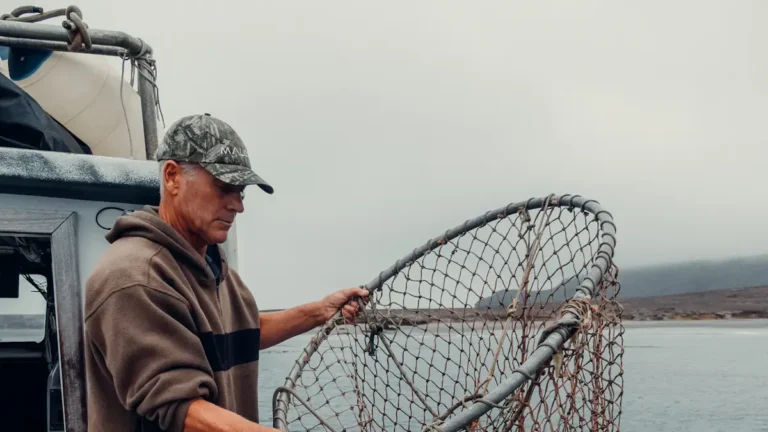
Prepare Your Rod and Reel for Stringing
Before you start stringing, take a close look at your rod and reel to spot any cracks, loose guides, or corrosion that could ruin a good day on the water.
You’ll also want to pick the right type of line for your setup and target fish, since braid, fluorocarbon, and monofilament each handle weight and abrasion differently.
With a clean, secure reel seat and the correct line choice, you’ll save time and avoid headaches once you move on to threading and spooling.
Inspect Rod And Reel
A quick inspection of your rod and reel will save you time and frustration once you start stringing, so let’s take a careful look together.
Start with rod inspection through checking guides for cracks, loose wraps, and alignment. Run your finger gently along each guide to feel for snags. Look at the tip for straightness and examine the blank for any soft spots.
Next check reel compatibility by confirming the reel seat fits the reel foot and the reel size balances the rod. Make sure the reel spins freely and the drag works smoothly. Inspect the handle and hood for wear.
In case anything feels off tighten fittings or replace damaged guides before you spool. You’re part of this fishing community and you’ve got this.
Select Line Type
Pick the right fishing line and you’ll save yourself frustration on the water and catch more fish. You want a line that fits your rod, target species, and confidence level.
Consider line durability and color visibility during selection. Stronger lines handle bigger fish and rough cover. Clear or green lines hide well near weeds. Bright lines help you watch bites in low light.
- Monofilament for stretch and forgiveness
- Braided for high strength and low diameter
- Fluorocarbon for low visibility and abrasion resistance
- Specialty blends for specific techniques
Match pound rating to fish and cover, then evaluate knot compatibility and spool capacity. Should you be unsure, ask a friend or pro so you feel supported and ready.
Attach Line to the Spool (Spinning and Baitcasting)
Now you’ll secure the line to the reel so it stays put while you spool.
For spinning reels you’ll tie a simple arbor knot and for baitcasting reels you can use the same basic knot or a clinch variation for extra hold.
Take your time, keep the line tight and wet the knot before cinching so it seats neatly and won’t slip.
Secure Line To Reel
Before you start winding, make sure the line is firmly attached to the reel so it won’t slip under pressure. You want to feel confident the line tension is steady and the knot security holds, because you’ll trust this setup once a fish tugs.
Work calmly, like someone teaching a friend.
- Feed line onto the spool and tie a secure arbor knot following spool grooves.
- Close the knot, pull standing line tight, and trim the tag close but not flush.
- Apply gentle tension with your fingers while you start reeling to seat the line.
- Check for twists as you run line to the tip and back, adjusting as needed.
You’re part of this community of anglers, so take your time and ask for help whenever unsure.
Tie Appropriate Knot
You’ve got the line seated on the spool and tensioned, so it’s a good time to attach the line securely for both spinning and baitcasting reels; doing this right keeps your setup reliable as soon as a fish hits.
You want a knot that balances knot durability with simplicity, and you’ll feel better being aware you picked one that fits your reel. Start with an arbor knot to anchor the line, then choose knot variations like improved clinch or Palomar for the hook or lure.
Practice both so you belong to anglers who trust their gear.
Thread the Line Through the Guides to the Tip
Pick up the rod and open the bail so you can guide the line smoothly through each ring from the handle to the tip. You’ll feel connected as you use steady line threading and respect the guide materials, so take your time.
Feed the line from the bottom guide up, keeping light tension. Pause in case a guide looks worn and swap it before continuing.
Share the task with a friend to build confidence and make it fun.
- Check guides for cracks or rough spots before threading.
- Run line through each guide top to bottom, staying gentle.
- Keep consistent tension to avoid loops or twists.
- Leave 3 to 4 feet past the tip for tying and examining.
Tie a Reliable Knot for Lures, Swivels, or Leaders
At the moment you’re ready to attach a lure, swivel, or leader, choosing and tying the right knot will make the difference between a long day and a great catch. You want knot durability and lure compatibility, so pick a Palomar for braided line, an improved clinch for mono, or a loop knot when you want action. Tie slowly, wet the knot, and dress it so coils lie neat. Share tips with your fishing friends so you all feel confident on the water.
| Knot Type | Best Use |
|---|---|
| Palomar | Braided line, high knot durability |
| Improved Clinch | Monofilament, general lure compatibility |
| Loop Knot | Lures needing free action |
Set Drag, Spool Fill, and Line Tension for Casting
Set your drag and spool fill so your casts feel smooth and your fish stays tied to the line. You want the drag adjustment to hold steady without shocking the fish, and spool fill and casting tension to work together so your casts fly true.
You belong here, learning every tweak that keeps lines healthy and confidence high.
- Check drag with steady pulls, tighten until it slips under strong, steady force.
- Fill spool to 1/8 inch below lip to avoid backlashes during casts.
- Keep light tension on line while spooling to remove slack and reduce twists.
- Adjust casting tension on your rod and reel gradually, matching lure weight and wind.
These steps link spool fill, drag adjustment, and casting tension so you feel supported on the water.
Fix Tangles, Line Twist, and Common Casting Problems
You’ll run into line twists and casting tangles sooner or later, and you can fix most of them without frustration.
Start through checking spool direction and untwisting the line with a simple swivel or allowing the line hang free and reeling in under light tension.
In case you still get loops or bird nests, stop, open the bail, clear the coils by hand, and adjust your spool fill and rod action before you cast again.
Fixing Line Twists
Should your line keeps looping and snarling, don’t panic-line twists are a common hassle and they’re fixable with a few patient steps and the right feel. You’re not alone, and you’ll get this with steady practice.
Check the line lay on the spool initially, then ease tension and let the line unfurl while you watch for coils.
In case you find twists, try these steps to restore smooth casting:
- Open the bail and hold the line near the rod tip, then walk backward to let the spool turn freely.
- Pinch the line and reverse the spool rotation manually to unwind coils.
- Clip on a swivel to isolate lure rotation and finish twist prevention.
- Re spool provided twists persist, maintaining light tension and even lay.
You’ll feel confident together.
Preventing Casting Tangles
After you’ve sorted out line twists, it’s a lot easier to focus on preventing casting tangles before they start. You’ll do a quick pre cast inspection of your guides, knot, spool level, and lure connection. Check environmental factors like wind, nearby trees, and water current so you can choose your cast direction and power. You’ll keep light tension on the line while you cast, avoid slack loops, and practice smooth, even wrist motion. Share tips with friends and learn together so you feel supported and confident.
| Check | Why | Fix |
|---|---|---|
| Spool level | Prevent overrun | Refill to 1/8 inch |
| Bail & knot | Avoid slips | Retie, wet knot |
| Wind | Causes birds nest tangles | Aim downwind slightly |
Care and Maintenance to Extend Line Life
In the event that you want your fishing line to last and perform well, a little regular care goes a long way, especially in case you’re out on the water a lot. You’re part of a crew who values gear that works whenever it counts, so treat your line like a teammate.
After each trip, rinse with fresh water, then focus on line drying and proper storage methods to prevent rot and memory. Check for nicks, abrasions, and sun damage before each use.
- Rotate spools and inspect for wear every month.
- Keep line away from heat and direct sun in a shaded case.
- Replace sections showing stress or visible fray promptly.
- Use breathable bags or labeled tackle boxes for organization.
Frequently Asked Questions
Can I Use Old Line From Another Reel When Restringing a Different Rod?
Yes - you can, but check line degradation and line compatibility initially: in case the old line’s damaged, weakened, or mismatched to your reel/rod, replace it. You’ll want reliable, safe gear that fits your group’s standards.
How Do I String a Pole for Left-Handed Versus Right-Handed Reels?
Sure - you’ll do a left handed setup through mounting reel so handle’s right, spool unwinds counterclockwise; right handed differences mean flipping reel so handle’s left, spool still counterclockwise; you’ll feel included and confident together.
What’s the Best Line Color for Different Water Clarities?
For clear water you’ll prefer low-visibility colors like clear or fluorocarbon; for stained water choose high-visibility hues like green or chartreuse. Consider visibility impact and color preference together so you’ll feel confident and included on the water.
Can I Spool Braided Line Directly Onto a Fly Reel?
Absolutely - you can spool braided line onto a fly reel; it’s massively useful. You’ll need good knot techniques (arbor plus backing loop), maintain steady line tension, and we’ll all fish better together with that setup.
How Often Should I Replace Line After Freshwater Use?
You should replace freshwater line every 1–2 years, or sooner should you notice line memory or line abrasion; trust your gear, check it regularly, and don’t hesitate to swap it out so you’re fishing with friends confidently.