Book Appointment Now

How to Restring a Fishing Reel
Want a reel that casts smoothly and lands fish without fuss? Start by checking the line for wear and matching the correct type to the reel. Remove old line carefully, then spool new line with steady tension and the proper knot so it winds in even layers. Watch fill levels and look for twists or slips so problems get fixed fast and fishing stays seamless.
When to Reline Your Reel: 6 Clear Signs
During the period you rely on your reel for good days on the water, grasping at what moment to reline it can save you frustration and lost fish. You’ll watch for line deterioration like fraying, discoloration, or stiff spots that catch on guides. Feel for roughness as you pull line through your fingers and check knots for slippage.
Notice environmental wear from sun, salt, or grit that shortens life and raises breakage risk. In case casts lose distance, should you get more wind knots, or when the line has memory that twists constantly, it’s time.
When your spool feels light or you’ve had a big break, don’t wait. You’re part of a group that cares, and relining keeps you ready.
Essential Tools to Restring a Fishing Reel
You’re about to restring your reel and having the right tools makes the job quicker and less frustrating.
Start with necessary items like scissors or line clippers, a spare spool or filler spool, an easy knot tool, and a firm grip on the rod to control tension.
You can also use optional extras such as a line spooler, line conditioner, and a soft cloth to keep things tidy and prevent twists.
Necessary Tools
Before you start restringing your reel, gather a small kit of reliable tools so the job goes smoothly and you feel confident the whole time. You’ll want line cutters for clean trims and spool holders to keep spools steady.
Add a pair of needle-nose pliers for tight knots, a small towel to protect finish, and a simple screwdriver set for reel access. Bring a marker to record line direction and a spool band to stop tangles. A shallow bowl of water helps wet braid or mono while spooling.
Pack a spare filling spool and a lightweight tension tool or even your fingers to keep pressure consistent. These items fit in a small pouch so you feel prepared and supported.
Optional Extras
Consider adding a few extra tools that’ll make restringing your reel faster and less stressful, and you’ll be glad you did.
You’ll want line conditioner to reduce memory and help the line seat smoothly. It makes winding cleaner and cuts down on future tangles.
Spooling devices are another smart add. They hold the filler spool steady and keep tension consistent so twists disappear.
You could also bring small scissors, a fine needle nose, extra backing, and a soft cloth. Each item helps at different steps, and together they speed the job and enhance confidence.
In case you’re working with braid, pair spooling devices with mono backing and apply a little line conditioner. These extras make you feel prepared and part of a careful crew.
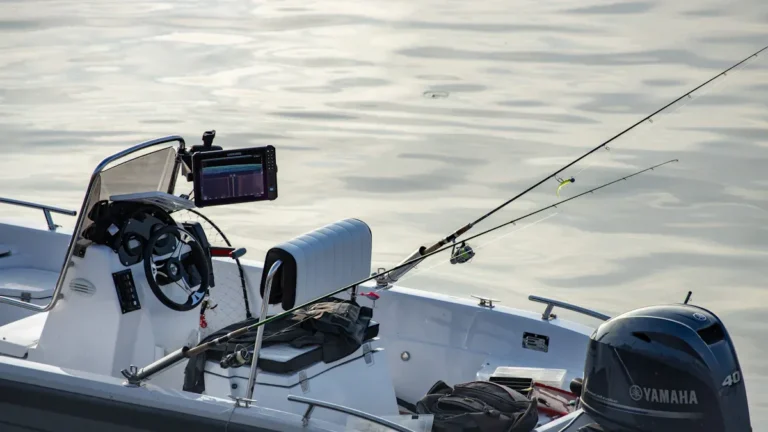
How Much Line to Spool: Fill Levels by Reel & Species
You’ll want to fill your spool to the right level for the reel type and the fish you’re targeting, because too little line limits casting and too much causes tangles.
For spinning and baitcasting reels aim for about 1/8 inch from the lip, and add species-specific length such as extra yards for pelagic or trolling rigs where big runs are likely.
Below we’ll walk through common spool fills per reel style and how many yards to add for popular species so you can trust your setup on the water.
Fill Level Guidelines
Once you’re planning how much line to spool, consider fill level as the balance between enough line for long casts and not so much that it tangles or damages your reel. You want ideal tension while watching line memory so your spool behaves. Regard your reel like a teammate; you both win once the spool sits about 1/8 inch below the lip for most setups. For braid over mono backing, leave the same gap and maintain steady tension. Should you need extra capacity for distance, add mono backing rather than overfilling. Be gentle, stay consistent, and ask for help from friends who fish in case you’re unsure. Below is a quick guide to pick a sensible starting point.
| Reel Type | Fill Target | Notes |
|---|---|---|
| Spinning | 1/8 inch below lip | Common balance |
| Baitcast | Same as spinning | Watch spool lip |
| Fly | Half to full spool | Depends on line weight |
Species-Specific Amounts
Now that you’ve got the general fill rule down, let’s match spool amounts to the fish you’re chasing and the reel you’re using. You’ll choose line length based on considering species preferences and habitat requirements.
For panfish and trout in small streams, spool less line so casts stay light and control is easy. For bass and walleye in lakes, add more line for longer casts and fighting space.
For saltwater species like redfish or inshore tuna, fill closer to the lip and add braid over mono backing for extra capacity and abrasion resistance.
For big pelagics or deep reef fishing, use heavier line and more yardage to handle depth and long runs. Trust your local anglers and adjust according to feel and experience.
Choose Line Type and Test Strength for Your Style
Picking the right fishing line for your style matters more than you could envision, because the line you choose will shape casting, feel, and how many fish you actually catch.
You want line durability for big fights and abrasion resistance while you fish structure. You also want line flexibility for smooth casting and better knot seating on light gear.
Consider braided, fluorocarbon, and mono options and match them to lures and cover you face. Assess strength through tying your preferred knot and pulling until it slips or breaks. Do several pulls so you trust the numbers.
Share your choices with friends and compare observations. That sense of community helps you learn faster and feel confident on the water.
Remove Old Line Safely (Spinning & Baitcast)
Start securing your reel and gathering the tools you’ll need so nothing slips or gets tangled while you work.
Next, cut and remove the old line carefully, feeding or pulling it off the spool whilst watching for knots or sharp fragments that could cut you.
Finally, inspect and clean the spool, wiping away dirt, old grease, and salt so your new line will seat smoothly and last longer.
Secure Reel And Tools
Before you touch the line, make sure the rod and reel are stable so you won’t fumble or cut yourself while removing the old line. You want clear reel stability and steady line tension before you start.
Set the rod on a flat surface or secure it in a soft clamp so you feel safe and supported. Gather tools within reach and keep a friendlier tone to remind yourself you’re part of a community that cares.
- Use needle nose pliers to free knots and snags
- Keep scissors or clippers for trimming tag ends later
- Have a rag to hold slick line and protect hands
- Use a soft clamp or rod holder to lock reel position
- Keep a garbage bag nearby for old line disposal
These steps connect tool prep to safe removal.
Cut And Remove Line
Get a firm grip on the rod and reel, then carefully cut the old line near the spool so you can remove it without tangles or surprises. You’ll feel calmer working slowly, and your friends will admire the care you take.
Use sharp scissors or a line cutter and pull a bit of slack before cutting to avoid sudden snaps. After cutting, pull the old line off in steady wraps, watching for stubborn loops.
In case knots conceal near the arbor, use a small tool or fingernail to ease knot removal, loosening fibers before pulling. Keep a container for discarded line so neighbors and wildlife stay safe.
Move deliberately, check for concealed tangles, and ask for help should a knot won’t budge.
Inspect And Clean Spool
You’ve already cut and removed the old line carefully, and now you’ll want to inspect and clean the spool so the new line winds on smoothly and won’t cause knots or backlashes. Take a breath; you and your mates share this ritual and it keeps you fishing together.
Check for line residue from old mono or braid and look closely for spool corrosion that can eat at fresh line.
- Wipe spool with a soft cloth and mild soapy water to remove grime
- Use a toothbrush to reach grooves and clear stubborn line residue
- Inspect edges and hub for pitting that signals spool corrosion
- Lightly dry and apply a drop of reel oil to bearings only
- Reassemble and spin the spool to confirm it turns free and true
Your reel will thank you and your crew will notice the care.
Prep the Spool and Tie a Secure Anchor
Once you’re ready to get the spool ready and tie a rock-solid anchor knot, start with placing the filler spool so its label faces up and it lies flat; this helps the line come off smoothly and prevents twists as you work.
Now open your bail and thread the line through the initial guide. You’ll tie a low profile knot on the arbor, like an overhand or slip knot, then add a backup overhand for strength. Pay attention to knot placement so it sits snug and low on the spool lip.
Hold steady line tension while you cinch knots tight and trim the tag end. You’re part of a group that cares about gear and skill, so take your time and do this carefully.
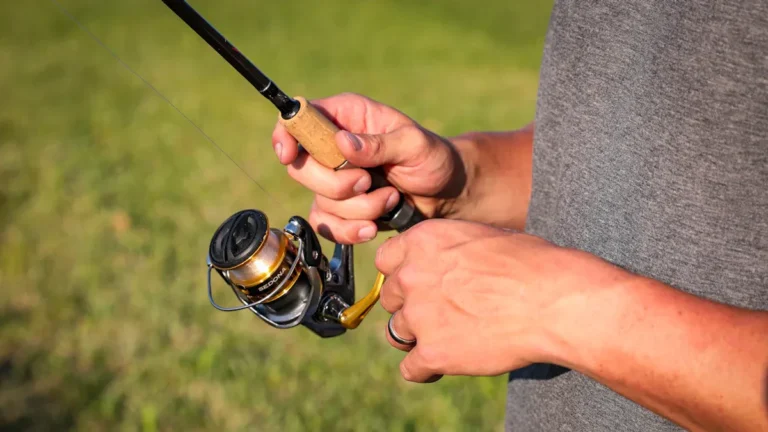
Spool Your Reel Without Twists or Slack
In case you desire your line to sit right and fish cleanly, start with keeping steady tension and watching for twists as you reel.
You belong here with other anglers who care about clean setups. Keep spool alignment consistent so the line lays neat. Hold tension like you’d during reeling a light lure and keep your fingers close to the initial guide.
In the event braid or mono comes off oddly, flip the filler spool and recheck direction.
- Match filler spool rotation to reel to avoid twists
- Pinch line near the initial eyelet for steady line tension
- Keep distance between rod tip and filler spool for smooth winding
- Wet the line slightly for less memory
- Use a spooling device for perfect spool alignment
Loading Braid, Mono, and Fluorocarbon: Step-by-Step
Once you’re ready to load braid, mono, or fluorocarbon, start considering how each line behaves so you can spool correctly and avoid problems on the water.
You’ll begin upon attaching a low profile knot to the arbor, then close the bail and keep steady tension as you reel.
For braid, add braided backing or a mono backing initially to protect the spool and make tying easier.
Mono is forgiving, so spool it smoothly and wet it for less memory.
Fluorocarbon benefits include low visibility and abrasion resistance, so treat it gently to keep knots neat.
Thread through guides, match spool rotation, and keep a short distance from the filler spool.
You’ll feel more confident once the line lays true and casts clean.
Tensioning, Finishing Knots, and Trimming Line
While you’re reeling, keep steady tension on the line so it lays down tight and even on the spool, because loose wraps cause tangles and backlashes later. You want consistent line tension as you fill the spool and you’re not alone should this feels tricky at the outset.
Good knot security matters for casts and catches, so tie neat low profile knots that won’t slip.
- Hold line with fingers or a cloth to control tension
- Check knot security through pulling hard before trimming tag end
- Trim tag close but leave a few millimeters so knot won’t slip
- Wet knots to seat them and reduce heat from friction
- Reel slowly while watching for uneven layers
These steps help you feel confident and supported as you finish.
5 Quick Checks to Confirm Your Reel Is Spooled Right
Want to know whether your reel is spooled right prior to you cast and lose a fish to a tangle? Check line tension through pinching near the initial guide while you reel slowly; it should feel firm but not rock hard. Verify spool alignment so the line comes off the filler spool in the same direction your reel winds. Assess smooth release by opening the bail and letting a few feet run free; it should flow without jerks.
| Check | What to look for |
|---|---|
| Line tension | Even, with gentle resistance |
| Spool alignment | Filler spool matches reel rotation |
| Free flow | Line runs smooth when bail open |
If something’s off, adjust direction or tension. You belong here, and you’ll get it right.
Common Restringing Problems (Twists, Slips, Nests) and Fixes
Restringing can be satisfying, but should you notice twists, slips, or nests forming as you spool, don’t panic - you can fix them. You belong to anglers who learn together, so try calm, steady fixes whenever line tangles or knot failures show up. Start through stopping, loosening tension, and tracing the problem spot.
- Check spool direction and flip the filler spool in case twists appear.
- Re-seat the line on the reel lip and reapply steady fingertip tension to stop slips.
- Cut out severe nests and respool from a clean tag to avoid memory issues.
- Replace weak knots, retie low profile arbor and connection knots so as to prevent knot failures.
- Use a spooling device or buddy in order to keep smooth feed and reduce future line tangles.
Keep patient and you’ll feel confident fast.
Simple Maintenance to Keep Line and Reel Casting Smooth
Keeping your line and reel casting smooth doesn’t have to be hard, and should you spend a few minutes after each trip on simple maintenance, you’ll observe fewer tangles and better casts.
Wipe the spool and guides with a clean cloth, then inspect reel alignment and rotor for looseness. You can apply light line lubrication sparingly to reduce memory and help casts flow. Check knots, trim tag ends, and rewind any uneven layers while the bail is open. Tighten handle screws and oil gears with one drop where the manufacturer suggests.
Store rods upright in a dry spot so guides stay true. These small steps build confidence, connect you with fellow anglers who care, and keep your setup ready for the next relaxing day on the water.
Frequently Asked Questions
How Often Should I Replace My Line Based on Water Conditions?
You should replace line more often in saltwater wear-every 3–6 months depending on use-and less frequently in freshwater durability situations, like every 6–12 months; check after abrasions, UV exposure, or performance decline.
Can Old Line Damage Internal Reel Gears?
Yes - in case you keep using degraded line, its line degradation can cause extra friction and tangles that strain components, and salt or trapped debris speeds gear corrosion, so you’ll want to replace line and inspect gears regularly.
Is It Okay to Mix Brands of Braided and Mono Backing?
Yes - you can mix brands; image two hands joining different ropes. You’ll want to check line compatibility and accommodate brand differences like diameter, stretch, and coating, so your setup feels reliable and part of the fishing community.
How Do Temperature Extremes Affect Line Performance?
Temperature extremes make line brittleness increase and cause elasticity loss, so you’ll notice more breaks in cold and stretch reduction in heat; you’ll want to store lines temperately and check them together before fishing.
Can I Spool a Reel Alone Without a Helper or Device?
Yes - you can manual spool alone; you’ll pinch the line near the initial guide, maintain steady line tension with your fingers, and reel slowly. You’ll feel capable and connected to the fishing community doing it yourself.