Book Appointment Now

How to Make Fishing Lures
Making your own fishing lures gives control over design, action, and cost while being a fun hands-on hobby. Start by picking a lure style and gathering basic tools like a saw, drill, sandpaper, and a small vise. Shape a wooden or plastic blank, add weight and hardware, then paint and seal for water resistance. Test and tweak each prototype to dial in the action and build better lures with every cast.
Quick Starter: Build One Simple Lure in 30–60 Minutes
Grab a piece of basswood and shall we make a simple fishing lure you can finish in 30 to 60 minutes, even should you be new to this. You’ll feel welcome as you shape a basic body with a coping saw, sand smooth, and drill small holes for eyelets.
Consider lure color promptly so your paint guides the fish and matches local waters. Next, gently seal the wood with polycrylic to protect the finish.
Add weighting with a large nail so the lure swims true. Now attach your hook and evaluate hook placement relative to the body to avoid snagging.
Use pliers to bend eyelets and secure split rings. You’ll be surprised how proud you feel making something that works.
Pick Your Target Species and Lure Type
Choosing the right species and lure type is the initial smart step you’ll take because it shapes every choice that follows, from size and color to action and weight. You want to feel part of a group that knows the water, so start through learning the species habitat you’ll target.
Consider bass in weeds, trout in clear streams, or pike in cold bays. Match lure type to feeding habits and water conditions to enhance lure effectiveness. Crankbaits, jigs, soft plastics, and spoons each work better in certain zones.
As you pick, envision where fish hide and how they strike. That image helps you choose size, color, and action that feels right. You’ll gain confidence and join others who fish with purpose.
Tools and a Safe Home Lure-Making Setup
You’ll want a clear list of essential tools and materials before you start, from a power drill and coping saw to sandpaper, pliers, small paintbrushes, basswood, polycrylic, plastisol and pigments.
Set up a safe workspace with good ventilation, a stable workbench, organized storage for small parts and molds, and easy access to eye protection and gloves. As you plan the layout, consider workflow and safety together so tools stay handy and hazards stay contained.
Essential Tools And Materials
Making a safe, well-equipped home setup for lure making starts with the right tools and materials, since they shape both your results and your safety. You’ll want power drill, coping saw, and a range of sandpaper to shape basswood or white pine for custom woodcarving projects.
Add pliers, vice grips, small paintbrushes, and eyelets from lure suppliers to handle hardware and finishes. For soft plastic work you’ll stock plastisol, pigments, glitter, and worm oil, plus molds in silicone or aluminum. Keep polycrylic sealant and specialized adhesives handy for durable bonds and water resistance.
As you gather supplies, consider the group you’ll join. Trade tips, try out small batches, and label everything so you and friends can make consistent, reliable lures.
Safe Workspace Layout
Once you set up a home lure-making workspace, plan it so tools, materials, and safety gear are easy to reach and nothing feels cramped or chaotic. You want a welcoming bench where community and craft meet.
Place power drill, coping saw, sandpaper, pliers, and brushes in labeled bins. Install a ventilation system near areas with paints, solvents, and plastisol pouring. Store paints, solvents, and scent additives in locked chemical storage away from heat.
Keep an initial aid kit and fire extinguisher visible. Arrange lighting to reduce eye strain and encourage focus. Share workspace rules with friends who join you.
Small touches show care and invite others to belong, while practical layout choices keep you safe and productive.
Affordable Woods, Metals, Plastics, and Hardware for Beginners
At the beginning, choose affordable woods like basswood or white pine because they’re easy to shape and forgiving for mistakes.
Pair those woods with budget-friendly hardware such as small eyelets, large nails for weighting, and basic hooks that you can buy in bulk to keep costs down.
You’ll find that simple metals and low-cost plastics let you practice techniques quickly, so you’ll build skill without wasting money.
Affordable Wood Choices
Should you’re starting out and want lures that won’t break the bank, basswood is the best place to begin because it’s soft, easy to shape, and holds detail well for painting and finishing.
You’ll also want to know about pine alternatives and wood durability so your initial projects last. Choose pieces without knots and with straight grain. Work slowly and sand between steps. You’ll feel proud as your shapes come alive.
- a small basswood block waiting for a cunning minnow shape
- a pale white pine plank with even grain for a rustic shallow plunging lure
- a slim strip of red cedar with fragrant wood and natural oils
- a denser red pine blank for added strength where you need it
These choices help you belong to a patient, careful maker community.
Budget-Friendly Hardware
If you wish to keep costs low and still build great lures, start with picking materials that give you the most value for money and the least wasted effort. You can choose basswood for carving and white pine as an affordable alternative.
For metals, reuse small nails for weighting and purchase eyelets in bulk from lure suppliers. Plastics like scrap acrylic or recycled packaging work for simple molds and experimentation.
Look for DIY materials at thrift stores, hardware sales, and maker groups to share tools and tips. Budget sourcing means trading time for savings through salvaging parts and buying small quantities to trial colors and finishes. You’ll feel supported by a community that shares tricks and low cost suppliers.
Make a Basic Wooden Plug Step-by-Step
Grab a block of basswood and let’s make a basic wooden plug you’ll be proud to cast. You’ll cut a rough profile with a coping saw, then refine shape while considering weight placement and eyelet locations. Choose drill sizes for your hook and eyelet holes so hardware fits snugly. Use coarse then fine sanding techniques to smooth curves and prep for finish.
- a rounded body tapering at both ends
- small nail weight pushed into center cavity
- pilot hole for eyelets drilled precisely
- smooth grain ready for paint and sealant
You’ll feel welcome learning these steps. Work slowly, check fits often, and ask for help whenever a detail trips you up.
Mold and Cast Soft-Plastic Baits at Home
If you desire to make soft-plastic baits at home, you’ll discover the process is surprisingly straightforward and rewarding once you learn the basic steps and safety habits.
Start through choosing a mold type like plaster molds for simple DIY shapes or silicone for reuse.
Prepare a clean workspace and heat plastisol slowly in a dedicated pot while you mix pigments and scents.
Use a funnel or ladle to pour molten plastisol into your mold, tapping gently to remove air pockets.
Let pieces cool fully before demolding.
Trim flash with scissors and add jig heads or hooks.
Keep records on pigment mixing ratios and heating times so you and your friends can repeat favorite colors.
Work safely, wear gloves, and enjoy making baits together.
Shape and Finish Metal Spoons and Blades
As you start shaping and finishing metal spoons and blades for fishing lures, you’ll find that a steady hand and the right tools make the job both satisfying and precise. You’ll learn metal shaping basics, like filing curves and hammering gentle bends, then move into finish techniques that protect and lure fish.
You belong to a maker group who shares tips, and you’ll feel supported as you practice. Start simple and build skills together.
- flat sheet cut to shimmer like a small fish
- rounded spoon that flashes on the retrieve
- thin blade that vibrates in current
- textured finish that scatters light
You’ll enjoy experimenting with polishing, patinas, and clear coats to match water and mood.
Build a Balanced Spinner That Runs True
You’ve learned how to shape spoons and blades so they flash and vibrate, and now you’ll want those parts to spin without wobble. You’ll check your spinner weights initially. Hold the blade on the shaft and watch for tilt. Small shifts in weight can make big differences. Use tiny washers or solder to add weight where needed.
Make a simple balance adjustment by placing the blade on a thin rod and spinning it gently. In case it favors one side stop and rebalance.
You’ll evaluate in water or on a smooth bench. Ask a friend to watch and help. You’ll enjoy the shared moments whenever a spinner runs true and feels right. That sense of belonging makes the work sweeter.
Paint, Clearcoat, and Place Eyes for Realistic Action
Start selecting paints and clearcoats that’ll stand up to water, sun, and the knocks a lure takes upon hitting rocks or a boat hull.
You’ll prep the body, seal wood with polycrylic, and let it cure. Use thin coats and simple brush techniques to layer color, letting each coat dry so edges stay crisp.
Then add eyes, focusing on eye placement to match species and action. Place eyes slightly forward for baitfish wiggle or centered for a steady roll.
You belong here, learning alongside others who care about detail.
- pearly flank with tiny scales catching light
- dark back fading to silver belly
- subtle gill lines and tiny scars
- glossy clearcoat catching sun for longer
Finish with two to three clear layers for toughness.
Tune Action: Make Lures Run Straight, Wobble, or Dive
At the moment you’re ready to make a lure move the way you want, tuning the action is where the magic happens and at which patience pays off; small changes can turn a stubborn wobble into a perfect straight run or make a shallow plug plunge deeper. You’ll enjoy line tuning and action adjustment because they let you shape behavior. Bend the eyelet slightly to correct yaw. Shift weight forward to plunge or back to wobble. Try small tweaks, trial in water, and share results with fellow makers who care.
| Problem | Cause | Fix |
|---|---|---|
| Pulls left | Eyelet bent | Bend right slightly |
| Wobbles | Rear weight | Move weight forward |
| Won’t dive | Lip angle | Adjust lip down |
| Rolls | Uneven paint | Sand and rebalance |
Add Scent, Rattles, Skirts, and Tail Swaps
Once you’ve got the lure running the way you want, it’s time to add scent, rattles, skirts, and tail swaps to bring it to life in the water. You’ll use scent integration gently, examining small batches so the scent feels natural, not overpowering.
For rattle construction, pick sealed beads or make a tiny chamber that stays quiet until needed. Combine skirt attachment and tail modification thoughtfully so movement and smell work together.
You belong to a group that tinker and share tips, so be patient and curious.
- soft skirt flowing like grass in current
- tiny rattle clinking as you twitch
- dab of scent lingering near the hook
- swapped tail creating wider, friendlier kick
Trust your hands and recordings as you experiment.
Fixes for Sinking, Wobbling, Hook Catches, and Paint Chips
At the moment a lure starts sinking or wobbling, you’ll want to initially check and adjust the internal weights to restore proper buoyancy and trim.
Next, correct body balance through shifting or adding weight and making small sanding or eyelet position changes so the lure runs true and hooks don’t catch on the body.
For paint chips, you can sand the area, reapply primer and paint, and seal with Polycrylic for a durable finish that keeps the lure looking good and staying fishable.
Adjust Buoyancy Weights
In case your wooden lure is sinking, wobbling, catching the hook on its own, or losing paint, you can fix most of those problems through adjusting its buoyancy and weight placement; this helps the lure swim true and keeps fish interested.
You’ll use buoyancy materials like balsa or foam inserts and consider weight placement with small lead or nail weights. Place weight low and centered for steady action. Assuming the lure lists, shift weights gently until it rides level.
- contemplate a tiny foam chamber taking on water slowly
- visualize a nail sunk near the belly for stability
- see paint staying sealed as the lure floats right
- envision smooth wobble replaced by confident glide
You belong here, tinkering with care and company.
Correct Body Balance
In case you want your lure to swim true and stop snagging or shedding paint, start with checking its balance and weight placement because small shifts make big differences.
You want your lure to belong in the water and feel right in your hands, so check material density initially. Different woods and metals change buoyancy and how the lure rides.
Then evaluate weight distribution along the centerline. Move small nails or beads forward or back until it glides level and resists rolling.
Provided it wobbles, shift weight inward or tighten eyelets so hooks don’t catch sides.
For sinking issues, reduce dense inserts or add buoyant sealant.
For paint chips, avoid large weight moves that bend skin.
Keep experimenting in a tub until it feels like yours.
Repair Paint Chips
Although paint chips can seem small, they often cause bigger problems like sinking, wobbling, and hooks catching, so you’ll want to fix them carefully and quickly.
You belong to a hands on group that cares about craft and catches, and you’ll feel proud once a repaired lure swims true.
Start off with sanding the chip area smooth, clean with alcohol, and pick a color matching paint. Apply thin coats with a small paintbrush, letting each dry. Seal with polycrylic for durability and chip prevention.
Be gentle during retying hooks and check balance after sealing.
- tiny nick on the belly
- flaked stripe near the head
- exposed wood showing grain
- paint lift around an eyelet
Adapt Lure Size, Finish, and Hardware for Fresh vs. Saltwater
Whenever you’re picking lure size, finish, and hardware, consider about where you’ll be fishing and what the fish are eating right now; freshwater bass and trout usually go for smaller, subtler profiles while saltwater species often chase bigger, flashier baits. You want gear that feels like home on the water. Use freshwater finishes that reduce glare and mimic prey. For saltwater hardware choose corrosion resistant hooks, split rings, and swivels. Match weight and size to current and target species. Below is a quick comparison you can use during choosing parts.
| Freshwater | Saltwater |
|---|---|
| Smaller profiles | Larger profiles |
| Matte, subtle finishes | High gloss, reflective finishes |
| Light weights | Heavier, durable weights |
| Standard hooks | Saltwater hardware |
| Soft plastics, wood | Metal, heavy plastics |
Where to Buy Parts in Small Quantities Without Waste
Once you want parts without leftover waste, start through checking local hobby and tackle shops where you can feel materials and buy just what you need.
In case stores are limited, look to online small-quantity suppliers that offer single eyelets, small packets of plastisol, and tiny tins of scent ingredients with low minimum orders.
You can also join craft marketplaces and swaps to trade or buy small batches from other makers, which saves money and builds helpful connections.
Local Hobby And Tackle Shops
Finding the right parts for your lure project can feel like a scavenger hunt, but local hobby and tackle shops make it easy to buy small quantities without wasting supplies. You’ll find friendly staff who share tips, invite you to community events, and run in store demos so you learn hands on. That sense of belonging makes shopping fun and practical.
- wooden blanks stacked like tiny boats
- jars of pigments and glitter catching light
- racks of hooks and eyelets in neat rows
- bins of soft plastisol samples to squeeze
When you walk in, you’ll get real advice on small batches, tool choices, and finishes. You’ll trade stories with others, swap parts, and leave inspired to craft without overspending.
Online Small-Quantity Suppliers
Looking for small-quantity parts online without wasting money or materials? You’ll find friendly sellers who cater to hobbyists and makers, so you don’t feel alone. Start with specialty lure suppliers that sell single eyelets, hooks, and split rings. They often list pack sizes and let you avoid bulk packaging that forces excess.
Search craft micro-stores for small bottles of polycrylic, pigments, and scent ingredients. Compare prices including international shipping when you order from overseas, and watch delivery times and customs fees.
Read reviews and ask questions in product threads to build rapport with sellers and other crafters. Keep a running list of dependable shops to save time. That way you buy what you need, learn who cares, and waste less.
Craft Marketplaces And Swaps
Want to save money and avoid leftover junk from big bulk packs? You can tap craft marketplaces and local swaps to get just what you need and feel part of a making community.
Look for lure exchanges and artisan collaborations in listings and groups. You’ll trade tips as well as parts, and you’ll meet people who care about quality like you do.
- a table of tiny eyelets, split rings, hooks shared at a community swap
- a shelf of small wood blanks and basswood offcuts from an artisan seller
- jars of pigment drops and worm oil passed between makers at a meet
- a box of custom silicone mold scraps offered from a mold crafter
Join in, ask questions, and offer what you don’t need.
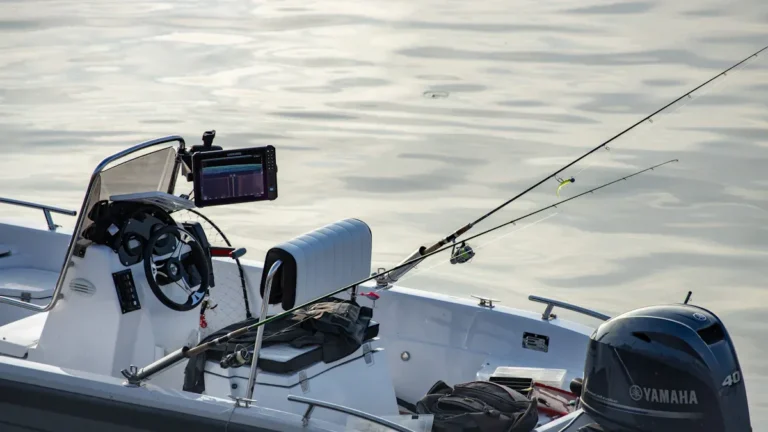
Test Lures and Document On-Water Performance
Before you head out, make a simple trial plan so you’ll know what to watch for on the water. You’ll observe field conditions like wind, clarity, and temp, then test one lure at a time.
Bring a notebook or phone and record retrieves, depth, and bite times. Invite a friend or group so you all belong to the same learning loop and share user feedback after each run.
Try varied speeds, pauses, and angles to see what triggers strikes. Photograph lure before and after to spot wear and paint issues.
Log gear used, hook type, and any adjustments you make. Back at home, compare observations, tweak weight or profile, and plan the next outing.
Scale Up: Kits, Templates, and Legal & Safety Notes
Once you decide to scale up your lure making, you’ll want kits, templates, and a clear sense of legal and safety steps to keep your project smooth and safe. You belong to a craft community that shares tools and care.
Start with kit organization so each wooden lures tools and soft plastic supplies are easy to find. Templates help you repeat winning shapes and speed production. Also stay aware of legal compliance for selling or mailing lures and scents.
- neatly labeled boxes for drills, sandpaper, pliers, brushes
- template boards showing sizes and hook placements
- safe storage for plastisol, pigments, and scent ingredients
- checklist for permits, labeling, and handling preservatives
Keep your workspace welcoming, tidy, and rule aware so everyone thrives.
Frequently Asked Questions
How Do I Age or Distress Lures for Vintage Appeal?
You’ll gently sand edges, alter paint chipping with a toothbrush and solvent, add diluted brown/orange washes for rust effects on hardware, lightly scuff finishes, and swap shiny parts for patinated ones so your group feels proud of the vintage look.
Can I Make Biodegradable Soft-Plastic Lures?
Yes - you can, but choices matter: use natural ingredients like biodegradable plastisol blends, trial eco friendly molds (silicone or plaster alternatives), share recipes with fellow makers, and iterate together to guarantee performance and environmental safety.
What Are Best Practices for Photographing Lures to Sell?
About 70% of buyers decide within seconds, so you’ll use lighting setups to showcase texture, background choices that feel like community, angle variety for action shots, and focus techniques to highlight detail-so your lures invite connection and trust.
How to Patent or Copyright a Custom Lure Design?
You can protect your custom lure through intellectual property: copyright the artwork and patent novel functional features (design patents or utility patents). Join maker communities for support, and consult an IP attorney so you’re confident and included.
Can I Use Electronics (Leds, Speakers) in Lures?
Yes - you can add LEDs and tiny speakers; glow technology and sound attraction enhance strikes. You’ll want waterproofing, secure mounts, and legal checks in your community, so you’ll feel confident sharing and refining designs together.