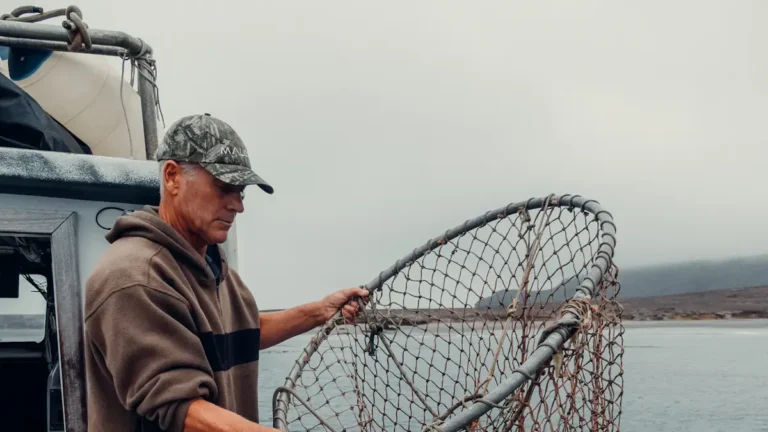
Book Appointment Now

How to Join Fishing Line to Braid
Want a quick, reliable way to join braided line to a leader? Use the double uni knot. Overlap 6–7 inches of both lines, make neat loops, then pass each tag end back through the opposite loop 5–8 times. Moisten the wraps and snug them evenly for a low-bulk, strong connection that’s easy to check and adjust. For bigger fish or lighter leaders, consider switching to an FG or blood knot based on gear and conditions.
Quick: Best Knot Right Away – Double Uni
Try the Double Uni as soon as you desire a fast, reliable braid to leader connection that won’t let you down on the initial big tug. You’ll feel part of a team whenever you learn this knot, because it’s simple and trusted among anglers who seek knot durability and braid compatibility.
You’ll double each line, wrap neatly, and slide the coils tight while keeping tension. That method builds grip without bulky profiles and helps your line pass guides smoothly. Practice builds speed, and you’ll tie it confidently in low light.
Use moistening to protect fibers and inspect wraps for evenness. In case you care about consistent performance and being welcome among fellow anglers, this knot will earn your trust and respect.
Tie a Double Uni Step‑By‑Step
Start alongside lining up the two lines side next to side and doubling each one back on itself to form two parallel loops that overlap for about 6 to 7 inches.
You’ll hold both doubled sections together and pass the tag end of each line through the opposite loop five to eight times. Keep wraps neat and even as you go. With a fingertip apply moisture application to the wraps so they snug without heat damage.
Pull the standing lines slowly to dress the knot, alternating pulls to seat wraps evenly. Trim tag ends close, leaving small tails for security.
Use protective equipment like gloves in case braid bites worry you, and soft pliers to cinch tight. You’ll feel confident appreciating the joins are tidy and strong for casting.
Tie a Single Uni and Test It
Make a neat single uni knot through initially doubling back the end of one line and forming a small loop, then passing the tag end of the other line through that loop and wrapping it around both strands five to eight times; you’ll feel more confident as the wraps lay tidy and even.
Now snug the knot slowly while keeping tension on both lines so the coils seat uniformly. Trim excess tag ends but leave a small stub for security.
You belong to a group that cares about clean gear and reliable knots, so practice this until it feels natural.
After tying, perform knot evaluation by pulling firm steady tension, then give a few sharp tugs to simulate a strike. Repeat until your confidence matches the knot’s performance.
Blood Knot vs Uni: Which to Use?
Curious which knot to pick in case joining lines, the blood knot or the uni knot? You’ll feel included choosing what fits your gear and skill. The blood knot works best once line diameter matches, giving smooth guide passage on casts. The uni is forgiving with differing diameters and slick braid, so it’s great whenever you want confidence in the moment. You’ll pick based on leader type, braid slickness, and how neat you need the knot to be for tight guides. Below is a quick comparison to help you belong to the group making smart choices.
| Feature | Best Use |
|---|---|
| Strength | Uni for mixed diameters |
| Profile | Blood for similar diameters |
| Ease | Uni ties faster |
| Guide passage | Blood runs cleaner through guides |
Advanced Low‑Profile Option: Tie an FG Knot
Should you want a low profile connection that passes guides smoothly and holds up under big fish pressure, the FG knot is a top choice you’ll appreciate.
I’ll walk you through why FG beats many knots for braid to leader, give a clear step by step tying method, and point out common mistakes so you avoid weak links.
Stick with me and you’ll gain a neat, strong splice that keeps your confidence high on every cast.
Why Choose FG
Why would you pick the FG knot in case you want a low profile and top strength for braid to leader connections? You’ll choose it because its strength comparison to other knots is clear.
The FG holds tight under big loads while staying slim so your line slips through guides smoothly. You belong to anglers who care about knot durability and sleek gear. You want a connection that feels like part of your outfit, not a bulky weak link.
The FG gives that confidence on heavy cover and big fish situations. It does take practice, but the payoff is huge. Keep practicing wraps, tension control, and trimming.
With patience you’ll join a group of anglers who trust this knot every time.
Step‑By‑Step Tie
Once you’re ready to tie an FG knot, take a calm, patient approach because this knot rewards slow, steady hands and careful focus.
Start with wrapping the braid around the leader with even, tight turns, keeping tension so wraps sit neat. Use knot lubrication and gentle line conditioning to let wraps slide and cinch without heat or damage.
Alternate wraps and lock passes, counting each turn so you stay sure. Trim tag ends close but leave a tiny stump for security.
After final locking wraps, pull slowly and check with steady pressure while keeping the knot aligned with guides.
You’ll feel satisfaction joining lines this way. You’re joining a community of anglers who value craft, patience, and dependable knots.
Common Mistakes
You’ve just finished the patient, careful steps of an FG knot and felt that quiet satisfaction as the wraps sit neat. Now watch for common mistakes that sneak in once you relax.
You could let line twisting form while you snug the knot, so pause and untwist both lines before you tighten. Another pitfall is knot unevenness from rushed wraps or uneven tension. Should coils stack crooked, rewrap slowly, keeping pressure even with each pass.
Don’t skimp on moistening the knot to avoid heat damage as you pull tight. Avoid leaving long tag ends that catch guides.
Practice in calm moments with friends and trade tips. You’ll belong to a group that respects care and takes honor in clean, strong connections.
How to Tie an Albright Stitch for Heavy Braid
Should you be working with heavy braid and want a secure, low-profile join to a fluorocarbon or monofilament leader, the Albright stitch is a smart choice because it handles big differences in line thickness and holds up under heavy loads.
Start by forming a loop in the leader and pass the doubled leader through the braid, laying tag ends alongside the braid. Wrap the braid around the doubled leader 10 to 12 times, keeping wraps neat for grip improvement.
Wet the knot with knot lubrication or saliva before cinching to protect and ease tightening. Pull slowly on both standing lines while adjusting wraps for even tension.
Trim tag ends close and evaluate the join with steady pulls. You’ll feel confident and part of a skilled group.
Choose Braid-to-Leader Strength and Taper
Picking the right braid-to-leader strength and taper can make or break your cast and fight, so consider it as matching parts of a team rather than just picking numbers. You want strength compatibility so the knot and leader share load smoothly.
Contemplate line tapering as a way to ease braid into a thinner, more forgiving leader for better casts and less guide wear.
- Choose leader pound rating 20 to 50 percent of your braid breaking strength for balance and confidence.
- Use a gradual taper from heavy braid to lighter leader for smooth guide passage and reduced wind knots.
- Match leader material to fish type and cover so strength compatibility and abrasion resistance work together.
You belong to anglers who care and fish with purpose.
When to Use a Shock Leader and Attach It
In case you expect big sudden loads, like long fast casts into wind or hard strikes from powerful fish, using a shock leader can save your day and your line. You’ll want shock resistance during casting heavy lures or fishing for toothy or hard-hitting species. Attach a shock leader between braid and your main leader to absorb peak loads and protect knots. Tie your preferred leader attachment knot, such as an Albright or FG, and keep tag lengths tidy. Change materials and lengths based on conditions and fish size. You belong to anglers who prep for strikes and strong winds. Use the table below to guide choices and then attach confidently with the understanding you’ve reduced breakoffs and preserved gear.
| Situation | Material | Length |
|---|---|---|
| Windy surf | Monofilament | 6 ft |
| Big lures | Nylon | 4 ft |
| Heavy fish | Fluorocarbon | 8 ft |
| Long casts | Mono | 5 ft |
Test Knot Strength Before You Cast
Now that you’ve chosen and attached a shock leader for heavy loads, you’ll want to check that every knot will hold at the moment it matters most.
You care about your gear and your mates, so examine knot durability before you cast. Use a simple casting simulation through pulling line through the guides and loading each knot as though a fish hit.
Watch for slippage and feel for soft spots.
- Pull hard on both ends for 20 seconds to seat the knot.
- Make a few false casts to mimic rod action and check wraps.
- Tie a backup knot and reevaluate in case you notice movement.
These steps build confidence, create shared practice, and keep you ready for the next bite.
Fix Slippery Braid: 5 Quick Fixes
Once braid feels like it’s covered in oil and your knots keep slipping, you don’t have to toss the spool and start over. You belong to a crew that solves problems, so try five quick fixes that are friendly and simple.
Initially, clean the line with a mild soap and dry it, then use moisture application sparingly to help knots seat without burning.
Second, add more wraps whenever tying knots that suit braid.
Third, use a short section of mono or fluorocarbon leader to give the knot a bite and smoother guide passage.
Fourth, wear protective equipment like gloves when pulling tight to avoid cuts and keep steady tension.
Fifth, inspect and retie knots, making small adjustments until they feel secure and confident.
Trim Tag Ends: How Much and Why
Once you finish a knot joining braid to leader, trim the tag ends to just the right length so they don’t snag or loosen later. Aim for about 1/8 to 1/4 inch on slick braid and a bit longer on fluffy monofilament, and use sharp scissors or a hot cutter to prevent fraying.
In case you’re worried about slippage, add a tiny drop of clear glue or carefully melt the braid tip to keep things tidy without adding bulk.
Trim Length Guidelines
A small trim on the tag end can make a big difference in how your knot behaves, so you’ll want to get it right for strength, casting, and safety.
Whenever you focus on knot trimming and line maintenance, you build confidence and protect your gear. Trim too long and the tag can foul guides. Trim too short and the knot might slip or fray.
- Cut about 1/8 to 1/4 inch for most knots after snugging, leaving a tiny tail to catch wraps.
- For slick braid joins add a bit more length, 3/16 to 3/8 inch, to preserve friction.
- For heavy leader knots keep a slightly longer tag until you check tension on a cast.
You’ll belong to anglers who care for their lines whenever you make precision trims.
Prevent Fraying Tips
Because braided line can fray and bite into itself, trimming tag ends correctly is one of the simplest steps you can take to keep knots strong and avoid snags on the water.
You’ll trim tag ends close but not too close. Leave about 1⁄8 to 1⁄4 inch so the knot keeps purchase without bulky tails. Use sharp scissors or a line clipper and finish with a quick burn on synthetic leader or a tiny dab of line coating for slippery braid. That small coating helps friction reduction and keeps fibers sealed.
You’ll also tuck longer tags under wraps whenever possible. Practice on spare line until you feel confident. Friends will notice your neat knots and you’ll feel proud out on the water.
Pass Knots Through Rod Guides Without Snags
If you desire your knot to slip cleanly through the rod guides without hanging up, you’ve got to evaluate shape, size, and smoothness from the start.
You’re part of a group that cares how gear performs, so use guide friendly knots and snag free techniques to protect confidence and rods. Keep the knot low profile and trim tag ends close. Lightly moisten before cinching to smooth the wraps.
- Choose low bulk knots like modified double uni or Albright for thin passage.
- Inspect wraps for neat even coils that won’t catch guides.
- Trial cast slowly to feel any hang ups and adjust knot or trim.
These steps link tidy tying with better casting and shared satisfaction among anglers.
Best Knot & Leader Setups by Species/Style
At any time you pick a target species or fishing style, your knot and leader choices can make or break the day, so consider about what you’re up against and what your tackle needs to do.
For trout and clear-water panfish, use a light fluorocarbon leader setup with an Albright or improved surgeon knot for a low profile and stealthy presentation.
For bass and heavy cover, step up to a stronger leader setup using fluorocarbon or heavy monofilament tied with an FG or quintet knot to resist abrasion.
For saltwater species and big game, choose species specific leaders in heavier fluoro and use double uni or modified double uni for braid to leader strength.
Match knot choice to leader diameter and fishing style so you feel confident and included on every cast.
Tools to Tie and Test Braid-to-Leader Knots
You’ll want a small kit of knot-tying tools like needle-nose pliers, a hemostat, and a fid to help you form neat, secure braid-to-leader knots without cutting your fingers.
To make sure those knots hold, use simple strength-testing gear such as a digital scale or spring scale and a secure clamp so you can apply steady tension and spot weak points.
Finally, carry a measuring and marking setup with a tape, fine permanent marker, and a felt tip to mark tag ends and measure wraps for consistent, repeatable knots every time.
Knot-tying Tools
A small toolkit can make a big difference whenever you’re joining braid to a leader, and grasping which tools to bring will save time and frustration on the water.
You’ll want knot lubricants to protect fibers and tying gloves to keep a good grip and prevent cuts. Those little comforts help you feel confident and connected to your crew.
- Cutters and nippers for clean ends and smooth tucks.
- Soft jaw pliers and hemostats to hold tiny tags without damage.
- Sharp needle nose and a small fid for threading leaders through braid.
Bring extra swivel clips and small light to see wraps. These tools work together, so your knots sit neat, slide right, and keep you fishing with friends longer.
Strength-Testing Gear
Want to know whether that knot will hold once a big fish turns your heart to ice? You’ll want simple gear that helps you tie and then prove the joint.
Use soft-jawed pliers, a small vice, and a fine clamp to steady braid and leader while you tie. Then add a handheld scale or digital fish scale for basic load evaluation of knots under controlled pulls. These tools let you check material durability and see where slippage starts.
Practice several times and record pull weights so your crew feels confident together. Keep a towel, gloves, and a marker nearby to protect lines, label evaluations, and share results. This setup is portable, affordable, and builds trust in your knots and team.
Measuring And Marking
Because getting your measurements right makes the rest of the knot work, start with laying out a clean workspace and the exact tools you’ll use to tie and evaluate braid-to-leader knots. You’ll want a ruler, calipers, marker, soft cloth, and a small clamp for steady line alignment.
Take your time and invite a friend or fellow angler should you want company while learning.
- Measure line length for wraps and tag ends with calipers for length precision.
- Mark wrap start and finish points with a fine marker for consistent repeats.
- Use a clamp and soft cloth to hold braid while you try knots under tension.
These steps help you feel capable and connected to others who care about strong, reliable knots.
Common Knot Mistakes and Why They Fail
During the period you’re tying braid to leader, small slipups can turn a strong setup into a weak one, so it helps to understand the common mistakes that cause knots to fail and how they relate to each other. You’ll feel better realizing simple fixes exist. Use moisture application while cinching and protective equipment like gloves for grip. Below is a friendly table that maps mistake, symptom, fix.
| Mistake | Symptom | Fix |
|---|---|---|
| Not wetting knot | Heat damage, weak seat | Wet before tightening |
| Too few wraps | Slippage | Add wraps |
| Uneven tension | Humps, uneven load | Dress knot evenly |
| Frayed tag ends | Snags, breakage | Trim and melt or secure |
| Skipping trial pull | Surprise failure | Test with steady pull |
You belong here and you’ll tie stronger knots with practice.
Maintain Lines: When to Retie and Inspect
In case you fish often, you’ll need a simple routine to check and retie your knots before they let you down. You want to belong to a group that trusts gear and each other, so make knot maintenance part of your prep.
Do a quick line inspection after every big catch and before long casts. Look for frays, bites, or slick spots where braid slips.
- Check knots and leaders weekly, retie should you see wear or any change in shape.
- After foul weather or heavy cover, inspect the whole rig and redo connections that feel stiff or loose.
- Before tournaments or long trips, replace knots that have experienced heavy load or repeated stress.
Small habits keep you confident and connected to your fishing partners.
Frequently Asked Questions
Can I Use Superglue to Secure Braid-To-Leader Knots?
You can, but you shouldn’t rely on superglue for knot durability; it can stiffen, weaken, or fail. You’ll fit better in the group using glue alternatives like head cement, UV resin, or whipped seal for secure, flexible joints.
How Does Water Temperature Affect Knot Holding Power?
You’ll find knot material and temperature effects matter: cold stiffens some leaders, reducing flexibility and slip resistance, while heat can soften monofilament, weakening knots; braid’s slickness stays, so try knots and adjust wraps for security.
Are There Knots Better for Spinning Vs Baitcasting Reels?
About 75% of anglers prefer Palomar or Improved Surgeon’s Knot; you’ll pick based on knot durability and reel compatibility. You’ll feel included choosing Palomar for spinning and Double Uni/Albright for baitcasting, depending on line setup.
Can I Tie These Knots With One Hand or Limited Mobility?
Yes - you can. With one handed knots and adaptive tying techniques, you’ll learn simplified Palomar, Modified Double Uni, or Albright variants using clamps, loops, and aids; you’ll feel included and capable every outing.
Do Colored Leaders Influence Fish Bite Rates?
Yes - colored leaders can affect bite rates. For example, anglers noticed bite drops using bright fluorocarbon; color visibility altered fish behavior. You’ll belong to anglers who try subtle, natural hues to increase hookups.