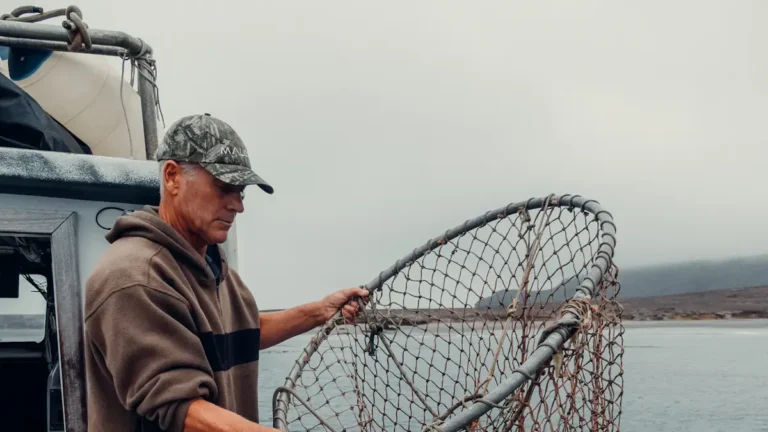
Book Appointment Now

How Tie Knots Fishing
Tying the right fishing knot sets the stage for every cast and catch. Start with basics like the Improved Clinch for mono, the Palomar for braid, and the Uni for many rigs. Prep tools such as nippers and a wetting cloth so knots seat cleanly. Thread the eye, make neat wraps or loops, wet the line to reduce friction, tighten smoothly, and trim the tag end close. Practice strength tests and leader hookups to build speed and confidence before the bite starts.
Quick Decision Guide: Which Knot to Use and Why
Looking for a fast way to pick the right knot while you’re on the water? You want knots that match your knot material and the fishing conditions you face.
In case you’re tying to braided line, reach for the Palomar for strength and simple steps. For mono or fluorocarbon, the Improved Clinch gives quick, reliable holding whenever you need speed.
Whenever joining lines of different thickness, try the Albright or Double Uni so you won’t worry about slipping in changing currents. Should you need hook mobility, a Loop knot keeps bait lively.
Consider water clarity, current, and target fish size as you choose. You’re part of a team out there, and choosing right keeps everyone confident and connected.
Tools and Prep: Line, Nippers, Wetting, and Setup
Whenever you pick your line, consider the fish you want and the conditions you’ll face so your knots hold under pressure. Keep a sharp pair of nippers and a few basic tools handy to make clean cuts and tidy finishes that won’t slip.
Before you cinch any knot, wet the line and set up a comfortable workspace so each turn seats neatly and you can feel how the knot tightens.
Line Selection Basics
Choosing the right line and getting your gear ready can make or break a day on the water, so you’ll want to start with a few simple tools and a clear plan.
You’ll pick from monofilament, fluorocarbon, or braid based on feel and target species. Consider line durability for long fights and abrasion resistance whenever structure is nearby. Also contemplate color matching to water conditions so your line stays less visible or easier to see should you prefer. Match pound test to lure size and hook strength.
Practice tying your go to knots on each line type so you know how they behave. You’ll feel more confident once your setup, line choice, and knots all work together.
Nippers And Tools
You’ve picked the right line and practiced your knots, so it’s time to get the small but powerful tools that make on-the-water prep fast and reliable. You’ll want a sharp pair of nippers, forceps, and a small multi tool that fits your vest.
Choose nippers with ergonomic grips so your fingers don’t tire whenever you trim tag ends after tying clinch, Palomar, or blood knots. Keep a soft cloth and tiny oil for tool maintenance to prevent rust and guarantee smooth action.
Store tools in labeled pockets for quick access and secure lanyards to avoid loss. Practice using each tool at home until motions feel natural. This gear makes knot work calm, confident, and part of the shared rhythm of fishing.
Wetting And Setup
Although prepping your line and tools could feel small, getting wetting and setup right will save you time and keep fish on the hook, not your patience. You’ll wet knots to reduce friction and enhance knot durability, and you won’t dry tying unless you’re practicing. Lay out nippers, spare line, and a clean surface. Moisten the knot with saliva or water, snug coils, then pull steady to seat the knot.
| Step | Why | Tip |
|---|---|---|
| Wet | Reduces heat and fray | Use water or saliva |
| Setup | Organized tools speed work | Keep nippers and leader handy |
| Check | Verify knot durability | Give a firm tug before casting |
You’ll feel part of the crew once your setup flows, and others will trust your calm, steady prep.
Improved Clinch Knot : Step-by-Step (When to Use It)
Once you need a quick, reliable way to tie a small lure to monofilament or fluorocarbon, the Improved Clinch Knot is a go-to choice you’ll use a lot.
It’s especially handy for jigs and small spinners because it holds well and ties fast once you get the motion down.
Below you’ll find simple step-by-step tying instructions and clear guidance on whenever this knot works best on the water.
When To Use It
Should you be tying the Improved Clinch Knot, it’s best to reach for it once you need a quick, reliable connection between monofilament, co-polymer, or fluorocarbon line and a small lure, swivel, or hook.
You’ll use it on light tackle days whenever simplicity matters and you want confidence that your knot won’t fail. Consider environmental impact whenever choosing gear and avoid overkill that adds waste.
Seasonal considerations matter too since colder water can stiffen lines and heat can weaken them, so pick this knot whenever conditions favor straightforward strength.
You’ll also turn to it whenever you want fast retying on the bank, whenever you’re sharing tips with friends, or whenever practicing to join the angling community.
Step-By-Step Tying
Before you pick up your rod, take a breath and get ready to tie an Improved Clinch Knot that’ll hold up at the moment it matters most.
Start using threading the line through the hook eye and doubling back. Wrap the tag end around the standing line five to seven times. Feed the tag end through the small loop near the eye, then back through the big loop you just formed.
Wet the knot for knot lubrication to reduce heat and friction. Pull the standing line slowly while holding the tag to seat coils neatly. Slide the knot tight against the eye, keeping coils tidy.
Trim the excess with clean tag trimming about 1 4 mm from the knot. Examine the knot with a firm tug before casting.
Palomar Knot : Fast, Strong Fishing Knot
If you wish a knot that’s quick to tie and virtually unbreakable, the Palomar knot is the one you’ll keep reaching for on the water.
You’ll feel part of the pack once you learn its knot history and why anglers trust it. The Palomar works great with braided or monofilament line, and it’s simple enough that you’ll teach a friend in minutes.
Try tying variations like a double Palomar for extra security or a slimmed version for small hooks. You’ll loop, pass, and snug with confidence, aware the knot stays neat under load.
Keep your line moist during tightening. You’ll belong to a group that values reliability, speed, and a knot that just plain works.
Uni Knot : Versatile for Hooks, Lures, and Lines
You’ll find the Uni Knot is a go-to because it balances strong holding power with simple tying steps, so you’ll trust it on hooks, lures, and during joining lines.
Start using threading the line through the eye, form a loop, and wrap the tag end around the standing line several times before snugging the coils-those neat turns give the knot its reliability.
With a little practice and a wet line to lubricate the knot, you’ll get consistent strength and fewer surprises on the water.
Knot Strength And Reliability
During the moment you need a knot that’s simple, strong, and works for hooks, lures, or joining lines, the Uni Knot is one of the most reliable choices you’ll turn to on the water. You’ll like its knot durability as fish pull hard and currents challenge your gear. It holds well on monofilament, fluorocarbon, and braid when tied correctly.
You’ll feel part of the group once you do regular knot inspection before each cast. Check for neat wraps, no frays, and tight seating at the eye. Provided you spot wear, redo the knot right away to avoid breakoffs. Practice builds confidence, and asking buddies for feedback helps you learn faster.
You’ll enjoy being aware your knot will keep you connected to the catch.
Tying Steps And Tips
When you need a knot that’s simple, strong, and quick to tie on the water, the Uni knot will become one of your go-to tools for hooks, lures, and joining lines.
You’ll start off by passing the line through the eye, forming a loop, and wrapping the tag around the standing line five to seven times. Pause to use knot lubrication before the final pull so coils seat evenly.
Then use a steady tightening technique, pulling the standing line and tag together while holding the knot neat. Trim the tag close.
Practice on different lines and lures until you’re confident. You’ll feel part of a group that shares tips, laughs at tangles, and helps each other learn better, faster, together.
Double Surgeon’s and Blood Knots for Leader Joins
In case you need a reliable way to join two lines of similar or slightly different diameter, the Double Surgeon’s and Blood knots give you solid options that are quick to learn and easy to trust on the water. You’ll learn to feel confident tying both, and you’ll belong to the group of anglers who share simple, trusted tools.
Start with the double surgeon’s upon overlapping ends, tying two simple overhand knots around the standing line, then snugging them together for compact strength. For blood knots wrap each tag around the other line five to seven times, tuck the ends through the middle, and pull tight slowly while moistening. Both stay slim for guides and resist slipping once you dress them neat and trim.
How to Connect Braided Line to Mono/Fluorocarbon Leaders
Curious how to join braided line to a mono or fluorocarbon leader so you don’t lose fish or gear? You’ll want a reliable method that balances knot durability and resists line abrasion. Use a Palomar or Double Uni for strength and smooth changes. Wet the knot, snug coils, and trim neatly. You’re part of a group that cares about solid connections and shared tips.
| Knot Type | Best Use |
|---|---|
| Palomar | Braided to mono for small lures |
| Double Uni | Braided to fluorocarbon for leaders |
| Albright | Thicker braid to heavy leader |
| FG Knot | Low profile, high strength |
| Surgeon Wrap | Backup reinforcement |
Practice these knots together, trade feedback with friends, and keep trying out to protect gear and confidence.
Common Mistakes and How to Test Knot Strength
Before you tie a knot, small mistakes can turn a good setup into a lost fish story, so it helps to know what to watch for and how to check the knot before you cast.
You want to avoid line deterioration from sun, salt, or nicks, so inspect the whole length and replace worn sections.
Watch for improper lubrication or no lubrication at all during tightening knots; a dry knot can slip or weaken.
Examine strength through pulling steadily, then with short sharp tugs, and try a bending stress to reveal weak spots.
Check wraps for neat coils, trimmed tag ends, and snug seats against the eye.
In case anything looks off, retie together and evaluate again until you trust it.
Quick Practice Drills to Build Speed and Consistency
You’ve checked your knots for wear and snug coils, so now let’s turn that inspection habit into fast, reliable tying under pressure.
You’ll practice short, focused drills that build muscle memory, advanced tension control, and steady mental focus. Work with a friend or group to share tips and feel supported while you learn.
- Time trials tying an Improved Clinch and Palomar for speed and satisfaction.
- Slow to fast repeats focusing on neat coils then increasing pace.
- Partner feedback sessions to spot sloppy wraps and elevate confidence.
- Blindfolded tying to trust touch and pressure for consistency.
These drills help you belong to a skilled crew, create calm under stress, and make tying feel natural on every trip.
Printable Cheat Sheet: Knots for Common Rigs
A printable cheat sheet will be your best pocket partner on the water, so let’s make one that’s simple, clear, and actually useful as the fish are biting.
You’ll want sections for rig setup, knot choices, and quick visuals showing steps. Label each rig with the best knot to use like Improved Clinch for small lures, Palomar for braid, and Albright or Double Uni for leaders.
Add a small reminder on knot maintenance, including moistening, snug tightening, and trimming tag ends. Include symbols for strength and speed so you can pick fast.
Keep font readable and laminate the sheet so it survives wet hands. Share a copy with your crew so everyone feels confident and part of the same team on the water.
Frequently Asked Questions
How Long Should Knots Hold When Stored Between Outings?
“Old habits die hard”: you’ll want knots to hold weeks to months provided stored properly; knot degradation depends on storage conditions like dryness, UV protection, and tension-free coils, so check and retie before each shared outing.
Do Knot Lubricants Differ by Line Material?
Yes - they do. You’ll want lubricants that focus on friction reduction and material compatibility with mono, braid, or fluorocarbon. Choose products labeled for your line type so you’ll feel confident and supported on every outing.
Can Knots Damage Rod Guides or Reels Over Time?
Yes - in case you don’t manage friction wear or knot slippage, abrasive lines and rough knots can gradually scuff rod guides and stress reels. You’ll want to inspect gear, dress knots, and use proper lubrication to protect everything.
Which Knots Are Easiest for Left-Handed Anglers?
About 70% of anglers prefer simple knots-so you’ll like the Palomar and Improved Clinch for left handed techniques; they’re easy for knot tying, quick to learn, and’ll make you feel part of the fishing community.
How Do Temperature Changes Affect Knot Reliability?
Temperature shifts affect knot reliability: you’ll notice thermal expansion loosens wraps, while moisture effects swell line fibers and change friction, so you’ll want to recheck, lubricate, and retighten knots to keep your group fishing confidently.