Book Appointment Now

Fishing Photography Tips: Capture Your Catch Clearly
Want clear, striking photos of your catch? This guide covers the best cameras and phone settings, plus shutter, ISO, aperture and focus tips that actually work on the water. Learn why soft light and polarizing filters improve clarity and color, how to pick clean backgrounds and flattering angles, and practical steps for shooting from boat, shore, or kayak while keeping gear safe. Short, usable advice for anglers who like great images without the fuss.
Quick 4-Step Checklist for a Great Fish Photo
If you desire a great fish photo every time, start with a simple checklist you can rely on. You’ll begin checking light and timing to match golden hours and avoid harsh noon glare.
Next, plan fish positioning so the eye and body face the camera and water remains in the frame.
Then set your camera for timing flashes and low shutter lag to freeze motion without startling the fish. Also wet the fish, support its belly, and limit time out of water to protect it and your conscience.
Practice varied angles and move your feet to find the best background.
Finally, breathe, smile, and trust your checklist. You belong here, learning alongside others who care about craft and care.
Choose the Best Camera or Phone for Fish Photography
You’ve got your checklist down and you’re ready to make better fish photos every time, so now you’ll want to pick gear that matches your goals and your budget.
You’ll choose between modern smartphones that benefit from smartphone innovations and dedicated cameras that offer camera durability and control. Consider how often you shoot, where you shoot, and who you share with.
Should you desire belonging with other anglers, pick gear that feels familiar and reliable so you join conversations confidently.
- Satisfaction when your phone captures the shimmer like a pro
- Comfort realizing your camera handles splashes and bumps
- Joy sharing clear catches with friends around the campfire
- Confidence trading tips inside your fishing circle
Camera Settings: Shutter, ISO, Aperture, and Focus Modes
At the moment you’re shooting fish in motion, choosing a fast shutter will freeze the action and keep those splashes crisp.
Match your ISO to the light so images stay clean without too much grain, and pick an aperture that gives you the right depth of field for either a sharp eye or a pleasing background blur.
Be sure to use continuous or single focus depending on if your subject is moving, since shutter, ISO, and aperture all work together to make the shot.
Fast Shutter Choices
In the event that you want crisp action shots of fish breaking the surface, fast shutter choices are the key that’ll freeze the moment and keep your images sharp. You’ll pick speeds that cut motion blur while watching for shutter lag that can steal the instant.
Choose 1/1000s or faster for big splashes, 1/500s for smaller hops, and experiment with bursts so you don’t miss the peak. Use continuous autofocus and high frame rates to stay locked on the fish. Raise ISO only as needed to maintain aperture and shutter.
You belong with others who chase perfect timing, so practice and share settings to learn together.
- Joy upon you nail the leap
- Satisfaction in a sharp freeze frame
- Relief from missed moments
- Warmth from shared tips
ISO For Conditions
Because light changes fast on the water, you’ll want ISO choices that let you balance shutter speed and aperture without losing image quality. You’ll choose low iso on bright mornings and late afternoons to keep colors clean and details sharp.
Whenever clouds roll in or you’re in shade, nudge ISO up so you can keep a fast shutter for action and still hold reasonable image quality. Don’t be afraid of high iso for split seconds once a catch pops or the sun ducks; modern cameras handle noise well and you’ll trade a bit of grain for a crisp moment.
Practice raising and lowering ISO quickly. Trust your settings, talk through choices with friends, and enjoy shared learning on the water.
Aperture And Depth
Although it could seem small, aperture controls how much of your scene looks sharp and how much melts into soft blur, and getting it right will change the feeling of every fishing photo you take.
You’ll use aperture to guide mood, drawing friends and fellow anglers into the moment. Wider apertures give shallow depth so the fish stands proud. Smaller apertures keep the whole scene readable whenever you want setting.
Use aperture effects and bokeh control to fit the narrative you’re sharing. You’ll feel confident once your settings match the emotion you want.
- Warm close-up with soft bokeh to highlight a shared triumph
- Wide depth to include teammates and sunrise together
- Selective focus to show the fish eye and hands holding it
- Gentle blur to protect location and invite curiosity
Choose a Clean Background for Clearer Fish Photos
Once you frame a fish, keep the background simple so nothing steals attention from your subject. Choose neutral colors like soft blues, greens, or grays and move until the fish stands out against a contrasting backdrop.
Through minimizing clutter and positioning the fish against a clean contrast, you’ll get clearer, more professional-looking photos that feel calm and focused.
Minimize Distracting Elements
A clean background can make your fish photos sing, so take a moment to scan the scene before you shoot. You want clarity, and that means clutter removal and avoiding distracting reflections that steal attention from your catch.
Move a step, change angle, or shift the fish so nothing odd intrudes. Whenever you work with friends, ask them to step back and respect the frame. Simple actions help everyone feel included and proud of the shot.
- Notice misplaced gear and gently ask for help to tidy it
- Watch for bright highlights on water and tilt to soften reflections
- Move plants or branches out of view to make the fish stand out
- Encourage quiet focus so your image feels calm and shared
Use Neutral Color Backgrounds
In case you want your fish to pop and not compete with the background, pick neutral colors that let the subject shine; muted tones like soft grays, beiges, olive greens, and deep blue-gray water make scales and eye details stand out without distraction.
Whenever you frame your shot, seek neutral backgrounds that support color neutrality so viewers join you in noticing texture and life. Move slightly, adjust angle, or choose a patch of plain shoreline to avoid clutter. Provided you have fellow anglers, ask them to wear subdued clothing and hold the camera steady.
Use shallow depth of field to blur busy areas while keeping the fish sharp. These small choices help you and your community create clear, respectful images that highlight the catch.
Position Fish Against Contrast
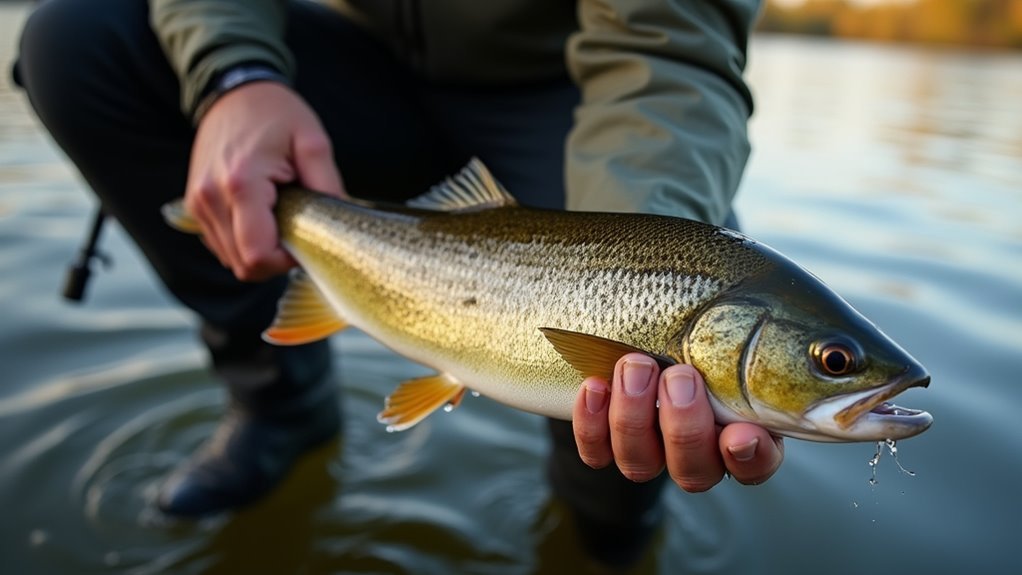
Because contrast makes your subject stand out, place the fish against backgrounds that clearly separate color and texture so viewers notice scales, shape, and eye detail right away. You want a clean spot that highlights the fish silhouette and uses background contrast to make the eye pop. Look for plain water, a dark wet rock, or a light sky behind your catch.
Move gently with your crew so everyone feels included and calm. Wet the fish so scales gleam, keep it low over water, and watch light direction for mood.
- Satisfaction once the fish silhouette feels iconic
- Warmth from shared victory on the bank
- Calm realizing you handled the fish with care
- Joy in a clear, honest image that belongs to your group
Shoot in Soft Light: Best Times and Angles
At what time do you get the kind of light that makes fish and water look instantaneously magical? You want golden hour warmth in dawn and late afternoon because soft light brings out scales without midday harshness that flattens texture.
Move so the sun is low and slightly behind you to avoid glare and to create gentle rim light on fins. In case you position the sun behind the fish you can welcome backlit silhouettes for dramatic mood while still keeping foreground detail with a touch of fill.
Try low angles at fish level to pair with soft light for intimacy. Change stance often, use small adjustments to angle and distance, and include surroundings to strengthen the sense of place and shared experience.
Reduce Water Glare With Polarizers and Smart Positioning
At the moment you want fish and water to look clear and colorful, a circular polarizer is your best friend and smart positioning is your follow through.
You’ll feel part of the group once you learn gentle filter adjustment and simple body shifts to cut reflections. Rotate the polarizer until surface shine fades and colors pop.
Move a step left or right, or lower your angle, to find less glare and truer fish tones. Combine slow movements with calm confidence so your mate nods and joins in.
- Satisfaction once your shot shows scale detail and deep water color
- Joy sharing a clear image that tells the story of the catch
- Warmth from learning with friends on the water
- Calm confidence as glare removal becomes routine
Steady Your Shot: Tripods, Braces, and Hand-Holds
During the moment you want crisp, shake-free fishing photos, steadying your camera is the initial move you’ll make and the one that brings calm to a hectic moment. You belong to a group that cares about craft and connection, so lean on simple camera stabilization tools.
Use a flexible tripod whenever you’re solo, brace against railings or knees once space is tight, and find a comfortable hand grip that keeps you steady without straining. Practice a two-handed hold and tuck elbows to your chest. Slow your breathing, take gentle breaths, and release the shutter between exhalations.
Below is a small guide to help you choose the right support and mindset.
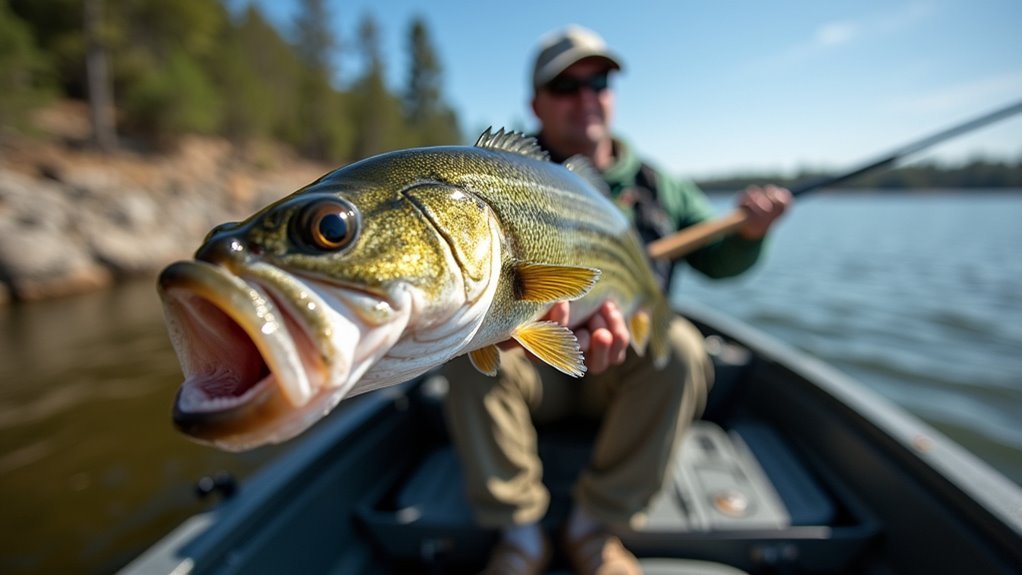
Compose Fish Photos: Angles, Rule of Thirds, and Close-Ups
At the moment you line up a shot, angle and framing decide whether the fish looks heroic or flat, and they work together like teammates to tell the story. You’ll want low angles at fish level to make the catch feel honored, and higher angles for setting.
Use the rule of thirds to place the eye or head along a grid line. Close-ups tighten emotion and show scale and wet texture. Watch fish reflections and angled shadows to add depth and mood.
Move your feet to shift viewpoint rather than relying on zoom. Balance tight shots with a few wider frames that include the water or hands, so viewers feel part of the moment and not just observers.
- Honor as the eye catches light
- Calm from soft background bokeh
- Awe at mirrored fish reflections
- Comfort in shared angled shadows
Capture Action: Movement, Burst Mode, and Timing
Once action heats up you’ll want to use burst mode so you don’t miss the split second that makes the shot.
Anticipate the peak of the movement through watching the angler and fish so you can time your frames right. Stabilize your camera with a steady stance or a monopod to keep those fast shots crisp and usable.
Use Burst Mode
Because action on the water moves fast, you’ll want to lean on burst mode to catch the exact instant that tells the story, and you’ll feel more confident realizing you’ve got multiple frames to choose from. Use burst timing to link your eye to the scene. Set continuous capture so you don’t miss a fin, splash, or smile.
You and your crew will relax understanding you can pick the best frame together. Practice short bursts for quick snaps and longer bursts whenever a fight lasts. Keep camera settings steady, focus on the fish eye, and hand cues help teammates sync.
- Joy of that perfect arc as the fish breaks free
- Relief appreciating you captured a real moment
- Satisfaction in shared achievement on the boat
- Warmth from memories you’ll relive through photos
Anticipate The Peak
If you wish to catch the exact moment a fish explodes from the water, you’ll need to read the scene and move before the peak happens. You’ll learn fish behavior by watching ripple patterns, bait activity, and angler cues so you can anticipate peak timing. Stay patient with your group, share what you see, and trust each other to call the shot. Use burst mode, prefocus where movement will occur, and lean into timing rather than luck.
| Cue | Action | Result |
|---|---|---|
| Ripples | Raise camera | Prepare burst |
| Bait splash | Track path | Aim ahead |
| Angler pull | Predict arc | Capture peak |
That table helps you sync observation, movement, and camera for clearer action photos.
Stabilize For Clarity
If you desire sharp, story-rich action shots, start through making stability your top priority so movement, burst mode, and timing can all work together. You’ll steady your camera, use lens stabilization, and seek vibration reduction to freeze the splash and the smile.
Stabilize with a shoulder brace or compact tripod whenever possible. Hold breath, lean into your stance, and let burst mode paint the sequence. Timing ties to rhythm; watch the angler and set your finger on the shutter.
- Feel the shared thrill whenever a frame captures the catch and the community around it
- Relish the quiet satisfaction of a frozen arc of water and a held fish
- Trust the camera and your steady hands to honor the moment
- Celebrate each clear frame as proof you belong in the story
Prep Hands & Gear: Wet Gloves, Mats, and Quick Rinses
Start through prepping your hands and gear so every shot feels calm and controlled, not rushed. You’ll want glove maintenance down so wet gloves stay grippy and fish safe.
Rinse gloves after each use, wring gently, and air dry flat away from sun. Keep a small spray bottle to mist hands and fish between frames.
Mat placement matters too. Lay a damp, clean mat on a flat surface so you can place the fish gently and frame close shots without harm. Have towels, a soft brush, and a bowl of water nearby for quick rinses.
These steps let you move confidently and include friends in the process. At the moment you act together, shots look relaxed and everyone feels part of the memory.
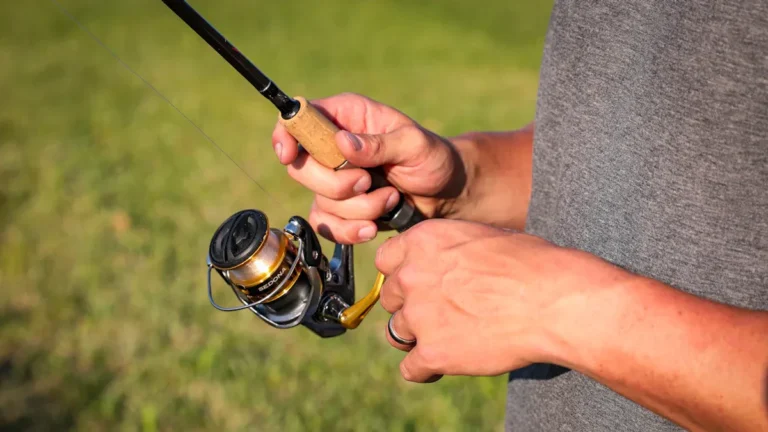
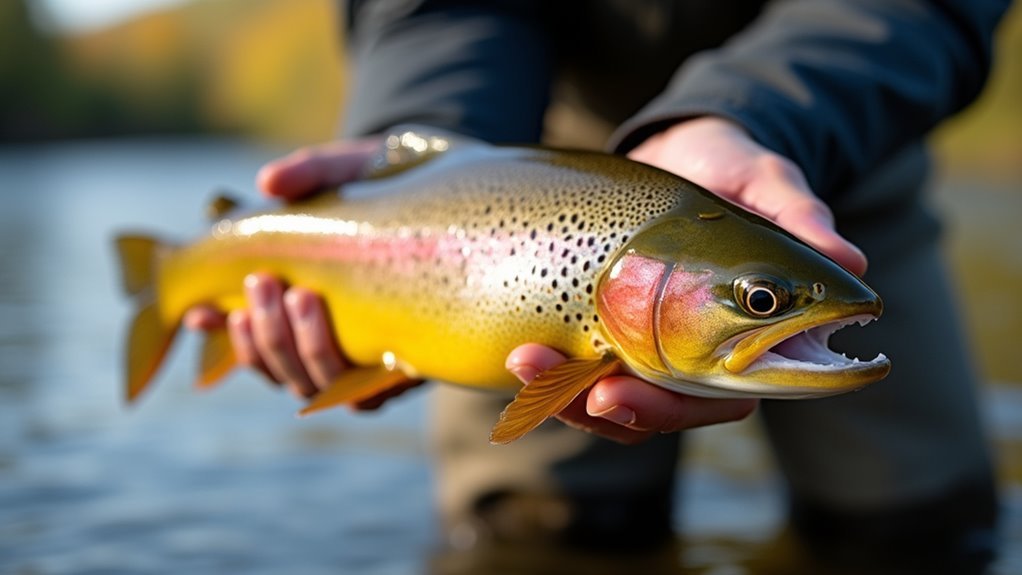
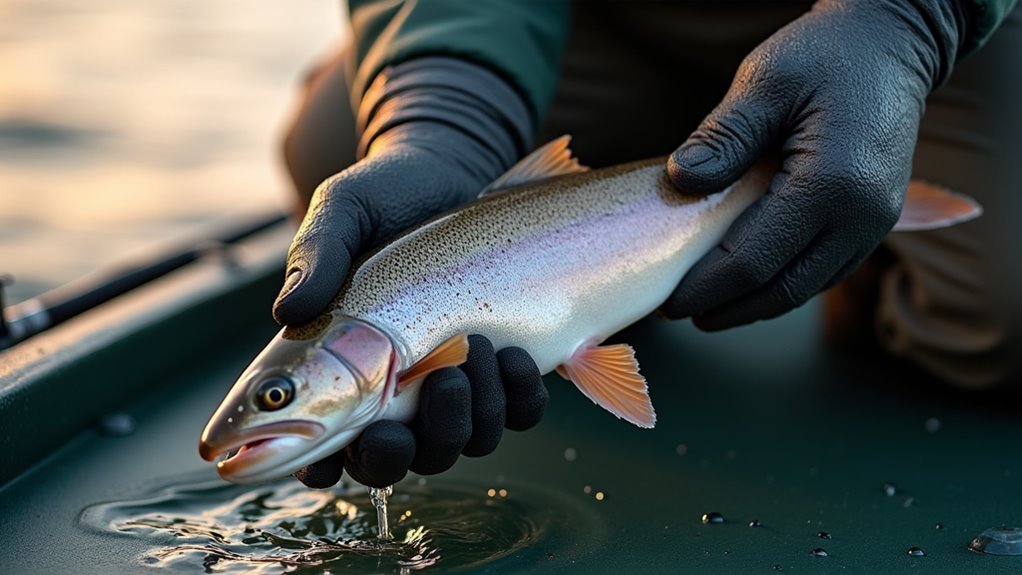
Hold and Support the Fish for Natural, Respectful Poses
At the time you hold a fish for a photo, support its belly with a steady palm so the body sits natural and relaxed.
Use a gentle hand near the head to keep the fish calm without squeezing, which helps its colors and eyes look their best. These simple touches show respect for the fish and make your shots feel more connected and real.
Support Under Belly
A gentle, well-placed hand under the fish’s belly makes a big difference in both the photo and the fish’s wellbeing. You want a firm grip without squeezing, and a balanced hold that keeps the fish level.
That care shows in the eyes and the shine of the scales, and it tells others you belong to a community that values fish and photo craft. Move slowly, breathe steady, and let your hands support rather than control.
- You feel proud whenever the fish looks calm and natural in your arms
- You protect the fish through keeping it wet and close to the water
- You connect to others who respect catch and release
- You show care through steady, confident hands
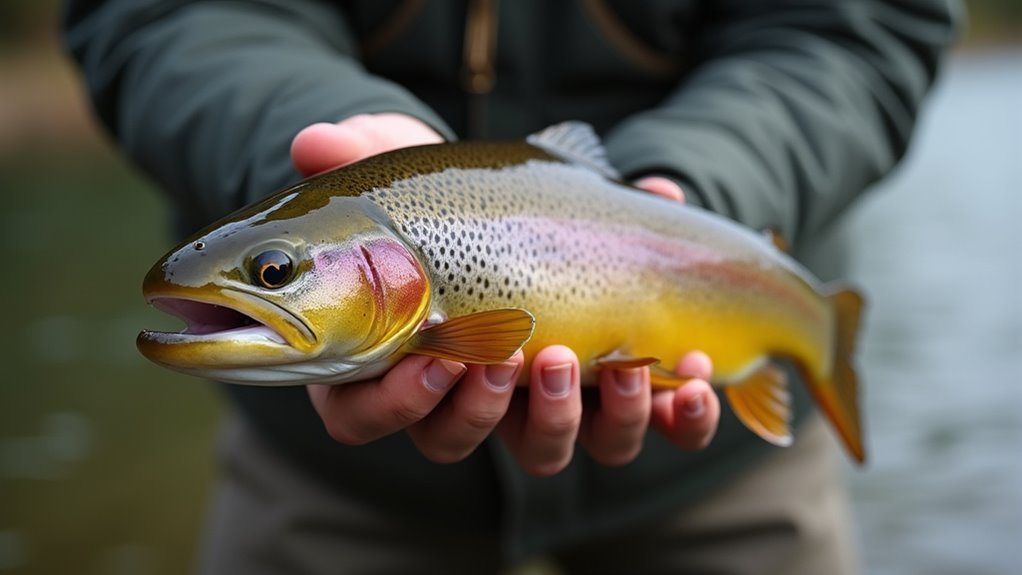
Gentle Head Restraint
Because steady hands and calm intent matter, a gentle head restraint helps you get natural, respectful fish poses without hurting the fish or looking stiff in photos. At the moment you cradle the fish, use gentle restraint at the jaw or just behind the gill plate to guide its angle toward the lens.
Combine this with head support under the snout so the mouth stays closed and natural. You’ll feel more connected to the animal and your crew will notice your care.
Practice slow motions, breathe steady, and keep fingers wet. Move smoothly between head support and belly support so the fish stays balanced. That flow keeps shots candid and humane. With patience and small adjustments you’ll make images that show skill and kindness.
Edit Quickly: Color, Contrast, Sharpness, and Crop Tips
Start through opening your favorite editor and trust that small, focused tweaks will make your fishing photos sing. You’ll nudge color balance to match the water and sky, lift contrast to add depth, and apply sharpness adjustment sparingly so scales and eyes feel alive.
Crop to center the catch and remove distractions while keeping habitat cues that bind you to the moment. Move between tools with calm intent and you’ll keep memories honest.
- Feel the pride as warm tones bring sunrise back to life
- Enjoy the calm of a clean crop that shows just enough setting
- Relish the clarity once tiny scales pop from careful sharpness
- Share the glow while balanced colors make everyone smile
Protect Your Camera Gear on the Water
Once you’re out on the water, you want your camera to feel as safe as your catch, so treating gear protection as part of the trip plan will keep you calm and shooting longer.
You’ll want waterproof storage for spare batteries, memory cards, and lenses. Pack items in sealed dry bags inside a padded case so everything stays organized and ready.
Use protective covers on your camera and lens during casting or moving between spots. Float straps and tether points add extra security and soothe nerves whenever waves hit.
Wipe gear with a soft cloth after splashes and air dry in shade to avoid salt damage.
Share these simple routines with your crew so everyone helps keep gear safe and your shots consistent.
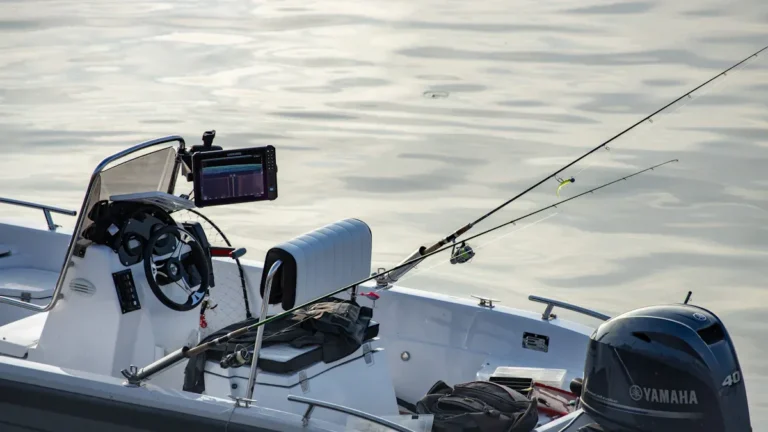
Boat, Shore, and Kayak: Location-Specific Shooting Tips
Whether you’re leaning over a rocky shoreline, paddling a quiet kayak, or casting from a chugging boat, each setting changes how you move, frame, and protect your gear, and grasping those differences will make your shots much stronger.
On shore you’ll use shore reflections to add mood and tie the fish to place. In a kayak you’ll mind kayak stability, brace with knees, and keep gear low. From a boat you’ll ask a friend to steady the frame and watch for spray.
Move gently, talk calmly, and include your crew to build shared esteem.
- Feel the calm as glassy water mirrors your joy
- Share a laugh after a perfect frame
- Trust your partner to steady the shot
- Celebrate small wins together
Common Problems on the Water and Quick Fixes
When you’re out on the water, things can go sideways fast, so it helps to know common problems and quick fixes that keep you shooting without panic.
You’ll face glare and harsh water reflection, so use a polarizer or change angle to cut glare and bring out true color.
Should gear get wet, wipe seals, shake water free, and use quick drying cloths to protect electronics.
In case wind tosses your boat, brace your stance, lower shutter speed, and stabilize on a rail or tripod.
When your subject struggles, shoot fast bursts, step back for safety, and keep fish wet for their comfort and your shots.
In the event light fades, raise ISO, open aperture, or add gentle fill flash for steady results.
Share and Tag Fish Photos: Formats, Captions, and Hashtags
While you’re pleased with that catch and want to share it fast, choosing the right format, caption, and hashtags can make your photo stand out and connect with other anglers. Choose photo formats that keep detail like JPEG for quick sharing and PNG for crisp edits.
Use caption tips that tell where, how, and why the moment mattered. Pair caption tips with hashtag strategies to reach local clubs and species fans.
Follow tagging guidelines to credit guides, buddies, and gear brands so you feel part of the community.
- Celebrate the thrill, the patience, and the memory that brought you here
- Invite others to share stories and advice with warmth
- Show humility and satisfaction in equal measure to bond
- Use friendly tags to welcome conversation
Frequently Asked Questions
Can I Photograph Fish at Night Without Flash?
Yes - you can, like a medieval astronomer, use low light techniques: rely on long exposure and ambient illumination, adopt tripod usage, steady handling, warm community tips, and patient timing to capture fish without flash.
How Do I Avoid Revealing My Exact Fishing Spot in Photos?
Don’t show distinctive landmarks; use location masking and background cropping to remove identifiable scenery. You’ll crop tight, blur backgrounds, avoid GPS metadata, swap angles, and share communal vibes so others feel included without exposing your exact spot.
What Legal Considerations for Photographing Protected Species?
Tread lightly: you’ll want wildlife permits and respect habitat protection rules; you can’t photograph some protected species, must follow location restrictions, avoid disturbance, share info responsibly, and connect with local communities for lawful, ethical guidance.
Can I Monetize My Fish Photos From Others’ Catches?
Yes - you can, but you’ll face copyright issues: you’ll need the photographer’s permission and clear image licensing terms. Make sure you’ve written agreements, respect creators’ rights, and promote fair, inclusive collaboration within your community.
How to Sanitize Gear Between Different Water Bodies?
A Maine guide once soaked nets in bleach solution; you should use cleaning methods like diluted bleach or hot soapy water, drying and disinfecting gear to prevent contamination. You’ll belong to stewards protecting shared waters.