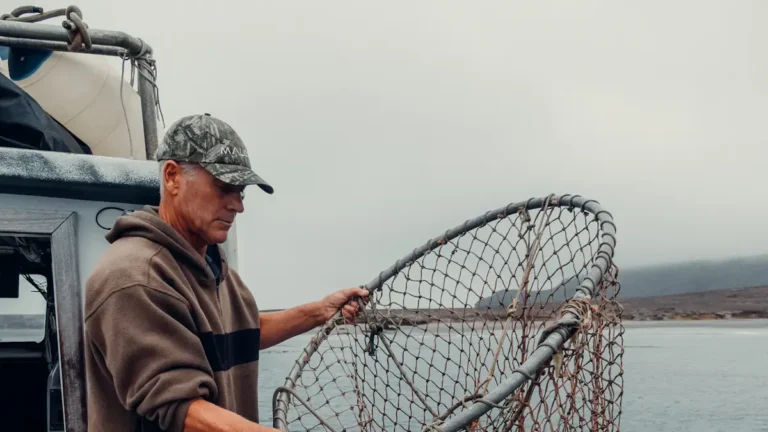
Book Appointment Now

What Is Jigging Fishing
Jigging is a fishing technique that uses a weighted lure moved in short lifts and drops to mimic injured baitfish and trigger strikes. Anglers feel for subtle taps or solid takes while controlling cadence and depth. Success depends on matching rod, reel, line, and jig type to the target species and water conditions. Watching structure and current helps place the lure where fish are holding. Practice tuning motion and timing to learn what works for different situations.
What Jigging Means and Why Anglers Use It
At the moment you pick up a rod and jig, you’re choosing a hands-on way to fish that copies how baitfish move, and you’ll see why anglers love it so much.
You learn jigging history as you handle gear passed along from friends and mentors, and that sense of lineage makes you feel part of a group. You’ll enjoy the rhythm, the quick lifts, and the quiet focus.
You’ll also care about environmental impact, so you’ll pick tackle and practices that reduce harm to habitat and bycatch. You’ll fish near structure, adjust retrieve speed, and share tips with others.
You’ll find belonging through shared stories, patient teaching, and celebrating small, precise strikes together.
Jigging Basics: Step-by-Step How to Jig and Spot Strikes
Set up your gear so the rod, reel, line, and jig match the fish and the water, because a sensible setup makes every movement feel natural and cuts down on missed bites.
Then practice the basic jigging motion with short lifts and controlled falls, keeping your line semi-taut so you can feel weight changes and water resistance. As you work the lure, watch the line and feel for subtle taps or extra slack on the drop and be ready to sweep the rod or strip in slack to set the hook.
Gear Setup Essentials
During the moment you’re getting ready to jig, the right gear setup makes the difference between feeling confident and wrestling with frustration, so let’s walk through what you’ll need and why each piece matters.
Start with a rod and reel that match the water and fish you want. Pick jig weight for depth and current so your lure hits the strike zone. Choose hook size according to target species and bait profile to guarantee solid hookups.
Use quality line with the right capacity and a leader whenever needed to avoid breakoffs. Add extra jigs in varied colors and sizes, pliers, and a compact tackle box for quick swaps.
Set up comfortably so you feel part of the group and ready to fish.
Jigging Motion Technique
You’ve already got your gear in order, so now it’s time to focus on the motion that brings a jig to life and turns bites into hookups. You’ll want to treat the jig as a vertical lure that speaks the fish language.
Start off with letting it sink, feel the weight, then lift the rod tip in a short, firm snap. Let the jig fall naturally and listen with your hands. Repeat a steady rhythmic motion that matches depth and current.
Vary lift height and pause length to imitate injured baitfish. Keep line semi taut so you feel taps on the drop. Use both hands for control and reel slack following each lift.
You’re part of a group that refines these moves together and learns from each cast.
Detecting Subtle Strikes
During the period you’re jigging, the hardest bites are often the softest, so learning to spot subtle strikes will turn more taps into hookups and save you from missed fish. You’ll tune your bite sensitivity through keeping a semi taut line and watching both rod tip and line for micro movements.
Use strike indicators such as slight pauses in the fall, tiny twitches, or a sudden bow in the line as cues to set the hook. Feel with your fingers on the rod blank and watch for weight changes as the jig drops. Practice different lift speeds and weights to learn what your spot feels like. Share observations with mates so everyone learns, builds confidence, and lands more fish together.
When to Choose Jigging vs. Other Methods
Before you’re deciding whether to jig or try another method, consider about where the fish are, how they’re feeding, and how much action you want in your hands.
In case fish hug structure or the bottom, jigging often wins because it reaches specific depths and mimics injured prey. Seasonal timing matters too since cool-water periods can push fish deeper where vertical motion helps. Provided water clarity is low, a heavy jig with bold profile can attract attention.
Once fish are cruising open water or feeding on the surface, casts with topwater lures or swimbaits might feel easier and offer longer casts. Trust your crew, share observations, and switch once bites lag. You’ll learn faster together, and decisions will feel confident and natural.
Pick the Right Rod & Reel for Jigging
You’ll want a rod with the right power and action so you can snap the tip for sharp lifts but still feel subtle bites.
Match that rod to a reel with a gear ratio that suits your jigging style, whether slow and steady or fast and aggressive, and choose line type and strength that give you sensitivity, abrasion resistance, and the backbone to fight fish.
Consider how these three choices work together so your gear feels balanced and responsive on every lift and fall.
Rod Power & Action
Curious how to pick the right rod and reel for jigging so you’ll feel confident on every cast? You want a rod that gives rod sensitivity to feel subtle taps and drops, and action flexibility so you can snap the tip for quick lifts or slow it for a soft fall.
Choose medium to medium-heavy power for common species, lighter for micro jigs, heavier for big bottom dwellers. Fast action rods keep tip feel and hookset strength, while moderate action adds forgiveness on runs.
Pairing rod feel with your reel weight keeps balance and reduces fatigue, so you stay longer with friends. Try gear before you buy. Trust your hands and the rod’s feedback to build skill and belonging on the water.
Reel Gear Ratio
Which gear ratio should you pick for jigging depends on the style of jigging you plan to do and how fast you want the lure to come back to you. You want a reel ratio that matches your rhythm and makes you feel confident on the water.
Faster ratios suit speed jigging and quick lifts. Slower ratios give more torque for heavy bottom work and controlled drops. Also consider gear compatibility with your rod and the need for simple reel maintenance so your setup stays reliable.
- High ratios like 7.1 1 let you retrieve quickly and keep rhythm.
- Mid ratios like 5.6 1 are versatile for many jig styles.
- Low ratios like 4.1 1 give power and smooth feel during hauling fish.
Line Type & Strength
Picking the right line and strength for jigging matters more than most anglers admit, because the wrong line can ruin your feel, lose fish, or get you stuck in structure. You want a line that keeps feel, resists line abrasion, and holds knot strength whenever you need it. Braided line gives sensitivity and thin diameter. Fluorocarbon helps hide the line and resists abrasion near rocks. Monofilament offers stretch and shock absorption for light jigs.
| Situation | Recommended Line |
|---|---|
| Open water, deep drops | Braided 20 to 50 lb |
| Rocky structure | Fluorocarbon leader 10 to 30 lb |
| Light finesse jigs | Mono or light braid 6 to 12 lb |
Trust your mates, assess knots, and check abrasion often so you stay connected.
Choosing Jigs: Types, Sizes, and Finishes
In the period that you’re standing over a promising stretch of water, selecting the right jig can make the difference between a slow day and a string of strikes, so let’s analyze the essentials you’ll need to know.
You’ll want jigs that match local prey size and behavior. Consider head shapes, skirts, and weight for the water depth.
Color patterns should suit light and clarity, and material durability matters whenever you tangle with structure.
You belong here with anglers who learn together. Start simple, then tweak.
- Match size to local bait and target species
- Choose finish and flash for water clarity and light
- Prioritize sturdy material durability for rocky spots
Try a few combos and share what works.
Line, Leaders, and Terminal Tackle for Jigging
Once you’re rigging up for jigging, the right line, leader, and terminal tackle will make a day on the water feel a lot more confident and a lot less frustrating.
You’ll want braid for sensitivity and low stretch, paired with a fluorocarbon leader to hide your drift and resist line abrasion near rock or structure. Match leader length to depth and cover, and pick pound rating that still lets the jig move naturally.
For terminal tackle use strong snaps, swivel, and quality split rings to protect knots and action. Learn a few terminal knots like improved clinch and Palomar for reliability.
Tie neatly, trim tag ends, and check connections often so you and your crew feel secure and ready.
Basic Jigging Motions: Lift, Tap, Bounce
At the time you start jigging, nailing the proper lift technique gives your lure a natural rise that triggers strikes, so focus on a quick, controlled rod snap and a steady hand.
Then use a controlled tap rhythm to keep the jig twitching midwater, which fools cautious fish into committing without spooking them.
Finally, practice effective bounce timing along the bottom so the jig skims structure and pauses just long enough for a bite to register.
Proper Lift Technique
A proper lift is the heartbeat of jigging and it’s the motion you’ll repeat most often on the water. You’ll feel more confident whenever your rod positioning is consistent and your wrist movement stays relaxed.
Hold the rod with both hands, keep the tip pointed slightly up, and use your forearm to drive the lift while your wrist fine tunes the lure action. This creates a natural rise and fall that fish recognize.
- Use smooth forearm power, not just wrist snaps.
- Keep line semi taut to sense bites upon the drop.
- Vary lift height and pause to match depth and mood.
These steps link setup and rhythm so you belong to the pace of the water.
Controlled Tap Rhythm
Start with light taps to keep the lure near structure, then shift to stronger taps to trigger curious bites. Focus on rhythmic timing so your taps sit between lifts and drops without denying the jig its natural fall.
You’ll watch line slack and rod tip for subtle strikes. Practice different tap patterns until they feel like part of your cast routine. Share findings with friends and try quieter or faster taps depending on depth and current.
You’ll belong to a group that reads water and adapts together.
Effective Bounce Timing
Now that you’ve practiced controlled tap rhythm, you’ll use that same feel to nail effective bounce timing for lift, tap, bounce sequences. You want timing optimization so your jig reads like real prey. Feel the rod bend, count beats, and match falls to rises.
Bounce synchronization links your hand, the lure, and the fish. You’ll gain confidence with simple patience and small changes.
- Count short one two pauses to set lift height and rest before fall.
- Match rod speed to current so the jig bounces true and stays in strike zone.
- Vary pauses and observe bites to refine rhythm and timing optimization.
You’ll belong to a group who shares tweaks, so ask, listen, and adjust together as you learn.
Matching Jig Cadence and Speed to Depth & Current
Upon fishing deeper water or fighting a steady current, matching your jig cadence and speed to depth and flow can make the difference between lots of bites and a slow day; you’ll want your jig to move like real prey, not a disconnected toy.
You’ll start through using depth sensing to know where fish sit and how long your jig takes to reach them. Then you make current adjustment via slowing lifts in strong flow and speeding cadence in slack water.
Try varied rhythms and observe which gets attention. Use heavier jigs to hold bottom, lighter ones to twitch higher.
Feel the line, watch sink rate, and trust small changes. You’re part of a group learning together, so share what works.
Reading Structure and Locating Fish for Jigging
Once you start scanning a lake or reef for jigging, consider like a fish rather than a fisherman; you’ll spot the places they hide and feed more quickly.
You’ll learn structure identification through reading contours, drop offs, humps, rock piles, and weed edges.
Contemplate fish habitat and where bait gathers. Move slowly, feel changes in depth, and mark likely seams with your electronics or landmarks.
- Use sounder returns to trace hard bottoms, bait schools, and subtle breaks.
- Watch current seams and temperature shifts where prey stacks.
- Probe secluded pockets near cover like logs, rock ledges, and vegetation.
You belong on the water. Ask questions, share spots, and fish with patience and curiosity.
Species Tips : Bass & Walleye
Why should you choose jigging for bass and walleye although both species feed differently and live in subtly different places? You’ll find jigging adapts to seasonal behavior, letting you match depth and action as fish move.
For bass around structure, use heavier, punchy lifts and larger skirted jigs that mirror craws and baitfish bait preferences. For walleye, slow drops and subtle lifts near bottom work best, with smaller finesse jigs tipped with live bait or soft plastics to honor their picky tastes.
You’ll belong to a community that tweaks weight, cadence, and color collectively, sharing small wins. Try varied speeds, change bait preferences across season, and swap sizes until the strike pattern clicks for your spot and mates.
Species Tips : Snapper & Tuna
Looking to land snappers and tuna on a jig? You’ll want to respect deep water structure and seasonal behavior to find them. You belong here with other anglers learning the rhythm and timing.
- Use heavier jigs near reefs and wrecks for snapper and work the drop slowly to tempt bites.
- For tuna, cast larger metal jigs and use faster lifts as seasonal behavior brings schools near the surface.
- Match jig weight to current and depth, and vary cadence until you feel confident.
You’ll feel connected once you share tips and swap spots with friends. Practice lift and fall, watch your line on the descent, and adjust speed according to depth. Trust your instincts, keep patient, and enjoy the hunt together.
Common Jigging Mistakes and Quick Fixes
In case you’re new to jigging or you’ve been at it a while, mistakes will happen, and that’s okay; what matters is fixing them quickly so you keep more bites and less frustration.
You could have poor hook placement in the event fish shake free. Check knot strength, set the hook firmly, and keep a semi-taut line so you feel strikes on the fall. Wrong lure selection can kill bites. Match weight to depth and size to local prey.
Should you be snagging, try a weedguard or a different head shape. In case you’re tiring, shorten lift distance or switch to lighter gear. When motion feels flat, vary lift speed and cadence.
Keep experimenting together with friends so you learn faster and feel supported.
Progressing From Beginner to Advanced Jigging Techniques
Once you’ve got the basics down and you’re landing fish more often, it’s time to sharpen skills that turn good jigging into great jigging. You’ll build confidence through practicing advanced retrieval patterns and experimenting with multi jigging setups that let you imitate varied baitfish schools.
Start slow, feel the lure, then add tempo and pauses to find what fish prefer.
- Refine cadence: mix slow drops with quick lifts to trigger reaction strikes.
- Change gear: try heavier jigs for depth and lighter micro jigs for picky fish.
- Read water: target structure and adjust weight and speed as you learn.
You belong to anglers who share tips, swap spots, and cheer each other once a new technique clicks.
Frequently Asked Questions
Can You Jigfish From a Kayak or Small Inflatable?
Yes - you can jigfish from a kayak or small inflatable; you’ll use kayak maneuverability to position over structure and rely on inflatable stability once anchored, adapting lifts, jig weight, and technique so everyone feels capable and included.
Are There Legal or Seasonal Restrictions Specific to Jigging?
Yes - you’ll need to check local regulations and fishing permits; seasons, size and bag limits, gear rules, and area closures can apply. Join fellow anglers, stay informed, and respect rules to keep fishing community access.
How Do Weather Fronts Affect Jigging Success?
They matter a lot: temperature shifts change fish depth and activity, and wind patterns concentrate bait or break surface, so you’ll adapt jig weight, cadence, and location together, aware other anglers nearby share conditions and tips.
What Safety Gear Is Recommended When Deep Jigging Offshore?
Consider the ocean as a trusted but unpredictable friend: you’ll want a life jacket snug, an emergency signal ready, non-slip boots, gloves, whistle, VHF radio, and buddies’ knowledge so you’re never alone out there.
Can Jigging Techniques Be Used for Ice Fishing?
Yes - you can use jigging for ice fishing; you’ll employ vertical motion through the hole, adjust lure selection for cold, smaller profiles, and share tips with fellow anglers so you’ll feel included and confident on the ice.