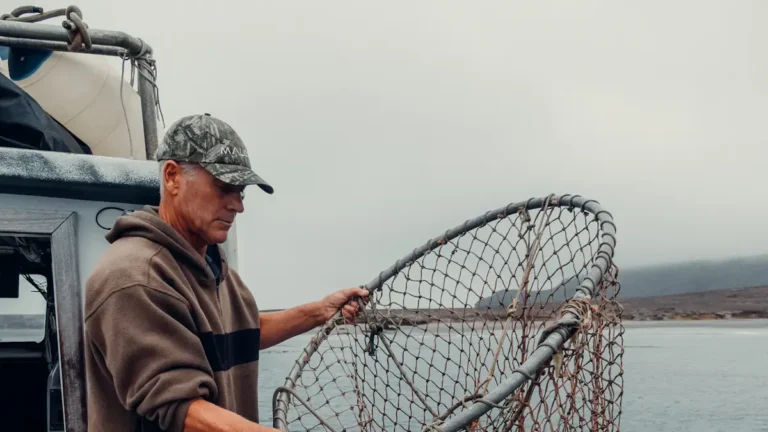
Book Appointment Now

How to Tie a Weight on a Fishing Line
Placing a weight on a fishing line changes bait action and can bring more strikes with small adjustments. Use a simple, secure setup that protects the line and keeps the bait moving naturally. Choose fixed or sliding rigs based on depth and current, then add split shot, egg sinkers and beads with knots suited to braid, mono or fluoro. Wet knots, tighten steadily, check placement for presentation, and swap weights as wind or bite guide your choices.
Quick 3‑Step: Attach a Weight Safely
If you desire a fast, reliable way to add weight to your line, start with three simple steps that anybody can follow.
Initially, pick the right spot above your hook and mark it gently so your group knows where to place the weight.
Next, attach the sinker through pinching or threading it according to type, taking care to feel the grip and avoid twisting.
Then perform weight evaluation by giving a steady pull and watching for movement. You’ll also do attachment verification by tugging and inspecting knots or rubber grips.
These steps build confidence and belonging, since everyone on the bank can learn them. Stay patient, share what you learn, and check again before every cast for safety and success.
Tools & Materials: Line, Weights, Pliers, Beads
You’ll want the right weight for the water and fish you’re after, so pick sinkers that match depth, current, and bait weight.
Keep beads and crimps handy to protect knots and hold weights in place, and use pliers to pinch split shots or crimp sleeves firmly without cutting the line. As you work, check that beads sit between weight and knot and that crimps are tight so nothing slips during casting or sensing a bite.
Choosing The Right Weight
Curious which weight will make your rig work best today? You’ll pick based on water depth, current strength, and the fish you want.
Learn weight types like rubber core sinkers, sliding sinkers, split shot, and tied ring weights so you know options and at what times to use them. Consider small for calm shallow water and larger for deep or fast current. Also consider environmental impact and choose lead-free options whenever possible.
Match weight to line strength and your casting style. Try a few setups together to feel the difference. Ask a friend or fellow angler for a trial cast. You’ll gain confidence quickly and belong to the group that cares about fish and water.
Securing Beads And Crimps
Start from gathering your line, beads, crimps, weights, and a pair of pliers so you’ve got everything within reach and won’t fumble as you’re tying knots.
You’ll slide a bead initially to protect the knot and control bead positioning, then add the crimp just above the weight. Hold the crimp with pliers, pinch gently, and squeeze firmly to set crimp durability without cutting the line.
Check the bead sits snug against the knot so it cushions shocks and keeps the weight from chafing. Examine through pulling and moving the weight; should the bead slips, re-seat it and re-crimp.
Take your time. You belong here, learning with friends on the water, and small careful steps build trusted rigs.
Pick a Rig: Fixed vs Sliding (When to Use Each)
At what point should you pick a fixed rig and at what point is a sliding rig better for the water you’re fishing? You’ll choose fixed rigs whenever you want precise depth control and steady presentation in calm or shallow water. Fixed rigs keep weight close to the hook so bites are easier to feel.
Sliding rigs suit deeper water and strong current because sliding rigs let the bait drift naturally and reach bottom without pulling the hook. You’ll feel safer tying fixed rigs for timid fish or crowded spots. Try sliding rigs whenever fish sit on the bottom or in fast water.
Practice both and share tips with your group. You’ll gain confidence and belong to anglers who know at which point each rig shines.
Attach Split Shot: Step‑By‑Step and Placement
Grab a pair of needle nose pliers and let’s get the split shot on your line the right way so you’ll cast cleaner and catch more confidently.
To start, pick a lead free split shot to lower environmental impact and show you care about the water you fish in. Pinch it onto the main line about 4 to 6 inches above the hook for beginners, or move it closer for better casting techniques and bite detection.
Use the pliers to close the shot gently so the line isn’t crushed. Check by tugging; it should stay put but not cut the braid or mono.
In case you need more weight, add small increments and space them to keep your cast smooth and your rig balanced.
Rig Egg Sinkers & Beads for Carolina Rigs
During the moment you rig egg sinkers and beads for a Carolina rig, you’re setting up a smooth, sensitive connection between your bait and the bottom so you’ll feel bites without spooking fish.
You’ll slide an egg sinker onto the main line, add a bead to protect knots and absorb shock, then tie a swivel and leader. This keeps your bait free to move while the weight senses structure.
- Use quality carolina beads to protect knots and add subtle flash
- Inspect and perform egg sinker maintenance to prevent cracks and corrosion
- Place bead then sinker then knot for smooth sliding and reliable action
You’ll feel included and capable whenever you follow these simple steps with care.
Set Up Sliding Sinker Rigs: Knots & Stops
During the period you’re setting up a sliding sinker rig, you’ll want knots and stops that keep things simple, strong, and easy to adjust so you feel confident on the water. Pick sliding sinker selection based on depth and current so your rig behaves.
Thread the sinker, tie a reliable knot at the end, then add a bead for a cushion. Next focus on swivel placement to stop the sinker from sliding off and to reduce line twist.
Tie a strong swivel knot, check it, and leave a short tag for trimming. Add a small rubber stop or bead above the swivel whenever you want limited movement.
Practice these steps with a friend so you learn together and build confidence.
Tie a Dropper Loop for Sinkers
Learning to tie a dropper loop will give you a simple, reliable way to add sinkers or extra hooks to your line without cutting or weakening it, and you’ll feel more confident setting rigs for different depths and currents.
Start by forming a small loop in the line, hold the loop, and twist to create loop formation. Push a bight through the twists, dress the knot, and pull both ends to tighten. This creates a strong midline loop for sinker attachment that won’t slip.
- Make the loop where you want weight or another hook
- Keep turns neat so the knot seats well
- Check the loop with a gentle tug before casting
You belong here, learning and helping each other fish better.
Secure Heavy Weights on Braid, Mono, Fluoro
At the time you’re putting heavy weights on braid, mono, or fluorocarbon, choosing the right knot makes all the difference between landing fish and losing gear.
You’ll want knots known for strength and slip resistance, and you’ll also use simple security tips like extra turns, wetting the knot, and snugging with steady tension.
Let’s look at which knots suit each line type and how small tweaks will keep your weights locked on and your confidence high.
Knot Choices For Line
Even though different lines feel the same in your hands, braid, monofilament, and fluorocarbon each behave differently when you tie on heavy weights, so you’ll want knots that match the line’s stretch, slickness, and thickness.
You care about avoiding line twisting and reducing knot friction, and you want knots that fit your group of anglers who share tips and trust each other.
Pick knots that match each line type so everyone feels confident on the water.
- Palomar for braid: simple, strong, low knot friction, resists line twisting
- Uni or Improved Clinch for mono: forgiving, holds under shock, easy to dress
- FG or Double Uni for fluoro: smooth profile, keeps strength, minimal slipping
Practice together until it feels natural.
Knot Security Tips
You’ve already picked knots that match braid, mono, or fluoro, so now you’ll want to make sure those knots hold up once you add heavier weights; the way a knot behaves under load can change a lot depending on the line type and the kind of sinker you use.
You’re part of a group that cares about reliable gear, so start with deliberate knot tightening while keeping loop stability in mind. For braid, snug turns and extra wraps prevent slippage. For mono and fluoro, seat the knot slowly to avoid crushing the line.
Assess with a firm pull and inspect for microscopic cuts. Re-tie after any hard strike. Use rubber core or swivel setups to reduce shock. These steps help you trust your rig and keep fishing with friends.
Weight Placement for Presentations & Conditions
Choosing where to place your weight will change how your bait or fly moves, so consider the water and the presentation you want before you cast. You’ll want to match presentation techniques to environmental conditions.
In calm water place weight closer to the hook to keep a natural drift. In current move weight farther back so the bait sinks faster and stays near the bottom. In shallow water use lighter weight to avoid spooking fish.
You’re part of a group learning together, so try options and share what works.
- Try 4 to 8 inches for gentle sinks whenever you need subtlety
- Use 8 to 18 inches in faster water to reach depth
- Keep experiment records and adjust as a team
Quick Fixes: Stop Slippage, Weak Knots, Snags
As your weight slips, knots feel weak, or your line keeps snagging, stay calm and work methodically so you don’t lose fish or gear. You belong to anglers who fix things fast.
Initially check the weight type and move it to a new spot in case rubber core sinkers or split shot slide. Use line protection like tubing or a small rubber sleeve to stop abrasion at contact points. Inspect knots closely and trim frayed ends. Wet knots and apply knot lubricants sparingly before cinching to strengthen turns and avoid heat or wear.
For snags, ease tension, back off pressure, and change angle instead of jerking. Practice these steps together and you’ll trust your setup and your crew on every cast.
When to Change Weight: Bite, Wind & Current
You’ll want to change your weight once the wind picks up or the current shifts so your bait stays where fish are biting.
In case you’re getting light taps or missed strikes, try a slightly lighter weight to let the bait sit more naturally, and should your line be dragging or your bait isn’t reaching the strike zone, add more weight. These small adjustments help you stay connected to the bite and make casting easier in gusts and strong flows.
Change With Wind
Once wind picks up while you’re fishing, it can change how the line moves and where your bait or fly ends up, so you’ll want to rethink the weight you’re using. You’ll notice wind drift pushing your line sideways and changing line tension. That affects presentation and hookup rates.
In case the breeze is light, try a slightly heavier split shot or rubber core sinker to keep the bait steady. Should gusts grow, move weight closer to the hook to reduce slack and keep the bite natural. Stay connected to other anglers and share what works so everyone learns.
- Add small increments of weight to counter steady wind drift
- Shift weight closer to control line tension and reduce tangles
- Trial casts together and adjust until presentation feels right
Adjust For Current
How do you know at what point the current demands a weight change? You watch how your line behaves and feel for resistance.
Should the current strength increase, your bait will ride up or drift sideways. In that case add weight so your bait reaches target depth and stays there.
When water depth is shallow but the current is strong, use a heavier split shot or ring loop weight placed closer to the hook. In deeper water a sliding sinker can help you maintain bottom contact while letting fish take the bait.
Gauge through casting and watching time to sink and line angle. Adjust gradually.
You belong to anglers who share signals and tweaks. Trust your feel and the water’s feedback.
Frequently Asked Questions
Can I Fish With Weights in Catch-And-Release Areas?
Yes - you can, but you should: follow local rules, use lead-free weights, minimize handling, and check gear to reduce fish stress; practice ethical fishing, respect habitats, and support fellow anglers who value conservation and belonging.
Are There Legal Restrictions on Sinker Materials Locally?
Yes - you should check local regs, because some areas restrict lead due to environmental impact; you’ll find material alternatives like tin, steel, or bismuth promoted, and local angling groups can help you comply.
How Do Weights Affect Sonar/Fishfinder Readings?
Weights can cause signal distortion through scattering sonar returns and creating false echoes, so you’ll want to check depth accuracy around weighted rigs; sharing tips with fellow anglers helps everyone trust readings and improve results together.
Can Weights Damage Sensitive Braided Line Over Time?
Yes - in case you don’t protect your braid, weights can cause line abrasion and gradual weakening, and poor attachments lead to knot slipping; you’ll want protective sleeves, careful placement, and regular checks so your crew feels confident.
What’s the Best Way to Dispose of Old Lead Sinkers?
You should recycle old lead sinkers through local recycling programs or hazardous-waste centers to avoid environmental hazards; should those aren’t available, join local angling groups for collective drop-offs, so you’ll feel supported and do the right thing.