Book Appointment Now

How to Draw a Fishing Pole
Drawing a fishing pole starts with a simple curved line and builds into a tapered, detailed tool. Begin with light gesture strokes to map the bend, then define taper with narrow parallel lines from butt to tip. Add an ergonomic handle, place a reel near the base, and thread the line through evenly spaced guides. Keep marks loose, vary line weight, and add small textures like cork wear and screws to bring the sketch to life. Practice different styles and correct common mistakes as you go.
Materials: Pencils, Erasers, Paper, and Optional Tools
You’ll want a handful of good pencils to start, because each one will do a different job as you draw a fishing pole. You’ll pick softer leads for dark lines and harder ones for fine details, so learning lead grading helps you choose the right tone.
Bring several erasers for gentle lifts and stronger corrections. Choose smooth paper that supports shading without tearing. Optional tools like a blending stump, ruler, or mechanical pencil can make guides and clean edges easier.
Practice sharpening techniques so points stay consistent and don’t break during your work. You’ll feel cared for whenever you share tools and tips with others, and belonging grows as you trade pencils, show sketches, and improve together while keeping supplies simple and reliable.
Best Angles and Composition for a Fishing Pole
How should you position a fishing pole on the page so it looks natural and draws the eye? Place the rod on a gentle diagonal from lower left toward upper right. That angle feels active and friendly, and it connects with the handle and reel near the viewer.
Slightly tilt the tip so it curves toward open space to suggest motion and invite viewers in. Consider lighting effects as you place highlights along the top edge and softer shadows underneath to give depth.
For background placement, keep simple shapes or a horizon line behind the rod so it doesn’t compete with the main subject. You can add a bobber or hook in the foreground to anchor composition.
Trust your instincts and adjust until it feels like it belongs.
Map the Pole’s Curve With Simple Gesture Lines
Start with light strokes so you can sketch the rod’s flow without commitment.
Follow the rod’s natural curve with gentle, sweeping gestures to place the long thin shape and the straight butt near the handle.
Once the basic path feels right, refine those lines with confident, slightly darker strokes to lock in the pole’s bend and rhythm.
Start With Light Strokes
Once you’re ready to map the pole’s curve, begin with very light, loose strokes that move across the page in a single flowing motion. You’ll feel more confident as you use light pressure and let the line find its path.
Start with long gesture lines that set the rod’s general sweep. Then add gentle sketch layering to build thickness and placement without committing. Keep your hand relaxed and breathe between strokes so the curve stays natural.
As you refine, connect those gesture lines to suggested handle and tip positions. This approach helps you belong to a shared creative process and lets corrections feel normal.
Move from simple marks to clearer lines, understanding each layer supports the next and teammates of artists do this too.
Follow The Rod’s Flow
You’ve loosened your hand and sketched the rod’s general sweep with light strokes, so now follow that flow with simple gesture lines that map the pole’s curve more confidently. Let your wrist lead and draw long, graceful arcs that suggest rod flexibility without overworking details.
Use a few parallel gesture lines to hint at thickness and to show where the butt and tip differ.
As you work, consider grip texture and suggest its shape with soft, repeated marks near the handle. These lines talk to each other so add connecting strokes that guide the eye from reel to tip.
You’re part of a group learning this craft together, so relax and let the pole’s motion unite form and feeling.
Refine With Confident Lines
Loosen your grip and let a few bold, confident strokes redefine the rod’s curve so the pole reads clearly and simply on the page. You’ll follow the initial flowing sketch and refine with confident strokes and bold contours that feel natural. Trust your hand and make long, simple gestures to show the pole’s bend, handle, and tip. As you work, bear in mind you’re part of a creative group learning together.
| Gesture | Purpose |
|---|---|
| Long curve | Map main bend |
| Parallel line | Add thickness |
| Short straight | Butt and handle |
| Small circles | Eyelets and reel |
| Light S | Line to hook |
These simple marks connect to the earlier flow, keeping rhythm and clarity. Keep lines smooth and sure, and welcome imperfection as character.
Draw the Pole Shaft: Proportions and Taper
Now you’ll set the shaft proportions so the rod feels balanced on the page, placing the longest stretch toward the handle and keeping the total length pleasing to the eye.
Then you’ll taper the shaft gradually so the butt stays thicker and the tip narrows smoothly, which makes the rod read as strong yet flexible.
As you work, keep your lines confident and flowing so the gradual change in width looks natural and guides the viewer from handle to tip.
Shaft Length And Balance
Curious how long your rod shaft should be and why that length matters? You want a shaft that feels like it belongs in your hands. Start off selecting a length that fits your casting style and space.
Longer shafts reach further and cast lighter lures, while shorter shafts give more control in tight spots. Consider material weight and how it shifts balance points along the rod.
Lighter materials move balance toward the butt, heavier materials shift it forward. As you draw, mark a slightly thicker butt section and a smooth diagonal taper toward the tip.
Place guides so balance points remain clear and the pole looks steady. Make small adjustments, and trust what feels right to you and your fishing friends.
Gradual Tip Taper
While you’re drawing the shaft, consider a slow, gentle taper that leads the eye from the thicker butt toward the delicate tip; this subtle change is what makes the rod feel realistic and balanced on the page.
Whenever you plan taper measurement, imagine small steps. Mark gradual widths along the shaft and blend them so the line feels continuous. This helps show tip flexibility without overdoing the curve. You can sketch parallel lines, then erase and smooth until the taper reads natural.
Work with light strokes initially, then darken once you’re happy. Share sketches with friends or a group so you get warm feedback and grow together. Gentle changes, patient checking, and simple measurements will make your pole look confident and inviting.
Create a Realistic Handle and Grip
In case you want a handle that looks and feels realistic, start through shaping an elongated rounded or rectangular base where the rod meets your grip; this gives the impression of a comfortable handhold and sets the stage for detailing.
You’ll want an ergonomic shape that fits the palm, so draw parallel curved lines for thickness and a straight butt section near the lower end. Use color contrast lightly to separate grip materials from the rod and show texture. Follow these steps:
- Sketch the base and top outline with curved lines to form the grip.
- Add scalloped wavy lines and small indentations for finger grooves.
- Highlight thickness with a second parallel line and keep lines smooth.
This helps others feel welcomed into your drawing process.
Sketch the Reel on Your Fishing Pole
Now you’ll pick the reel type that suits your pole and sketch a simple circle near the lower middle or base to mark its position.
Then add a smaller inner circle and two curved lines to give the reel body thickness and a few irregular shapes for the reel seat where it meets the rod.
Finally, draw the handle with a central small circle, an L-shaped arm and a tiny end cylinder so your reel looks ready to turn.
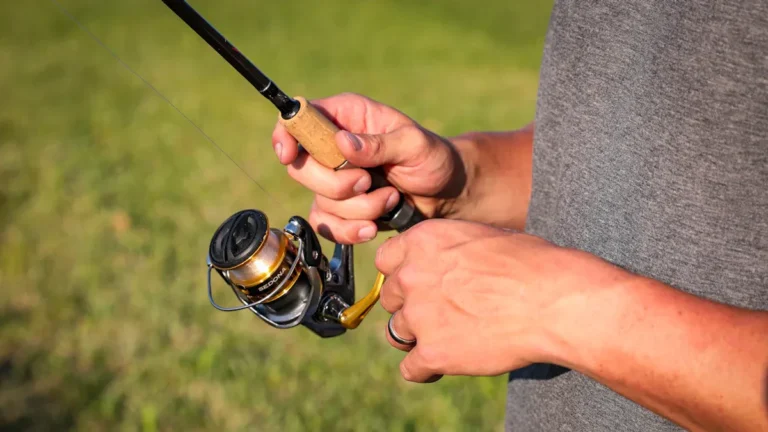
Choose Reel Type
Which reel will fit your drawing and fishing style best? You want a reel that feels right in your sketch and in your hands. Reflect on design and purpose as you draw.
- Spinning reels: sketch a round simple body with clear line path. They look friendly and open, so they suit gentle, welcoming drawings and beginners who want comfort.
- Baitcasting reels: draw a compact, low profile shape with a visible spool and handle. They fit confident, precise styles and add a technical touch to your pole.
- Hybrid ideas: combine rounded faces with low profiles to show versatility.
Choose a reel that matches mood and function. That link between form and feeling helps your drawing belong to someone who’ll use it.
Draw Reel Body
You picked the reel style that fits your sketch and your hand, so let’s place that reel body on the rod with confidence and care.
Place a circle near the lower middle of the rod and add a smaller inner circle to suggest the spool.
Draw two curved lines to show visible side parts, keeping shapes slightly irregular to hint at real reel mechanics and to welcome personal touches.
Add an irregular shape atop and between reel and pole for the seat, then sketch a small, uneven block to connect the reel to the handle area.
Vary line weight and add short hatch marks to imply body texture so the reel looks held and used.
These simple steps help you belong to a shared drawing practice.
Add Handle Details
Upon your readiness to add handle details to the reel, start with settling the reel snugly against the rod so the parts line up and feel natural in your sketch; this step helps everything that follows sit right and look like it belongs on the same tool.
Now you’ll sketch the reel handle and seat with care, so your drawing feels shared and welcoming.
- Draw a small center circle for the reel handle, add an L-shaped arm and a tiny cylinder grip to suggest action.
- Add scalloped edges and indentation patterns along the handle base to show texture and grip comfort.
- Include a little rectangular arm and tiny circles where the arm meets reel, plus gentle curves linking handle to reel seat.
Use simple strokes, stay patient, and envision you’re teaching a friend.
Add Guides, Eyelets, and Rod Tapering
Start adding the guides and eyelets with a gentle, steady hand so the rod will look balanced and realistic. As you place each guide, consider rod flexibility and how spacing affects the curve.
Draw small C shaped brackets that grow slightly toward the handle. Keep guide alignment straight along the rod center so the line will run cleanly later on.
Taper the rod through narrowing the parallel lines gradually toward the tip. This tapering links to guide spacing and gives the rod a natural bend.
Add tiny circles inside each eyelet for detail and show three or more guides spaced evenly.
Work slowly, step back, and adjust spacing so the whole piece looks like it belongs together and feels right in your hands.
Draw Fishing Line and Natural Line Tension
Whenever you sketch the fishing line, consider about how it behaves in the air and water so the line looks alive and believable. You want to show natural tension without overdoing it. Let the line curve gently from reel through eyelets, then flex more near the tip or bobber.
Small changes tell a story about movement and weight, and you belong to a group who notices those details.
- Draw a loose S curve from reel to tip to show slack, then tighten near hook for tension.
- Use subtle straightening lines at the moment the line is pulled to show force and direction.
- Add slight kinks where the line meets guides to suggest contact and realism.
Practice with light strokes, feel the rhythm, and adjust until it feels right.
Clean Your Sketch: Refine Outlines and Erase Guides
Now that your fishing pole sketch is built, you’ll want to refine line weight so the crucial parts stand out and weaker guides fade.
Take time to erase construction marks gently, keeping only the clean outlines you need for the handle, reel, and eyelets.
Then smooth and sharpen curves and joins so the rod reads as a confident, finished drawing you can be proud of.
Refine Line Weight
You’ll want to gently clean up your sketch through deciding which lines should be dark and which should stay light, because clear outlines make your fishing pole look confident and real.
You’re part of a group that cares about craft, so take your time with line variation and pressure control to show form and weight. Use a softer touch for subtle curves and a firmer hand where the rod meets the reel or handle.
Here are focused steps to guide you:
- Start with light strokes to keep guides flexible and erase later.
- Reinforce main outlines like the rod base, handle edge, and reel with heavier lines.
- Add delicate, varied lines to eyelets and hook for realism.
Work slowly, trust your eye, and enjoy refining each confident mark.
Erase Construction Marks
Because cleaning up your sketch helps the drawing feel finished and confident, start through preparing to erase construction marks with care and patience. You’ll want to protect the lines you love while removing the rough guides that held everything together.
Lightly blend stray pencil strokes near the rod base, handle, and eyelets so the main outlines stand out. In case you’re doing image cleanup on a screen, use soft opacity brushes and zoom in to control digital erasing without losing detail.
Work from large shapes to small parts like the reel handle and hook. Keep your hand relaxed and take breaks so you don’t overwork one area. Invite feedback from friends or a group to feel supported as you refine and clean the sketch.
Smooth And Sharpen
Start through taking a deep breath and settling in, because smoothing and sharpening your fishing pole sketch is where your drawing will really start to sing. You’ll remove stray construction marks and gently redraw key lines for line smoothness and clean edges.
Work slowly and feel supported; this is a shared craft. Use these steps to guide you:
- Lightly trace the rod base and handle with steady strokes, removing rough guides as you go.
- Refine eyelets, reel, and reel handle with confident arcs, keeping curves consistent.
- Focus on tip sharpening through narrowing the final lines and erasing extra marks for a crisp point.
As you refine, check proportions and keep marks soft until you’re happy, then commit to darker, final strokes.
Shade and Texture to Show Material and Depth
When you add shading and texture to a fishing pole drawing, you make the rod feel real and solid instead of flat and lifeless. You’ll use color blending to move from light to dark along the rod, suggesting roundness and the way light wraps the surface.
Add soft strokes around the handle and harder marks where metal meets wood to show surface contrast and material change. Work in layers so tones build naturally and you don’t overwork one area.
Use short hatch marks on wrapped grips and gentle smudging on the shaft. Pay attention to where guides cast thin shadows and where the reel reflects a small gleam. This helps the whole piece sit together, inviting others into your shared craft.
Small Details That Sell Realism (Screws, Cork Wear)
At the moment you zoom in on a finished fishing pole, those tiny touches are what make it believable and alive, and you’ll want to add them with care.
You notice how small threaded screws hold the reel seat and guides, and how tiny shadows sell weight.
You want the handle to feel used, so show subtle cork texture and faint dark spots where hands gripped it.
- Mark screw heads with tiny highlights and short radial lines to suggest threads and metal.
- Shade the cork with soft stipple and short curved strokes to show wear and grip.
- Add light scratches and polish marks near metal parts to imply use and history.
These details connect you to the object and invite others in.
Common Mistakes and Quick Fixes for a Believable Pole
Mistakes happen, and you won’t ruin a drawing through fixing them initially, so don’t be afraid to tweak as you go; in case a rod looks stiff, for example, soften the lines and add a gentle curve toward the tip to suggest real flex and weight.
You belong here, and small fixes make your pole believable. Watch for incorrect proportions between handle, reel, and rod length. Should the handle be bulky, trim its width and add a straight butt section.
In the event eyelets look off, space them with increasing size toward the reel and fix uneven curves through smoothing with light strokes. Check the reel placement so the line runs straight through guides.
Use subtle wear marks and balanced thickness to tie everything together and build confidence as you adjust.
Style Variations: Cartoon, Realistic, Kid‑Friendly Poles
- Cartoon: big shapes, bright color schemes, chunky handle designs
- Realistic: slim profiles, detailed reel accents, natural color schemes
- Kid friendly: simple lines, large handles, cheerful color schemes
These options connect style with technique and belonging.
Practice Exercises and Project Ideas to Improve Fast
Now that you’ve looked at style options like cartoon, realistic, and kid friendly poles, you’ll want focused practice that speeds your improvement without wasting time. Start with speed drills to warm up. Do short timed sessions drawing rod base, handle, reel, eyelets, and hook.
Then try blind contour sketches to train steady lines and observation. Mix repetition exercises with small projects like a kid friendly pole poster, a realistic study of reel parts, or a cartoon strip showing a cast. Pair drills so you move from line control to detail work.
Share work with friends or a group for feedback and cheer. Keep sessions short and frequent. Track progress, adjust drills, and celebrate small wins to stay connected and motivated.
Frequently Asked Questions
Can I Draw a Spinning Instead of Baitcasting Reel?
Yes - you can: envision your reel as a friendly village clock, its reel mechanics keeping time while the community (your line tension) stays steady; you’ll fit a spinning reel easily and feel right at home.
How Do I Paint Metallic Shine on the Reel?
You’ll paint metallic shine through layering color: start midtones, add bright highlights where light reflection hits, deepen edges with darker glazes, then blend softly. You’ll feel included as your reel gleams realistically together.
What’s the Best Paper Weight for Inking a Finished Drawing?
You’ll want heavy cardstock or smooth Bristol around 300–350 gsm (or 100–150 lb); it’ll kindly resist bleeding, feel reassuring under your hand, and help your inks sit cleanly so your work belongs on any shared table.
Can I Digitize and Color My Sketch in a Tablet App?
Yes - you can digitize and color your sketch on a tablet; you’ll want a responsive stylus, adjust stylus pressure for line variation, work with layer blending modes, and share files so everyone feels included and supported.
How Long Should Each Practice Session Be for Improvement?
Try 25–45 minutes per session; one artist friend improved fastest with 30-minute daily practice. You’ll build momentum with consistent timing, so pick a session duration you enjoy and stick to it to belong and progress together.