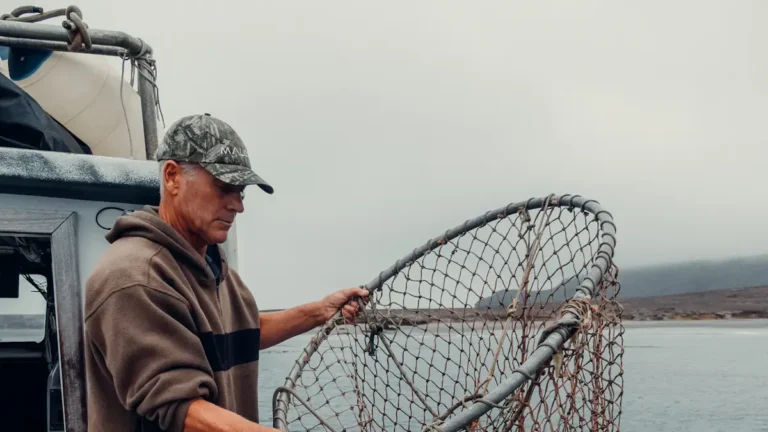
Book Appointment Now

How to Attach Fishing Hook to Line
Want to stop losing big fish? Learn a few solid knots and the right way to attach a hook, and your line will hold when it counts. Check the hook eye for burrs and straightness so the knot seats cleanly. Use a Palomar for braided line and large hooks, and an improved clinch for mono or fluorocarbon. Match line strength to hook size, dress the knot neatly, moisten before tightening, and give a firm pull test before casting.
Quick Knot Guide: Best Knot by Line, Hook, and Fish
During the moment you’re getting ready for a day on the water, picking the right knot for your line, hook, and target fish can make the difference between a quick release and a story you tell for years, so let’s walk through the best choices together.
You’ll favor the Palomar for braided line and big hooks because it stays strong and simple. For monofilament or fluorocarbon try the improved clinch for general use and the uni knot whenever you need extra security. Snelling works best with bait and circle hooks.
As you tie, practice knot lubrication to protect fibers and focus on tag end management to prevent slippage. Each knot links to a type of tackle and fish behavior, so pick one you trust and practice it until it feels like second nature.
When to Use Braided, Fluorocarbon, or Monofilament Line
Contemplating which line to pick for your next trip and why it matters? You want to belong to a group that cares about success and shared stories, so choose with confidence.
Consider these emotional, practical pointers:
- Braided line: low stretch, high strength, great for cover and feeling bites, but check line buoyancy whenever you need topwater action.
- Fluorocarbon: low visibility in clear water, sinks, matches water clarity, ideal as a leader or for shy fish.
- Monofilament: forgiving stretch, floats more, user friendly for beginners and for knots that need cushion.
- Blending lines: pair braid with fluorocarbon or mono for best feel, stealth, and knot reliability.
You’ll feel supported making choices that fit your water, gear, and friends on the bank.
Match Line and Hook Sizes: A Simple Chart
Choosing the right line and hook sizes together makes fishing easier and more fun, and you’ll catch more fish provided they match. You want to feel part of the group that knows what works, so consider a simple chart linking hook gauge to line diameter.
For small hooks like 8 to 14, pick light line diameter under 0.20 mm. For medium hooks 4 to 8, use 0.20 to 0.35 mm. For large hooks 1 to 4, step up to 0.35 to 0.60 mm.
In case you use braided lines, observe they’ve thinner line diameter for the same strength, so drop a size on hook gauge.
Assess your setup on shore with gentle pulls. You’ll join fellow anglers quicker once your rigs feel balanced and reliable.
Inspect Your Hook: A Quick Pre-Tie Checklist
You’ve picked the right line and hook size, so now give the hook a quick once-over before you start tying; a tiny flaw can cost a fish or a day on the water.
Check for hook corrosion along the bend and shaft. Run your thumb gently to feel pits or rough spots that can cut your line. Inspect eye alignment to make sure the eye sits straight with the shank. Look at the point and barb for sharpness and straightness.
Finally, confirm the bend and gape match your bait or lure choice so the setup feels right in your hand and in the water.
- Look for rust and pitting that signal hook corrosion
- Feel eye alignment and true seating
- Assess point sharpness with gentle press
- Match bend to bait type
Tie the Clinch Knot: Step-By-Step for Beginners
1 clear, simple knot can save a day on the water, and the improved clinch knot is one of the quickest, most reliable ways to attach a hook to your line.
You start with threading the line through the eye and leaving a 4 to 6 inch tag end. Wrap that tag end around the standing line 5 to 7 times, more wraps for thin line.
Pass the tag end through the small loop near the eye, then back through the larger loop formed with the wraps.
Before you snug it, use knot lubrication like water or saliva to protect the line. Pull the standing line slowly to tighten while doing careful tag end management, then trim the excess close to the knot.
Tie the Improved Clinch Knot and When to Use It
At what time should you reach for the improved clinch knot and how will it make your day on the water easier? You’ll use it whenever you want a reliable, simple connection for hooks with mono or fluoro, and even light braid.
It’s forgiving, quick, and keeps you with the group during times get busy.
- You feel confident tying under pressure
- You trust a knot that resists slipping
- You care for your gear with knot lubrication to avoid heat and wear
- You protect line life to prevent line degradation
Thread, wrap 5 to 7 times, pass through the small loop, then the big loop, moisten, and snug. You’ll feel connected to others and the moment as you cast.
Tie the Palomar Knot for Braided Line
When you need a simple, super-strong knot for braided line, the Palomar knot is the one to reach for because it keeps power and sensitivity where you need them most.
You start with doubling your braid to form a tied loop big enough to pass the hook through. Feed that loop through the eye, tie a loose overhand knot, and pass the hook through the loop.
Before you snug things up, use knot lubrication like water or saliva to protect the fibers. Pull both the standing line and tag slowly and evenly so the knot seats without heat damage. Trim excess tag.
You’ll feel confident using this knot on heavy braid, and you’ll fit right in with other anglers.
Tie the Uni Knot: Strength and Adjustability
Now you’ll get hands-on with the Uni knot, so you can see how its anatomy gives both strength and adjustability.
I’ll walk you step by step through the tying process, point out which parts of the knot carry the load, and show simple strength examination tips you can do right at the water.
This clear, friendly guide will help you tie a reliable Uni knot whether you’re using mono, fluoro, or braid, and you’ll learn how to tune the knot for peak performance.
Knot Anatomy Overview
Upon looking closely at the Uni knot, you’ll see it’s built from a few simple parts that work together to give strength and adjustability, and you’ll feel more confident tying it once you understand each role.
You belong with others who learn this craft, and you’ll observe how knot components and structural elements match to make a reliable join. Each part has a job and you can feel that teamwork as you pull the line taut.
Consider it like a small community on your line.
- Eye and tag join to start trust and alignment.
- Wraps create friction and distribute load.
- Overhand knot locks position and prevents slipping.
- Tightened coils compact for strength and neatness.
Step-By-Step Tying
In case you want a knot that’s both strong and easy to adjust, the uni knot delivers and you’ll find it’s forgiving while still holding tight as fish pull hard.
Start through threading 8 to 10 inches of line through the hook eye, then pinch tag and standing line together. Form a simple loop over the standing line and use wrapping techniques to make 4 to 6 neat turns for monofilament, or more for braid. Keep wraps snug and aligned with finger guidance.
Before you pull tight, apply knot lubrication like water or saliva to protect the line from heat and friction. Pass the tag back through the loop in the manner it came out.
Pull both ends evenly to seat the knot, then trim excess.
Strength Testing Tips
In case you want to know how strong your uni knot really is, a few simple strength assessments will give you confidence before you head out on the water. You’ll check knot durability and line elasticity through trials gently, then more firmly, so you learn how your setup behaves.
Start with light tugs, then increase force while watching for slippage or stretch. Feel the line and listen for change. Share trials with a friend so you both learn and belong to the same careful routine.
- Tie the uni knot, moisten, tighten, then tug gently five times
- Pull to 50 percent of rated breaking strain and watch for slips
- Hold under steady load for 30 seconds to assess stretch
- Repeat with different line types to compare durability and feel
Tie a Snell Knot for Baited Hooks
In case you want your bait to sit straight and present naturally, learning to tie a snell knot will make a big difference. You’ll pass the line twice through the eye, set loop formation against the shank, then wrap the tag end down the shank to build coil tension. Keep wraps tight, five to ten turns, and hold coils with a finger while you pull the standing line.
| Step | Action | Tip |
|---|---|---|
| 1 | Thread line twice | Align loop to shank |
| 2 | Wrap 5-10 times | Maintain coil tension |
| 3 | Tighten snug | Moisten before final pull |
This knot centers bait, enhances hook point alignment, and helps your crew feel confident on the bank.
Tie Loop Knots (Kreh/Non-Slip) for Natural Bait Action
You’ll want to use a Kreh or non-slip loop whenever you need your natural bait to move freely and look alive in the water.
The Kreh loop keeps the bait off the hook shank so it swims with more natural action, and the non-slip version locks the loop in place so you won’t lose that motion under strain.
In the next section you’ll learn simple step-by-step tying tips for both loops so you can pick the one that fits your bait and line type.
Kreh Loop Benefits
A small change to how you tie your lure can make a big difference each time you’re after natural bait action, and the Kreh loop is a simple, powerful way to get that extra movement.
You’ll notice loop benefits right away: the hook swings freely, bait looks alive, and fish respond more naturally. It also keeps casting distance from suffering whenever tied correctly, so you don’t lose range for action.
- You’ll see softer, more natural bait movement that entices bites.
- You’ll keep hookup angle that improves hooksets without fighting the bait.
- You’ll reduce slack that confuses fish while staying confident on long casts.
- You’ll join a community of anglers who value subtlety and skill.
Try it, and you’ll feel included in a hands on tradition.
Tying The Non-Slip
When you want your bait to move naturally and still set the hook cleanly, the Non-Slip loop knot is the go-to choice for anglers who care about action and reliability.
You start passing the line through the eye and forming a small loop, keeping enough tag for wraps. Hold the kreh loop base, wrap the tag around the standing line five to seven times, then thread the tag back through the original loop.
Moisten the wraps, pull the standing line while holding the loop open, and snug the knot so the loop sits free for bait motion. This non slip loop gives natural action, strong hook sets, and easy adjustments so you and your mates feel confident on the water.
Trim and Dress Knots for Reliability
After you finish tying a knot, trimming and dressing it properly can make the difference between landing a fish and losing one, so take a moment to do it right. You’ll want to moisten the knot with proper knot lubrication before final seating to protect fibers and help line maintenance over time.
Dress the wraps so they lie neat and concentric, then snug slowly so the knot sets evenly. Trim tag ends close but not too close to avoid slip under tension. You belong to anglers who care, so treat each knot like teamwork with your gear.
- Trim tag end to 1–2 mm for a clean finish
- Leave a slightly longer tag on mono than braid
- Recheck wraps for gaps before final snug
- Wipe excess moisture and store dry
Test Knot Strength Quickly on the Water
You’ve just dressed and trimmed your knot, so now you’ll want to check its strength before you cast off to avoid surprises on the initial big bite.
You’ll hold the rod, pull the line firm with steady pressure and feel how the knot reacts. Assess several times with increasing force to mimic a real strike.
Use your thumb and forefinger to pinch the knot while you pull to sense slippage and to judge knot durability.
In case you have a scale or break tester, use it for quick field testing to get numbers you can trust.
Practice this routine with each knot type so your crew feels confident. Share what you learn with fishing partners so everyone benefits and fishes safer together.
Choose Knots by Species and Fishing Style
When you pick a knot, consider about where you’ll fish and what you’ll use for bait or lures. Freshwater species and light lures often do well with uni or improved clinch knots, while saltwater fish and heavy braided lines can call for Palomar or snelling techniques for extra strength.
As you switch between bait and artificial presentations, match the knot to the line and hook so you stay confident whenever a big fish hits.
Freshwater Vs. Saltwater
Curious which knots work best for freshwater versus saltwater fishing? You’ll notice water salinity and fish behavior change your knot choices.
In freshwater, calmer water and smaller species let you favor finesse knots like the improved clinch or uni knot. In saltwater, heavier lines and aggressive runs demand secure knots such as the palomar or snell.
You belong to anglers who adapt, so pick what feels right.
- Freshwater: lighter tackle, subtle knots, sensitive feel that connects you to the fish.
- Saltwater: corrosion and big fights need tougher knots, extra wraps, and lubricant.
- Species focus: match knot to mouth type and strike power for confidence.
- Style matters: shore, boat, or fly fishing shift your knot priorities and rhythm.
Lure And Bait Choices
Want to match the right knot to the lure or bait so your hookup rate improves and you feel more confident on the water? You’ll pick knots based on species, lure durability, and bait preservation.
For soft baits use snelling or uni knots to protect delicate hooks and keep bait intact. For big hard lures choose loop knots for action and Palomar for braided lines that need strength and lure durability.
Whenever live bait is key, snell or improved clinch preserves bait presentation and keeps hooks aligned. Saltwater fish need stronger knots and extra wraps to handle abrasion.
Shift between styles through assessing knots at home so you join others who trust their setup. You’ll feel welcome and capable once your knots match your gear and fish.
Quick Fixes When Knots Slip or Fail
Should a knot start to slip while you’re reeling or the hook feels loose, don’t panic; you can fix it fast and keep fishing. You’re not alone; every angler faces this.
Try quick knot retightening: wet the knot for line lubrication, pull the standing line while holding the tag end, then snug with short, even tugs. In case it still slips, cut the tag, rewrap with one more turn, and retie with calmer hands.
- Check line for damage and replace in the event it’s nicked.
- Use water or saliva to lubricate before final tightening.
- Reinforce with an extra wrap on thin lines.
- Carry spare pre-tied leaders for fast swaps.
Frequently Asked Questions
Can I Reuse a Hook After Untying a Knot Several Times?
Yes - you can often reuse a hook after untying knots, but check for hook wear and sharpness; repeated tying stresses knot integrity and metal. In case you notice burrs, bends, or weakened points, replace the hook to stay safe.
How Does Water Temperature Affect Knot Performance?
Cold water tightens your ego and line: it reduces knot elasticity and raises line rigidity, so knots feel stiffer and can slip or break more easily. You’ll want extra wraps, lubrication, and careful dressing to belong safely.
Are There Corrosion-Resistant Hooks for Saltwater Use?
Yes - you can choose corrosion-resistant hooks with material coatings like stainless, nickel, or ceramic to enhance hook durability; you’ll feel confident understanding your gear’s protected, like you belong to a thoughtful, saltwater-ready group.
What’s the Best Way to Store Tied Rigs Long-Term?
You could worry rigs’ll tangle, but store them neatly on labeled rig cards or foam strips in a tackle box with desiccant packs; that improves rig organization, controls moisture, and helps your fishing group stay ready together.
Can Knot Strength Be Measured Without Specialized Tools?
Yes-you can roughly gauge knot strength with manual examination and visual inspection: pull steadily on the line, look for slippage, crushed fibers, or uneven wraps, and compare break points through hand to build shared confidence.